
Email Templates
Overview
ADSS Web RA sends email notifications to users and operators when certain operations are performed for an enterprise. For example, a user receives an email when their certificate renewal request is approved, and an operator receives an email when a bulk operation is completed.
The 'Email Templates' section available under each enterprise allows you to customise the content of these email notifications for that particular enterprise. Changes made at the enterprise level apply only to the emails sent for that enterprise and do not affect other enterprises.
What you can do on this page
On the enterprise Email Templates page, you can:
- Change the subject and body of an email for the enterprise.
- Add placeholders to an email. A placeholder is a value, such as the recipient's name or a request number, that Web RA fills in when it sends the email.
- Maintain separate content for each supported language.
- Send different content for different certification profiles by using profile templates. This option is available for certificate-related emails only.
- Restore the original content of an email by using Reset to Default.
|
|
Important Notes: The following rules apply to email templates at the enterprise level:
|

Default content
Web RA provides default content for every email template. If you do not change a template, Web RA continues to send its default content in the email notifications.
|
|
Note:
|
Layout of Email Templates Section
The page is divided into two panels. The left panel lists the email templates grouped by category. The right panel shows the details and content of the selected template.
|
Field / Control |
Description |
|
Search template by name |
Filters the template list by template name. |
|
Template list |
Lists all email templates available for the enterprise, grouped into categories such as User Management, Certificate Renewal and Bulk Operations etc. Expand a category and select a template to open it. |
|
Origin |
This is a read-only field that indicates where the operation that triggers the email is performed from: Admin, Web, API, or a combination of these. |
|
Recipient |
This is a read-only field. It shows who receives the email: User or Operator. |
|
Profile Template |
Shown only for email templates that support profile templates. This dropdown lists the profile templates created for that particular email template for the enterprise. Use the + button next to the field to add a profile template. |
|
Certification Profiles |
This field is displayed only for email templates that support profile templates. This is read-only field that shows the certification profiles linked to the selected profile template. |
|
Editor toolbar |
Formatting options for the email body, such as undo and redo, bold, italic, underline, text alignment, lists, font size, text colour, links and horizontal lines. |
|
Subject |
This is mandatory field. It shows the intended purpose of the email being sent. You can include placeholders in the subject as well. |
|
Placeholder list and + button |
Lists the placeholders available for the selected template. Select a placeholder and click + to insert it into the email body at the cursor position. |
|
Language |
Selects the language version of the template to view or edit: English, العربية (Arabic), Français (French), Español (ES) or Español (LA). |
|
Email body |
The content of the email, shown as it will appear to the recipient. |
|
Save |
After making any changes to the email template you need to click this button to save your changes. |
|
Reset to Default |
Restores the content currently shown to the default content. |
How email templates work
All email templates on the enterprise 'Email Templates' screen use the same layout. For every template, you can select the language, edit the subject and body, insert placeholders, save your changes and reset the content to default.
All email templates present on this screen can be divided into two types:
You can identify the type of a template when you open it. Templates with Profile Template field display two additional fields at the top of the screen, 'Profile Template' and 'Certification Profiles'.
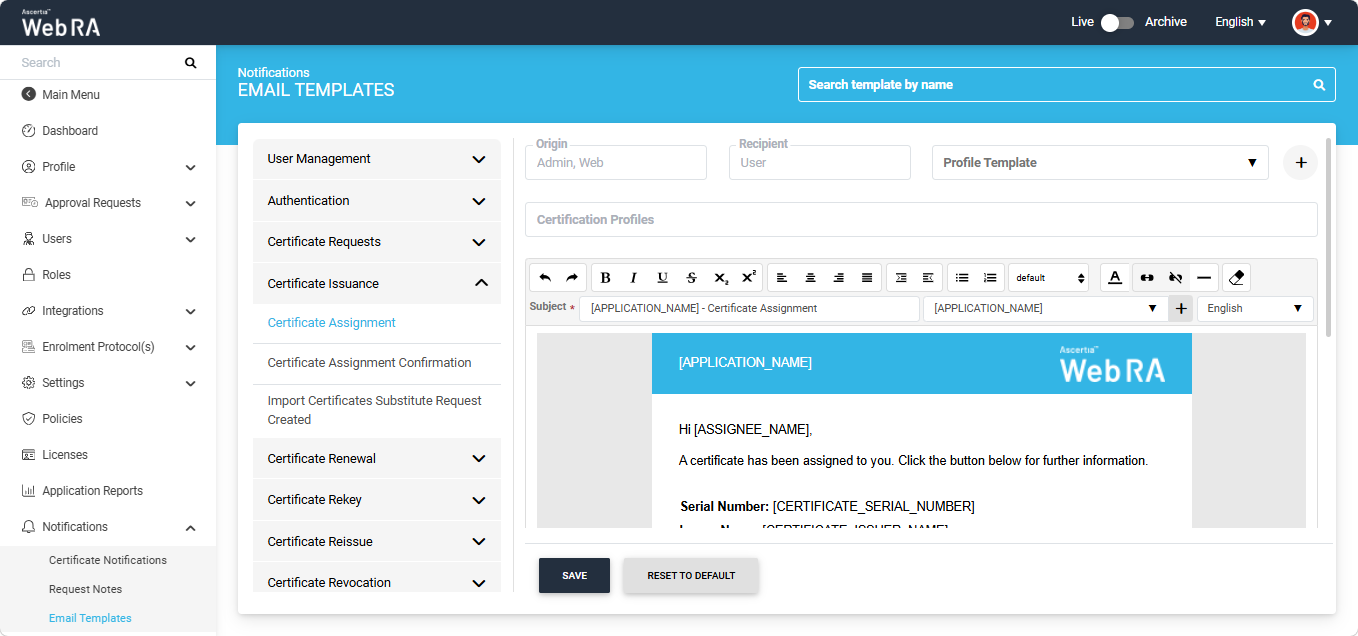
Templates without Profile Template support do not display these fields.
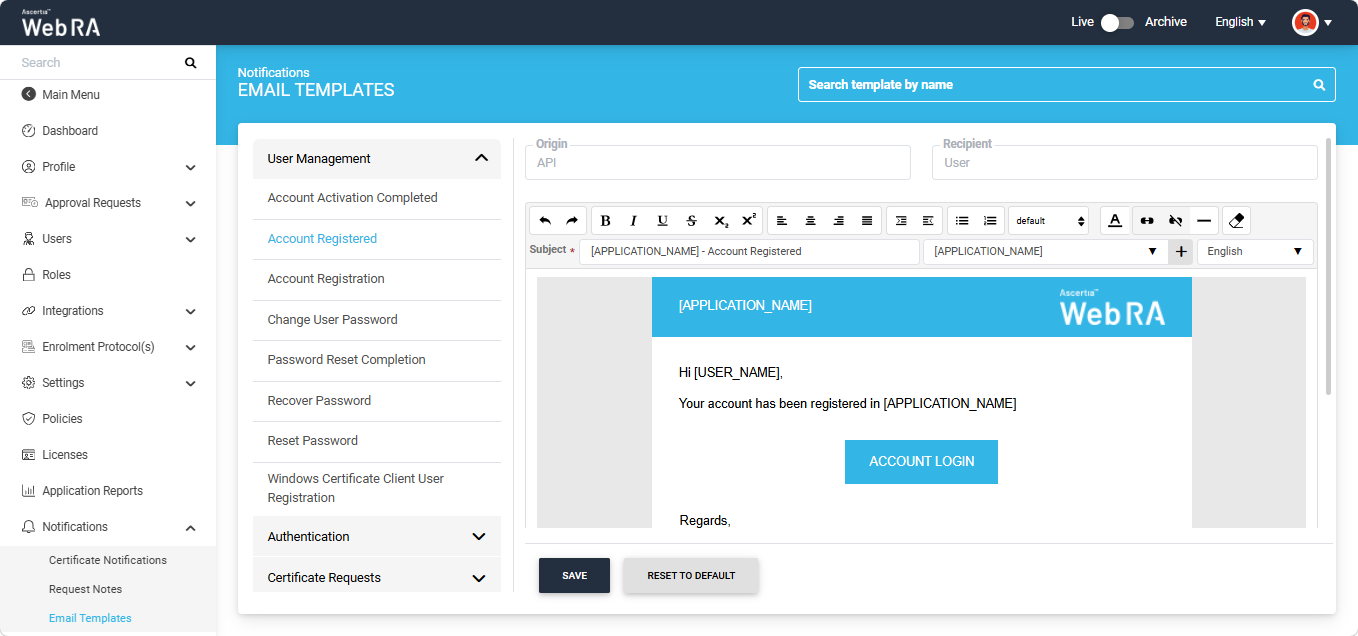
|
|
Note: Templates are grouped into categories, and some categories contain both types. For example, in the 'Bulk Operations' category, 'Bulk Certificate Request Draft' supports profile templates, but 'Bulk Operation Request Submitted' does not. Use the following lists to check the type of each template. |
Email Templates with Profile Template Support
The following email templates support profile templates at the enterprise level:
- Certificate Issuance
- Certificate Assignment
- Certificate Assignment Confirmation
- Import Certificates Substitute Request Created
- Certificate Renewal
- Certificate Renewal Limit Exceeded
- Certificate Renewal Request Rejected
- Certificate Renewed
- Renew Certificate Request Approved To Reviewer
- Renew Certificate Request Declined To Reviewer
- Renew Certificate Request Reviewed
- Renew Certificate Request To Approve
- Renewal Request Submitted
- Certificate Rekey
- Certificate Rekey Request Approved To Reviewer
- Certificate Rekey Request Declined To Reviewer
- Certificate Rekey Request Rejected
- Certificate Rekey Request To Approve
- Certificate Rekeyed
- Rekey Request Submitted
- Certificate Reissue
- Certificate Reissue Request Declined To Reviewer
- Certificate Reissue Request Rejected
- Certificate Reissued
- Reissue Certificate Request To Approve
- Reissue Request Submitted
- Certificate Revocation
- Certificate Revocation Request Rejected
- Certificate Revoked
- Certificate Suspended
- Revocation Request Submitted
- Revoke Certificate Request Approved To Reviewer
- Revoke Certificate Request Declined To Reviewer
- Revoke Certificate Request To Approve
- Certificate Reinstatement
- Reinstate Request Submitted
- Certificate Expiry & Reports
- User Certificate Report
- User Scheduled Certificate Report
- Bulk Operations
- Bulk Certificate Request Draft
- Bulk Certificate Substitution Report Summary
- Bulk Certificate Substitution Validation Report Summary
- Bulk Operation Certificate Revoked
- Bulk Revocation Report Summary
- Bulk Revocation Validation Report Summary
Email Templates without Profile Template Support
The following email templates do not support profile templates at the enterprise level:
- User Management
- Account Activation Completed
- Account Registered
- Account Registration
- Change User Password
- Password Reset Completion
- Recover Password
- Reset Password
- Windows Certificate Client User Registration
- Authentication
- Email OTP
- Email Signing Mailbox Validation Token
- Certificate Requests
- Request Submitted
- Token Management
- Go>Sign Token PIN
- Go>Sign Token PIN and PUK
- Go>Sign Token PUK
- Enterprise Management
- Accept Decline Invitation
- Enterprise Invitation
- Enterprise Invitation Request
- Enterprise License Quota Notification
- Enterprise Request Registration
- Digital Onboarding
- Enterprise Digital Onboarding Request
- Enterprise Digital Onboarding Request Approved
- Enterprise Digital Onboarding Request Declined
- Enterprise Digital Onboarding Request Pending Approval
- Bulk Operations
- Bulk Operation Request Approved
- Bulk Operation Request Rejected
- Bulk Operation Request Submitted
- Bulk Request Creation Report Summary
- Bulk Request Validation Report Summary
- Bulk User Invite Report Summary
- Bulk User Invite Validation Report Summary
Configuring Email Templates Without Profile Template Support
This section explains how to customise email templates without profile template support for an enterprise. The 'Account Registration' template in the 'User Management' category is used as an example. The same steps apply to all email templates with the same format.
Opening an Email Template
Expand Notifications > Email Templates from the left-tree menu in the Enterprise.
The system displays the 'Email Templates' screen of the enterprise.
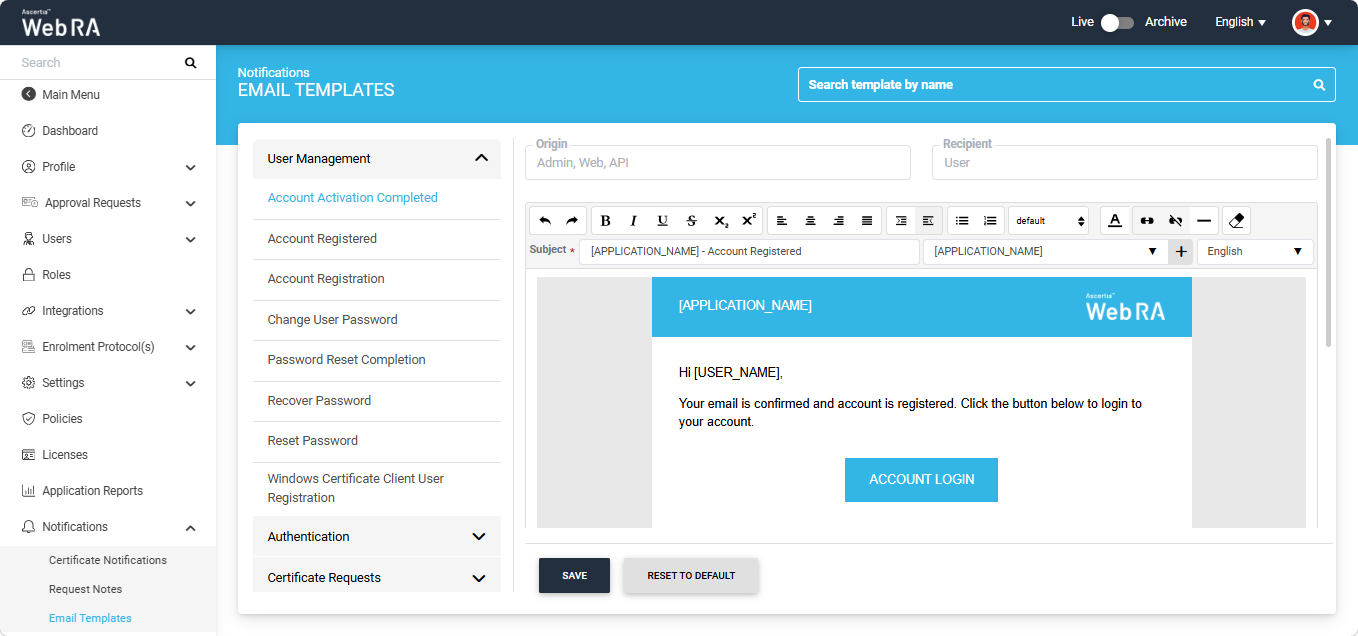
Click the 'User Management' category to expand it, and then click the 'Account Registration' template. Alternatively, type the template name in the 'Search template by name' field to find the template.
The system displays the details of the selected template in the right panel. The 'Origin' and 'Recipient' fields are read-only and show where the email is triggered from and who receives it. Below these fields, the system displays the subject and body of the email in the editor.
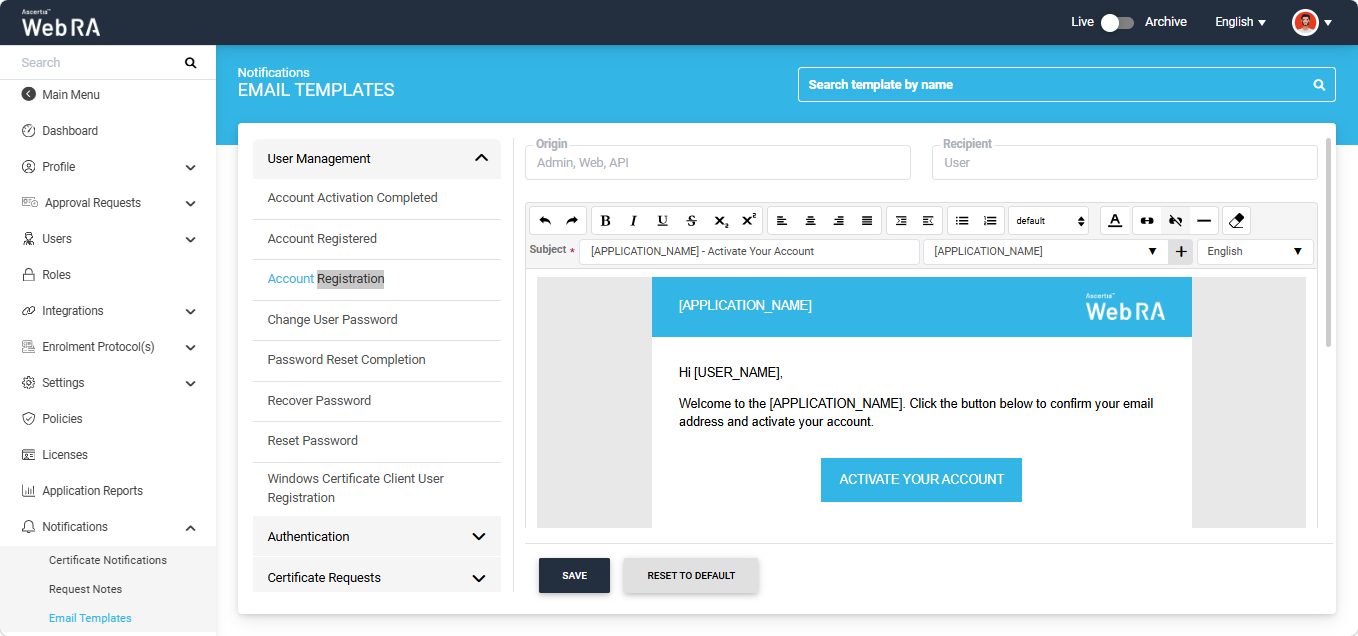
Selecting the Language
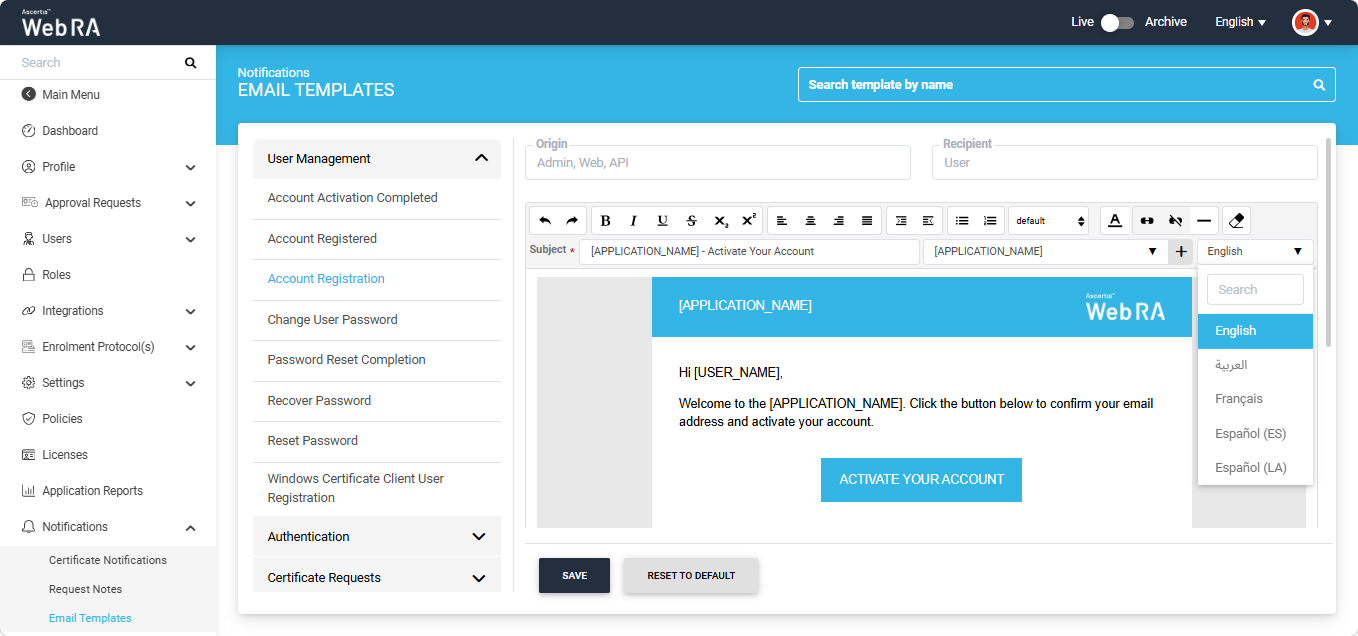
Each email template has a separate version for every supported language. Before making any changes, select the language you want to edit from the 'Language' dropdown on the right side of the 'Subject' field. The system displays the subject and body of the selected language version.
|
|
Note: The selected language remains the same when you open another template. Always check the selected language before making changes. |
Editing the Subject and Body
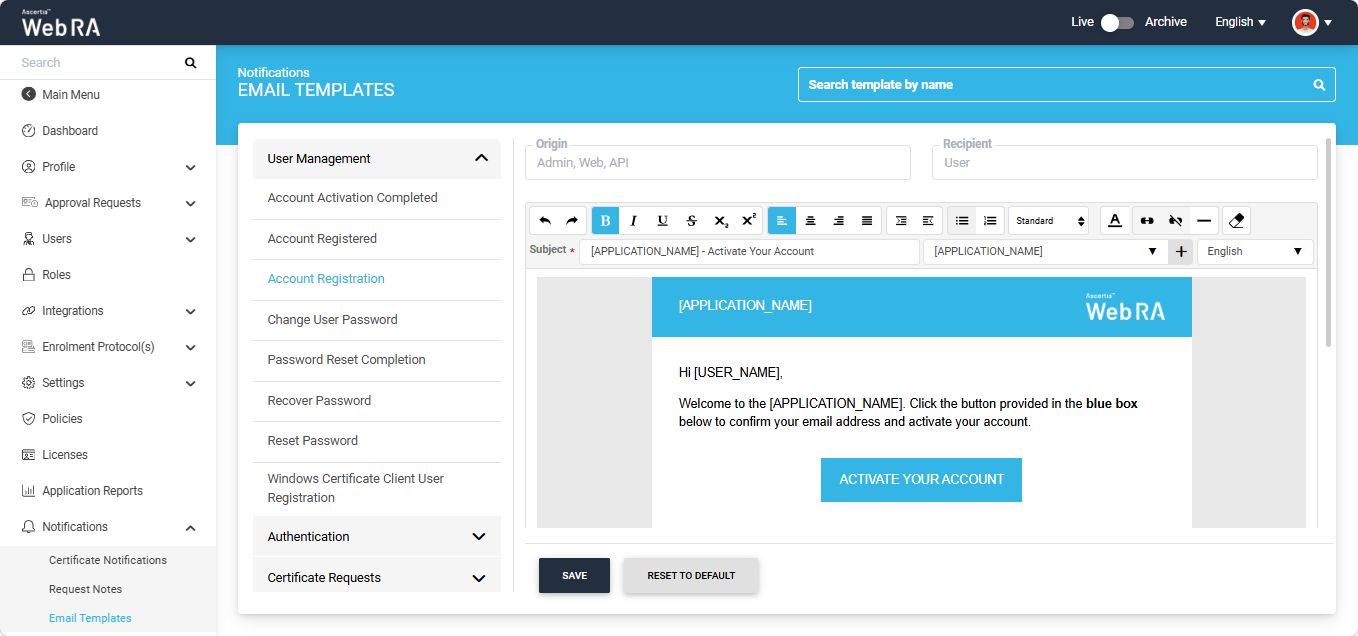
To change the subject of the email, click the 'Subject' field and edit the text. The 'Subject' field is mandatory and cannot be left empty.
To change the content of the email, click inside the email body and edit the text. Use the toolbar above the 'Subject' field to format the content, for example to make text bold, change the alignment, add a list or insert a link.
Inserting a Placeholder
Placeholders are values, such as the recipient's name or the application name, that the system replaces with actual data when the email is sent. Placeholders are shown in square brackets, for example [USER_NAME].
To insert a placeholder, click the position in the email body where you want to add it. Then select the required placeholder from the placeholder dropdown next to the 'Subject' field and click the '+' button. The system inserts the placeholder at the selected position.
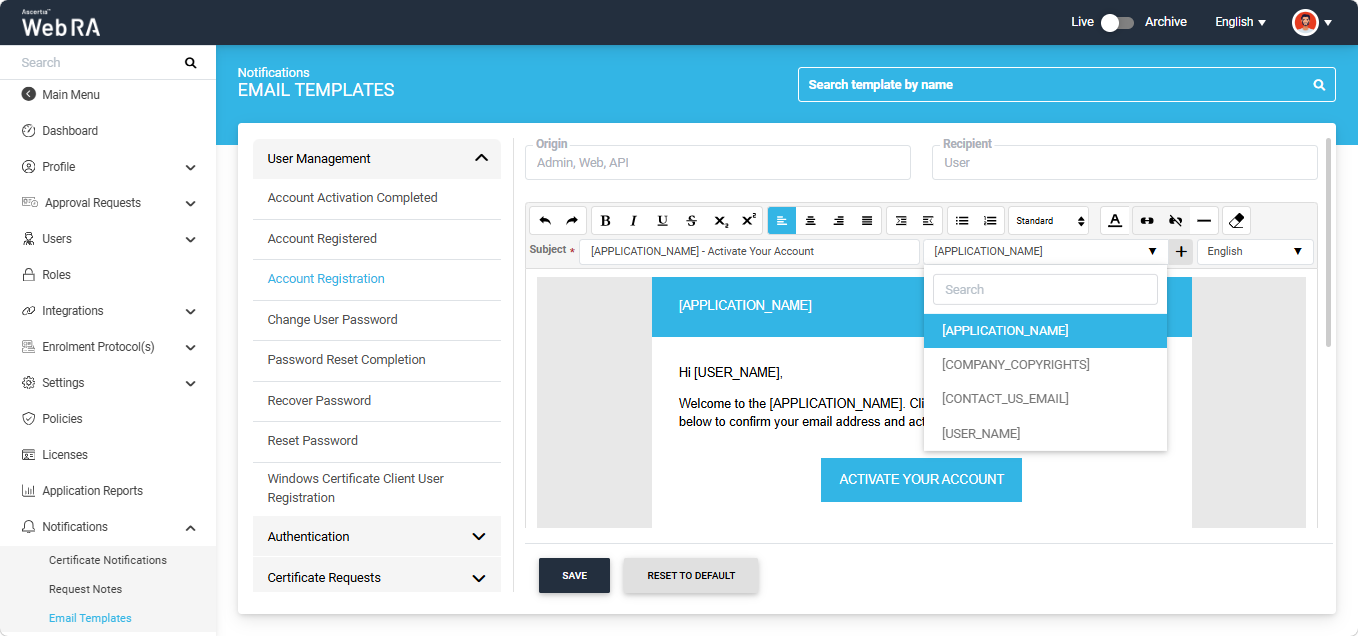
The placeholder dropdown lists only the placeholders that are available for the selected template. To use a placeholder in the Subject, type it in the 'Subject' field exactly as it appears in the dropdown, including the square brackets.
|
|
Note: The system does not validate placeholders that you type manually. It is the operator's responsibility to use only the placeholders listed for the template and to keep any placeholders that the email requires. |
Saving the Changes
After making the required changes, click the 'Save' button. The system saves the template for the enterprise and displays the message 'Email template updated successfully'.
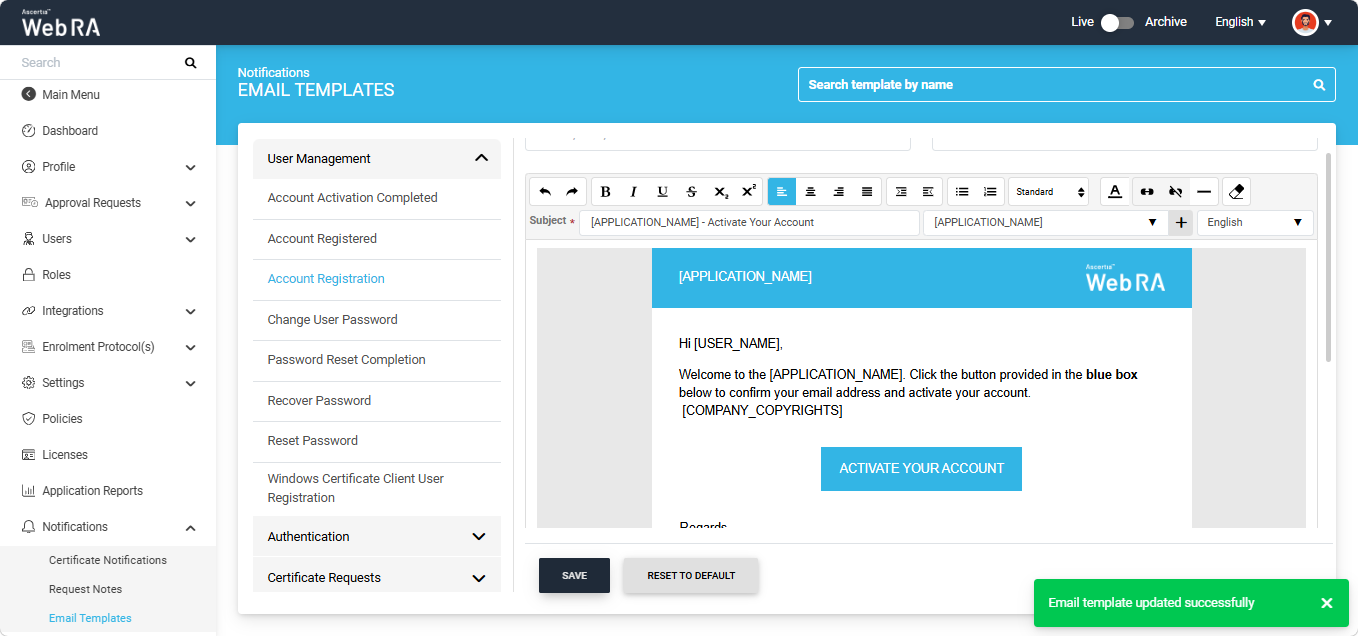
If you select another email template without saving the one you are currently working on, the system displays the 'Discard Changes' dialog. Click 'Discard' to discard your changes, or click 'Continue Editing' to return to the template.
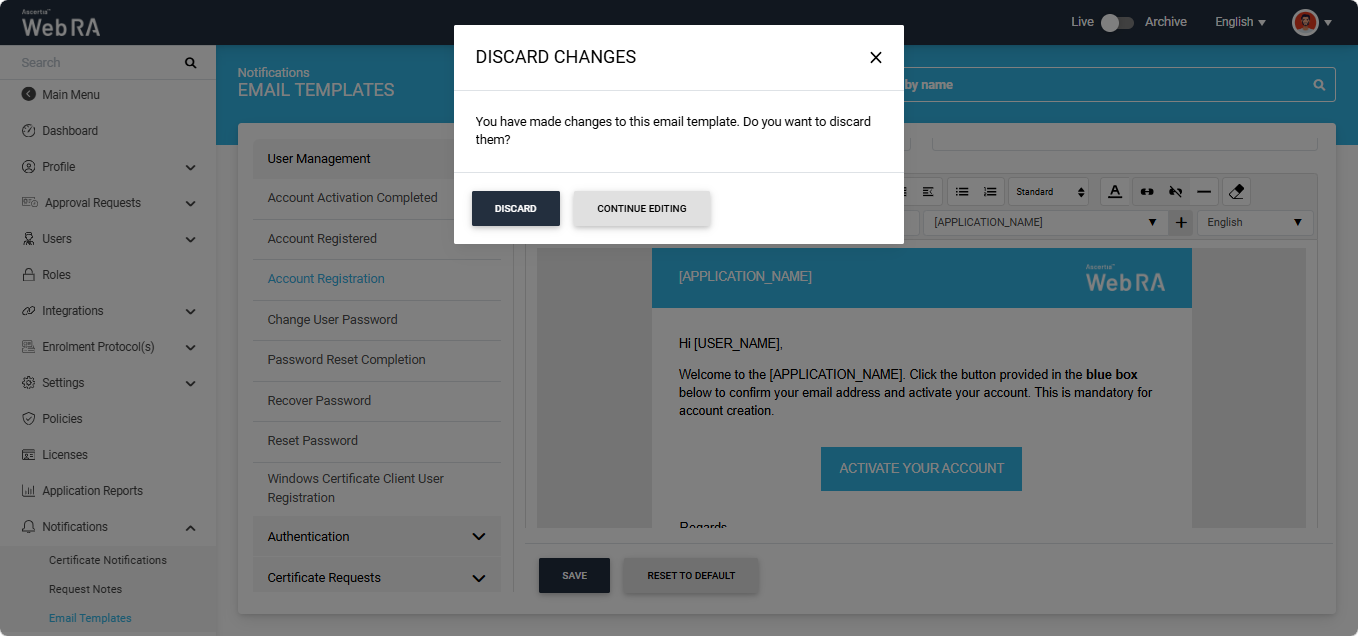
|
|
Note: The operator is responsible for the content of the template. Before saving, make sure that the formatting is correct and that any links or external content added to the email are accurate and secure. The system does not validate links or external content. |
Editing Other Languages
To customise the template in another language, select the language from the 'Language' dropdown, edit the subject and body, and click the 'Save' button. Repeat these steps for each language you want to customise.
Languages that you do not customise continue to use their default content.
Resetting the Template to Default
To restore the default content of the template, select the language you want to reset and click the 'Reset to Default' button. The system displays the 'Reset Template Confirmation' dialog.
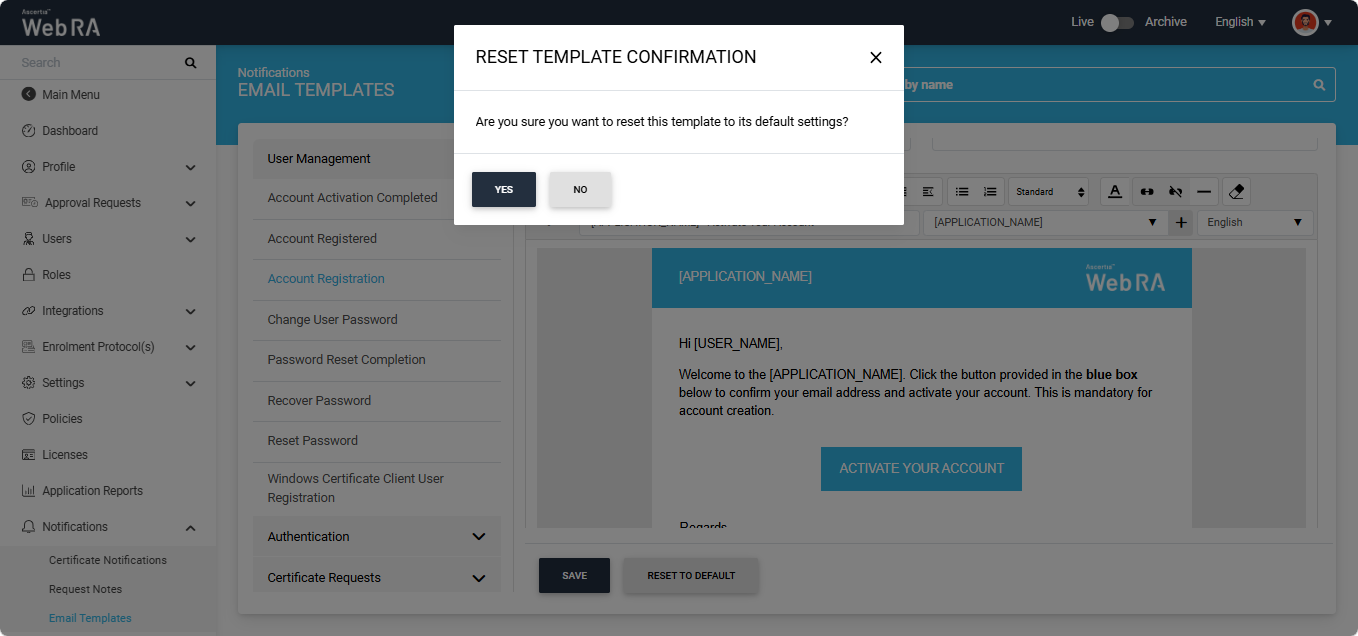
Click 'Yes' to confirm. The system restores the default subject and body of the selected language and displays the message 'Email template reset to default successfully'.
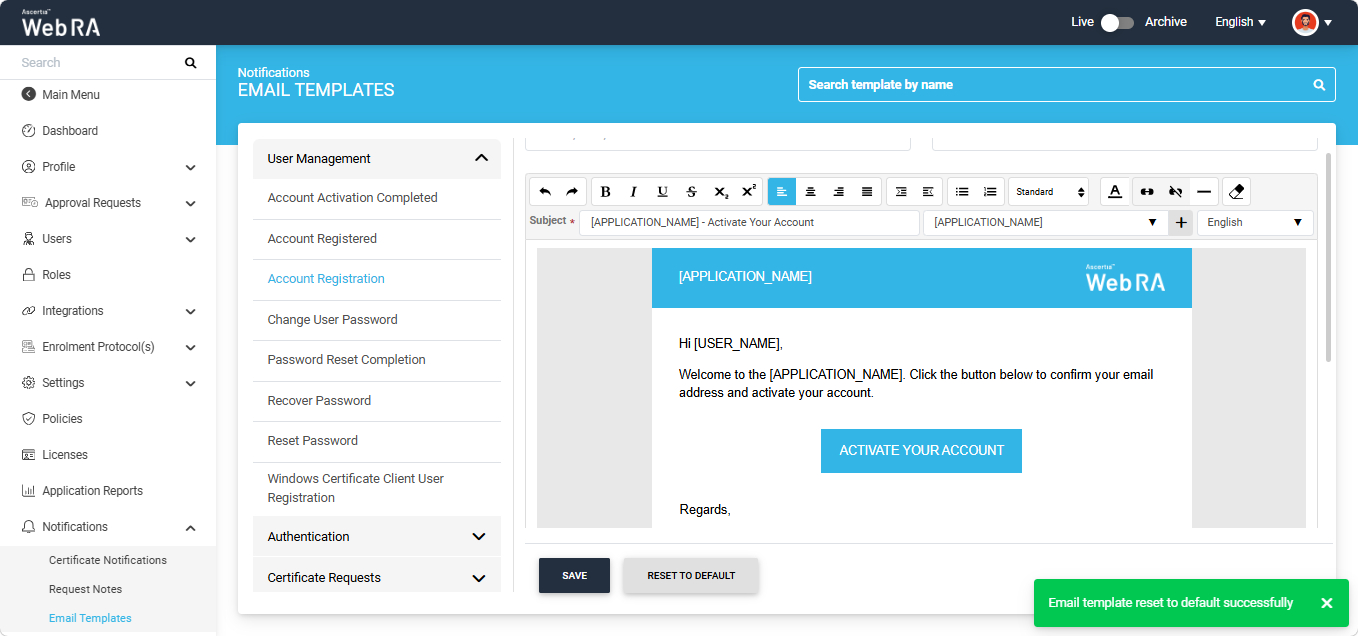
|
|
Note: When you reset an email template at the enterprise level, the system checks the same email template at the global level:
|
|
|
Note: Reset to Default applies only to the selected language. The other language versions keep their customised content. |
Configuring an Email Template with Profile Templates
This section explains how to customise an email template that supports profile templates for an enterprise. The 'Certificate Renewed' template in the 'Certificate Renewal' category is used as an example. The same steps apply to all email templates that support profile templates.
Opening the Email Template
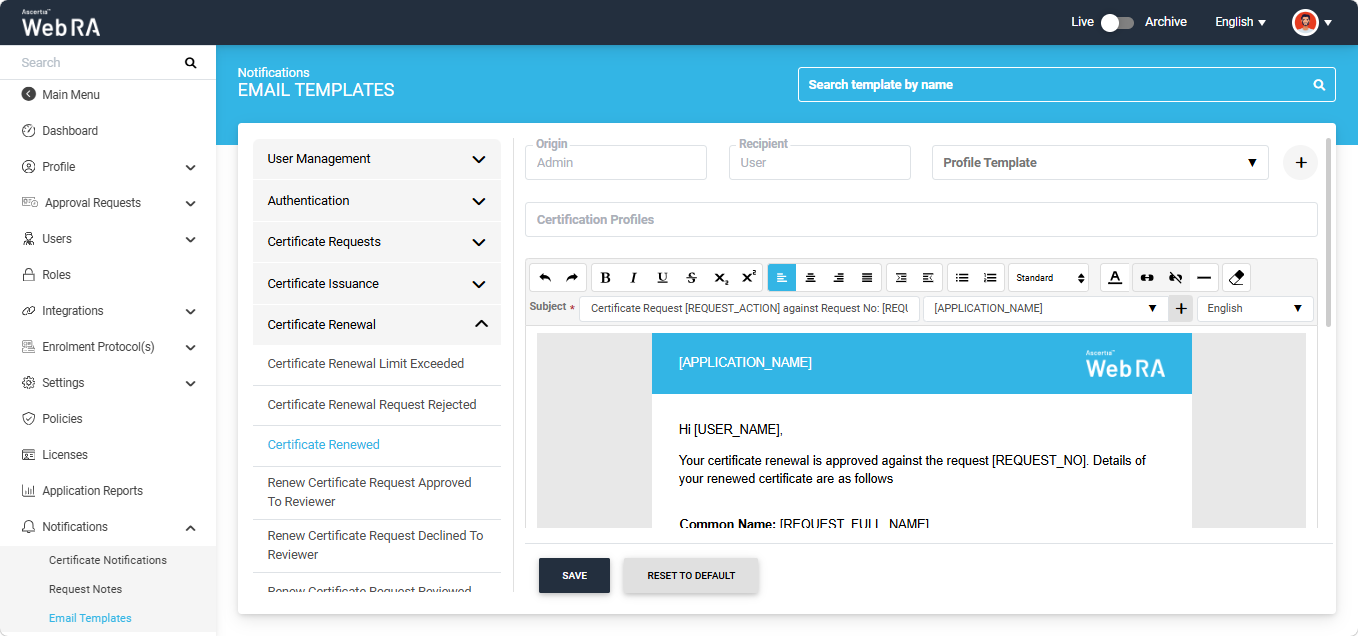
Expand Notifications > Email Templates from the left-tree menu in the Enterprise. Click the 'Certificate Renewal' category to expand it, and then click the 'Certificate Renewed' template.
The system displays the details of the selected template in the right panel. The ‘Origin’ and ‘Recipient’ fields are read-only and show where the email is triggered from and who receives it. The system also displays the following fields:
|
Field |
Description |
|
Profile Template |
Lists the profile templates created for this email template for the enterprise. When no profile template is selected, the system displays the default content of the template. The '+' button next to this field is used to add a new profile template. |
|
Certification Profiles |
Displays the certification profiles linked to the selected profile template. (This field is read-only) |
Adding a Profile Template
To add a profile template, click the '+' button next to the 'Profile Template' field. The system displays the 'Add Profile Template' dialog.
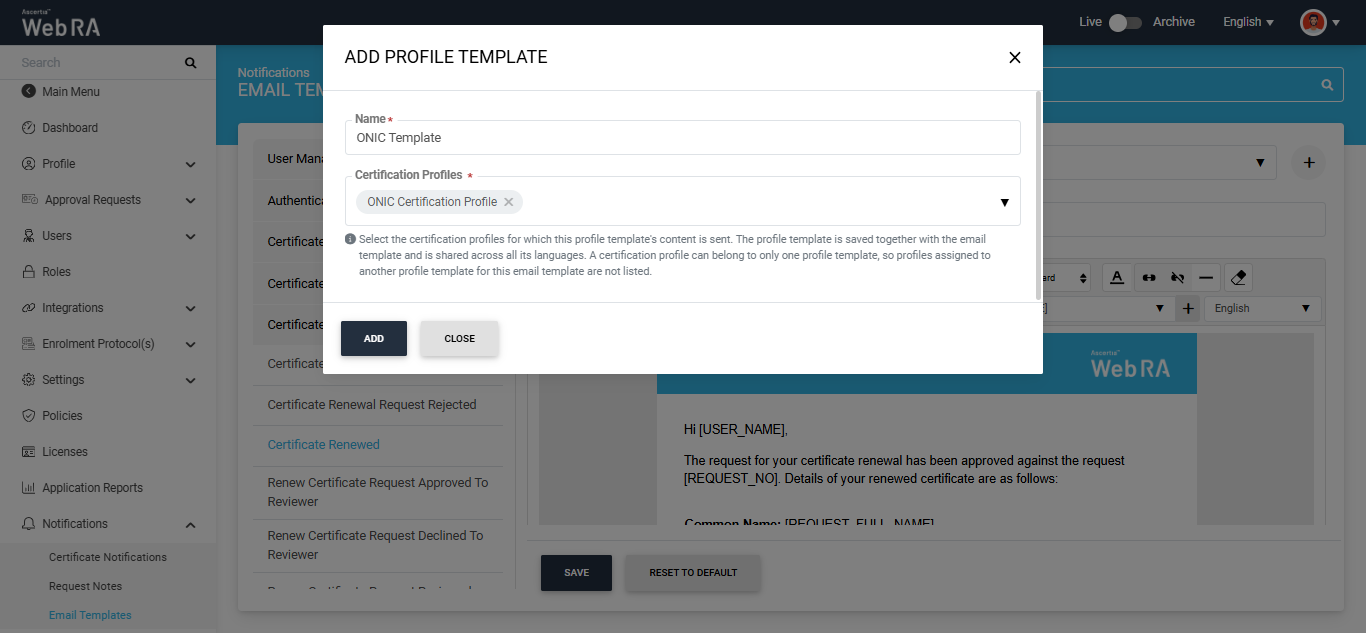
The 'Add Profile Template' dialog consists of the following fields:
|
Field |
Description |
|
Name |
Specify a name for the profile template. The name can contain up to 255 characters. |
|
Certification Profiles |
Select one or more certification profiles for which this profile template's content is sent. The list displays the certification profiles configured in the Enterprise Service Plan. Click 'Select All' to select all the listed profiles. Note: A certification profile can be linked to only one profile template within the same email template. Profiles that are already linked to another profile template of this email template are not listed. The same certification profile can be linked to profile templates of other email templates. |
After providing the required information, click the 'Add' button. The system selects the new profile template in the 'Profile Template' field and displays the linked certification profiles in the 'Certification Profiles' field. The subject and body of the new profile template are copied from the default content of the template.
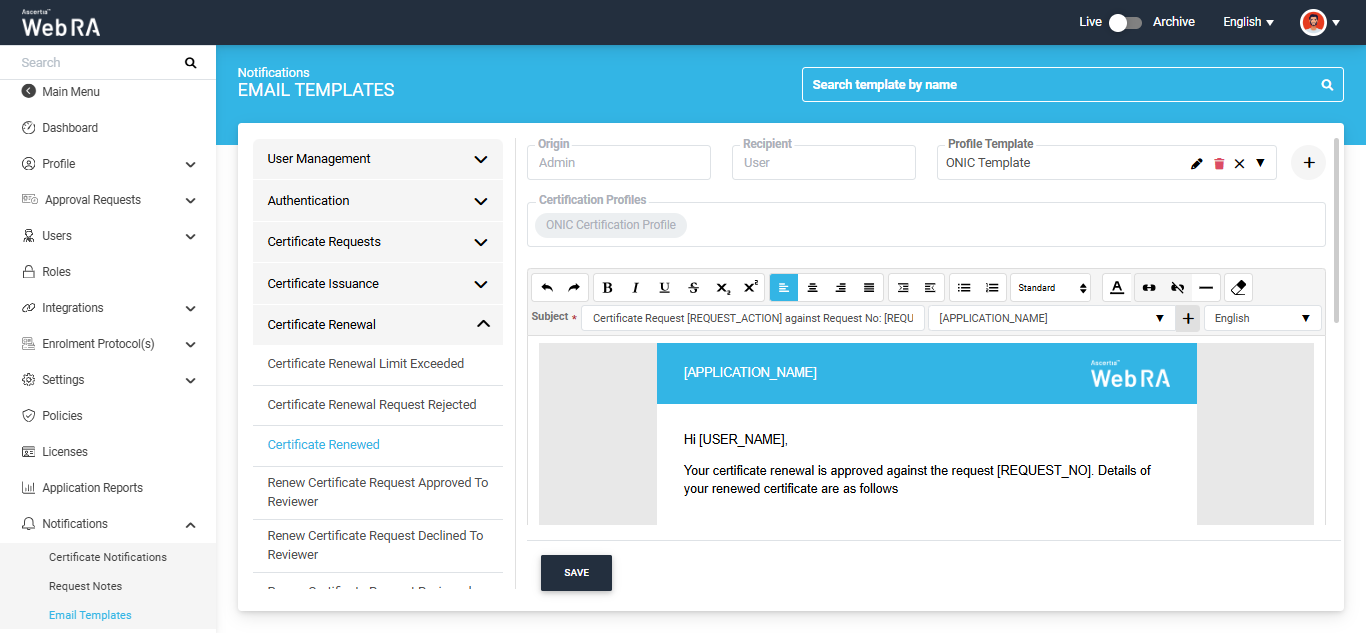
When a profile template is selected, the 'Profile Template' dropdown field displays the following icons:
|
Icon |
Description |
|
Edit (pencil) |
Opens the 'Update Profile Template' dialog to change the name or the certification profiles of the profile template. |
|
Delete (bin) |
Deletes the selected profile template. |
|
✕ |
Clears the selection. The system displays the default content of the template. |
|
Dropdown arrow |
Lists all the profile templates created for this email template for the enterprise. |
Customising the Profile Template Content
After you add a profile template, you can customise its content as required.
If multiple profile templates are created, make sure the required profile template is selected in the 'Profile Template' field. To select a different profile template, click the dropdown arrow in the 'Profile Template' field and select it from the list. The system displays the content of the profile template and its linked certification profiles in the 'Certification Profiles' field.
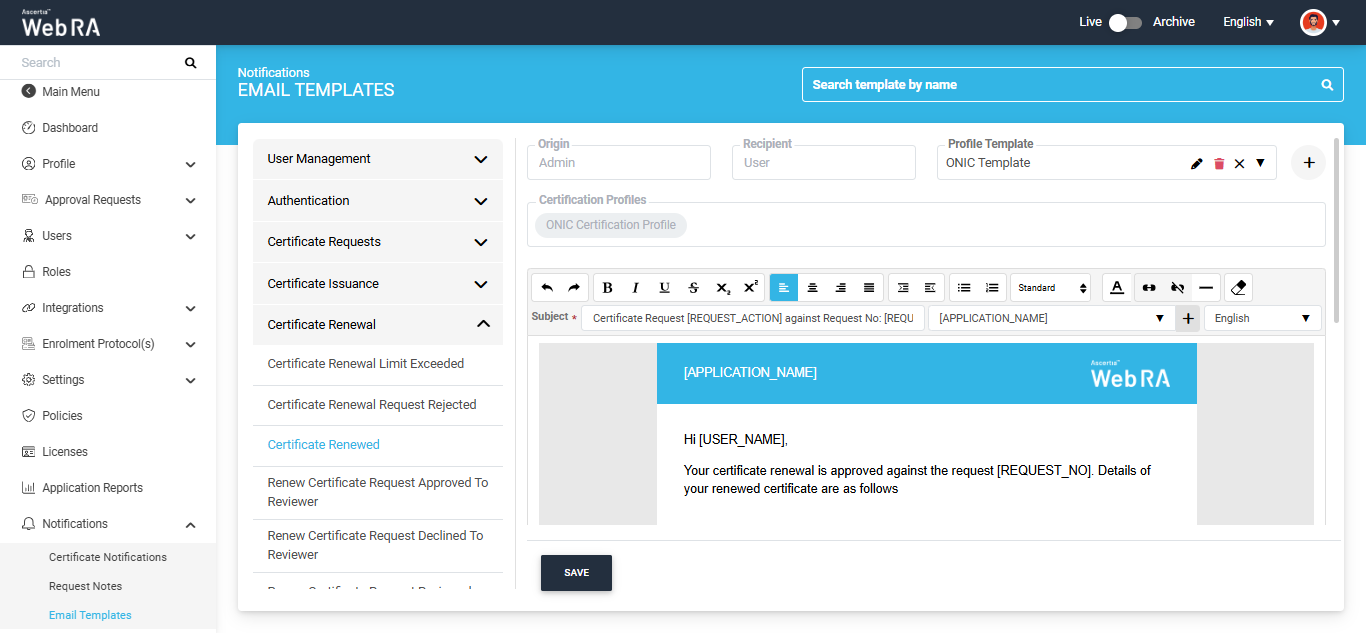
Selecting the Language
Each profile template has a separate version for every supported language. Select the language you want to edit from the 'Language' dropdown on the right side of the 'Subject' field. The system displays the subject and body of the profile template in the selected language.
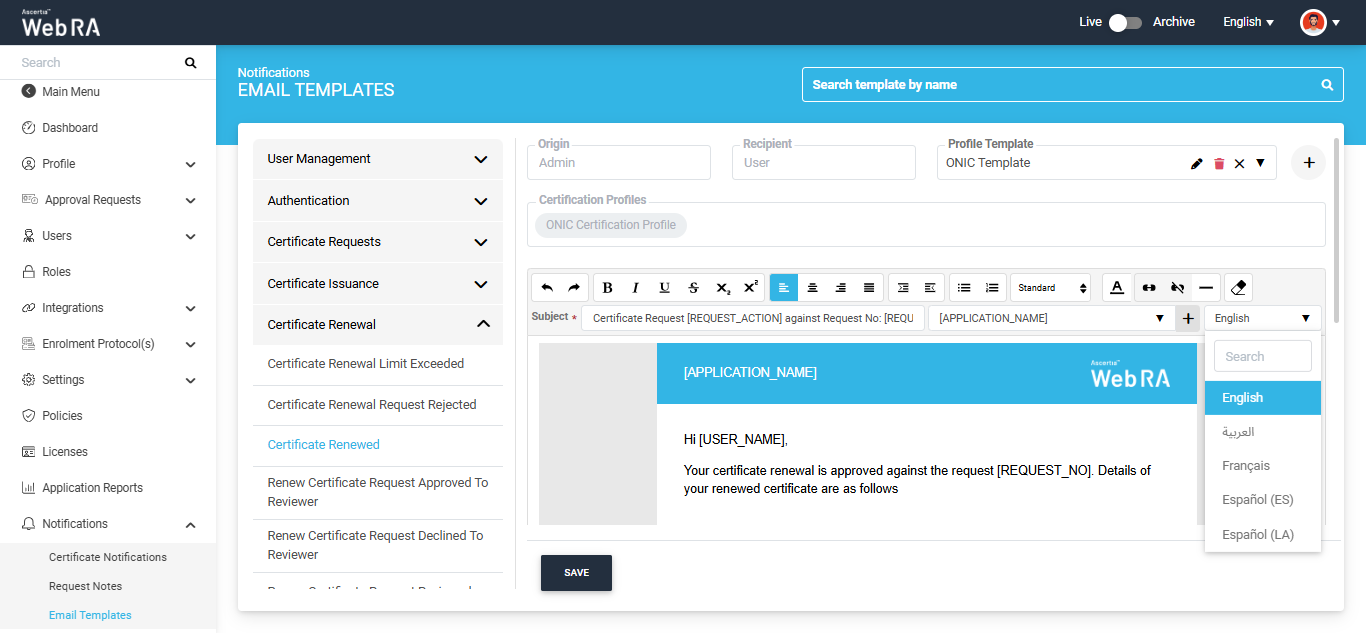
|
|
Note: The selected language remains the same when you open another template. Always check the selected language before making changes. |
Editing the Subject and Body
To change the subject of the email, click the 'Subject' field and edit the text. The 'Subject' field is mandatory and cannot be left empty.
To change the content of the email, click inside the email body and edit the text. Use the toolbar above the 'Subject' field to format the content, for example to make text bold, change the alignment, add a list or insert a link.
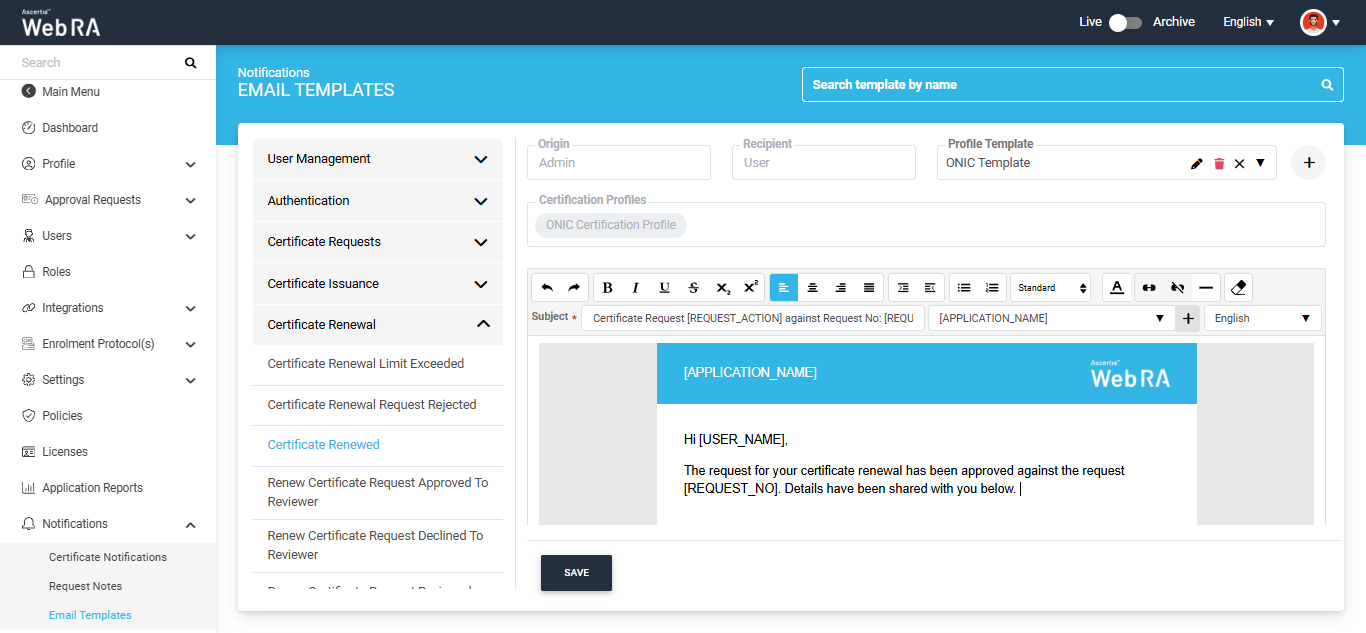
Inserting a Placeholder
To insert a placeholder, click the position in the email body where you want to add it. Then select the required placeholder from the placeholder dropdown next to the 'Subject' field and click the '+' button. The system inserts the placeholder at the selected position.
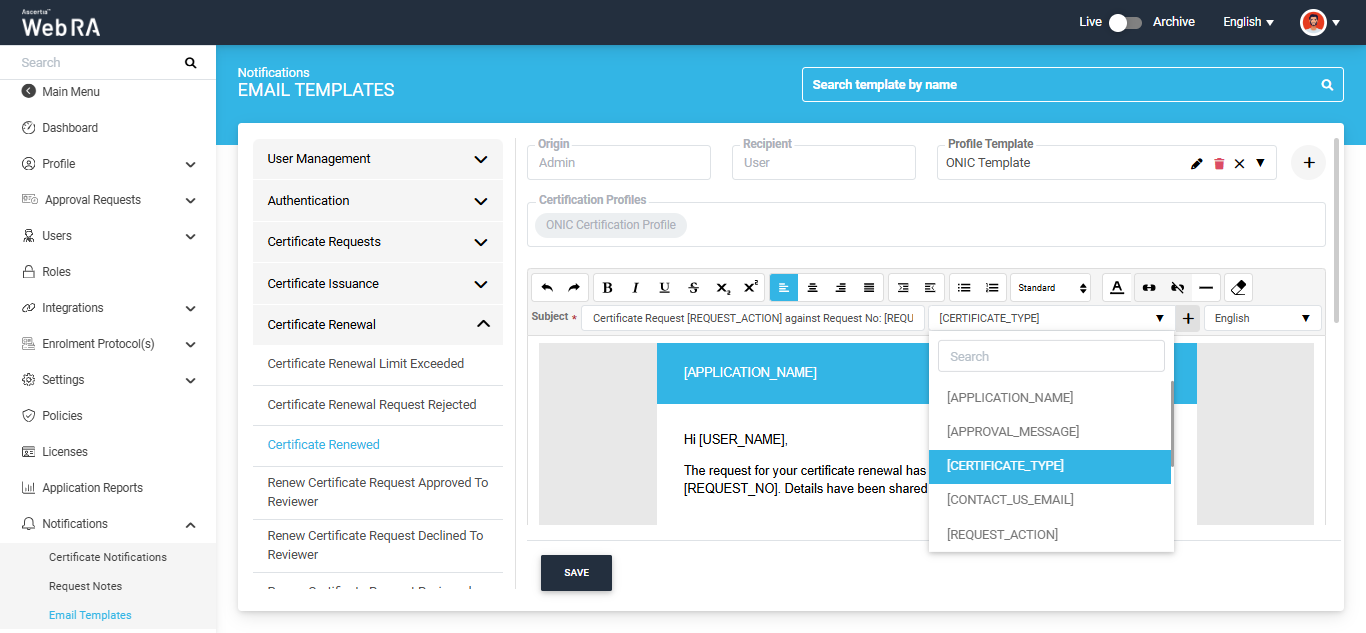
The placeholder dropdown lists only the placeholders that are available for the selected template. To use a placeholder in the subject, type it in the 'Subject' field exactly as it appears in the dropdown, including the square brackets.
|
|
Note: The system does not validate placeholders that you type manually. It is the operator's responsibility to use only the placeholders listed for the template and to keep any placeholders that the email requires. |
Saving the Changes
After making the required changes, click the 'Save' button. The system saves the profile template and its content, and displays the message 'Email template updated successfully'.
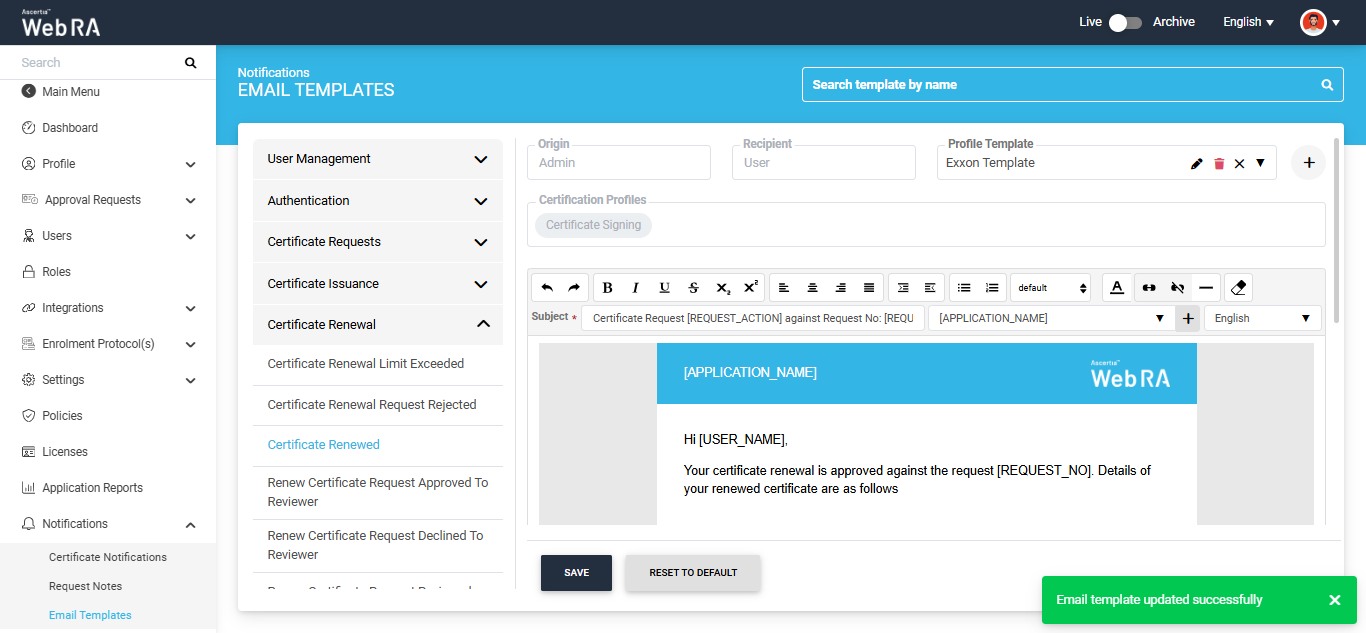
|
|
Note: A new profile template is saved only when you click the 'Save' button. If you select another email template before saving, the system displays the 'Discard Changes' dialog. Click 'Discard' to discard your changes, or click 'Continue Editing' to return to the template. |
Editing Other Languages
To customise the profile template in another language, select the language from the 'Language' dropdown, edit the subject and body, and click the 'Save' button. Repeat these steps for each language you want to customise. Languages that you do not customise continue to use the content copied from the default content of the template.
Adding More Profile Templates
To add another profile template for the same email template, click the '+' button next to the 'Profile Template' field and follow the steps in Adding a Profile Template. Each profile template must be linked to different certification profiles.
Switching Between Profile Templates
To view or edit another profile template, click the dropdown arrow in the 'Profile Template' field and select the required profile template from the list. The system displays its content and its linked certification profiles.
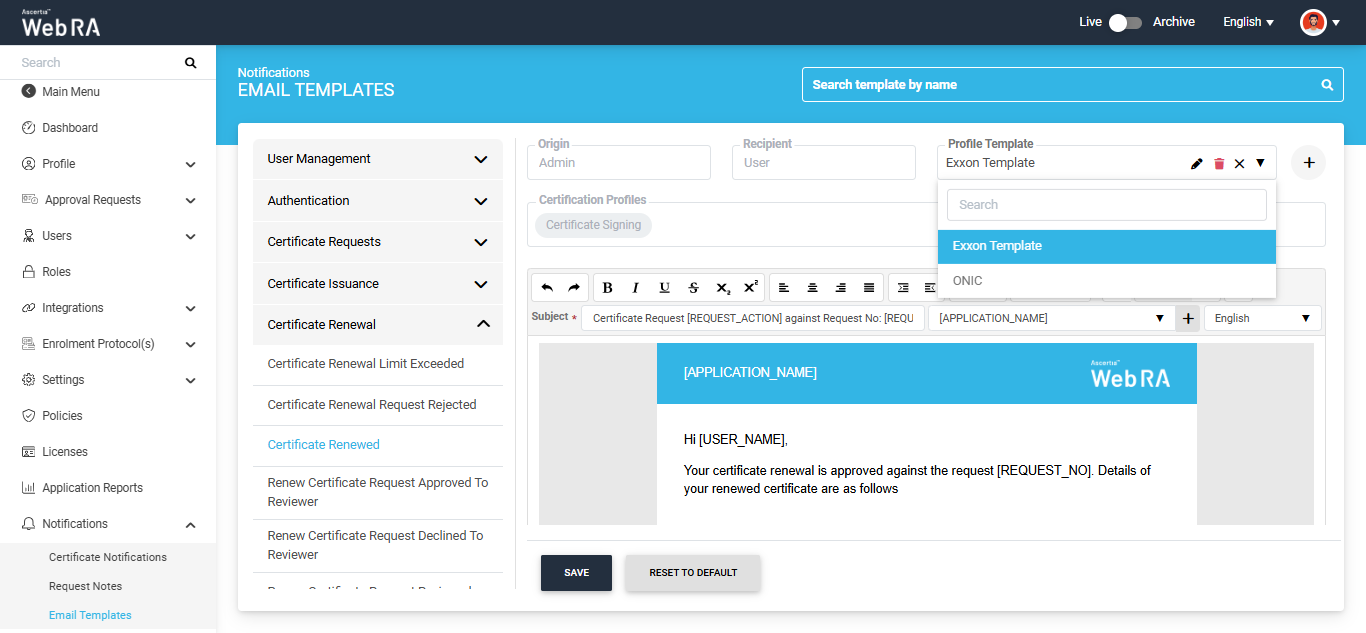
Updating a Profile Template
To change the name or the certification profiles of a profile template, select the profile template and click the 'Edit' (pencil) icon. The system displays the 'Update Profile Template' dialog.
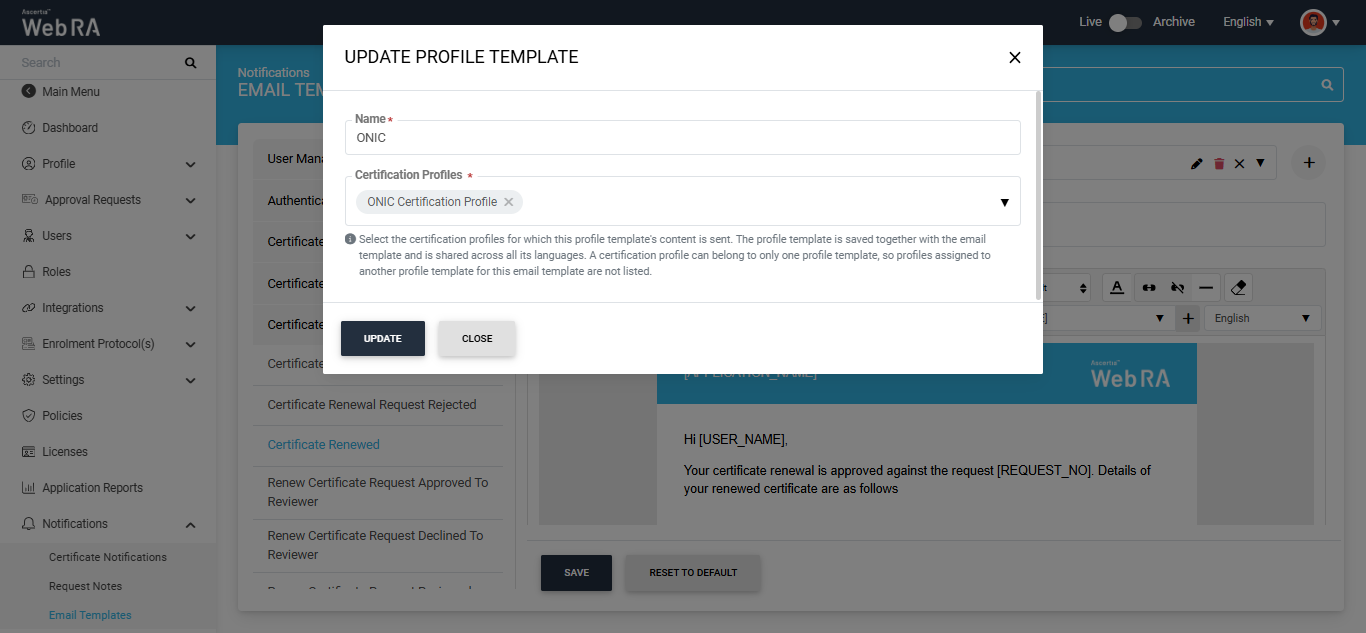
Update the 'Name' or 'Certification Profiles' fields as required and click the 'Update' button. Then click the 'Save' button to save the changes.
Resetting a Profile Template to Default
To restore the original content of a profile template, select the profile template and the language you want to reset, and click the 'Reset to Default' button. In the 'Reset Template Confirmation' dialog, click 'Yes'.
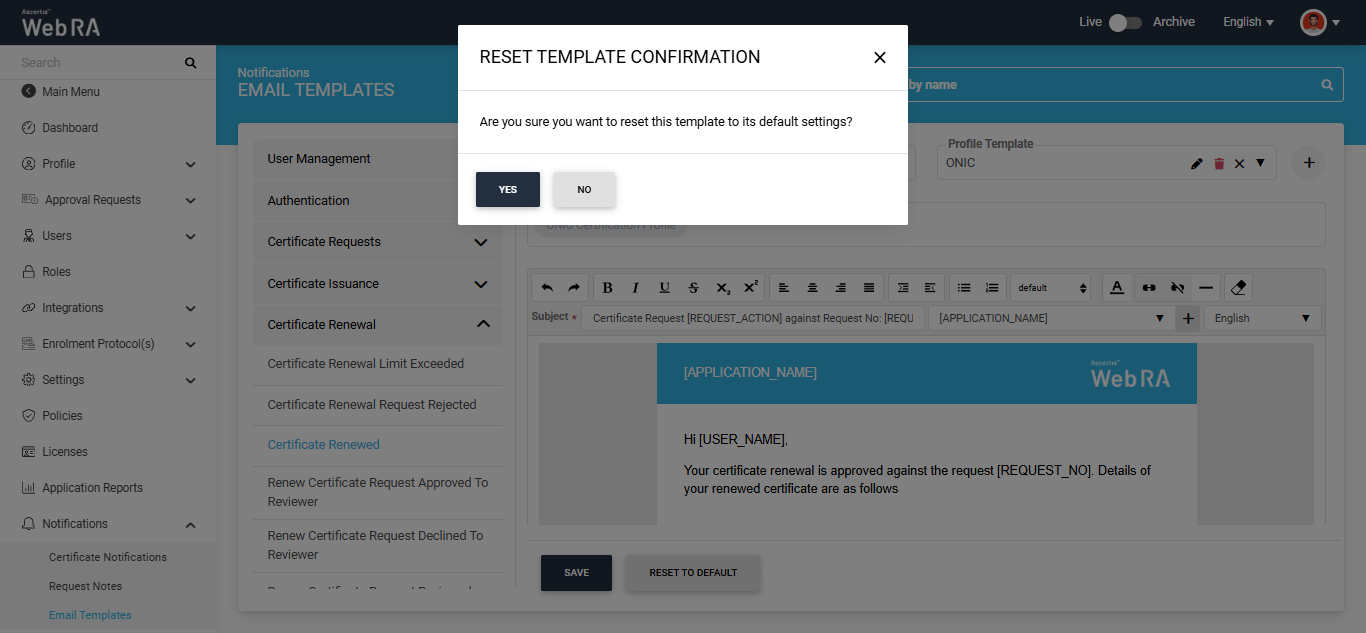
The system restores the default subject and body for the selected language and displays the message 'Email template reset to default successfully'.
|
|
Note: Resetting a profile template does not delete the profile template or remove its linked certification profiles. Only the content of the selected language is reset. |
Deleting a Profile Template
To delete a profile template, select the profile template and click the 'Delete' (bin) icon. The system displays the 'Delete Profile Template' dialog.
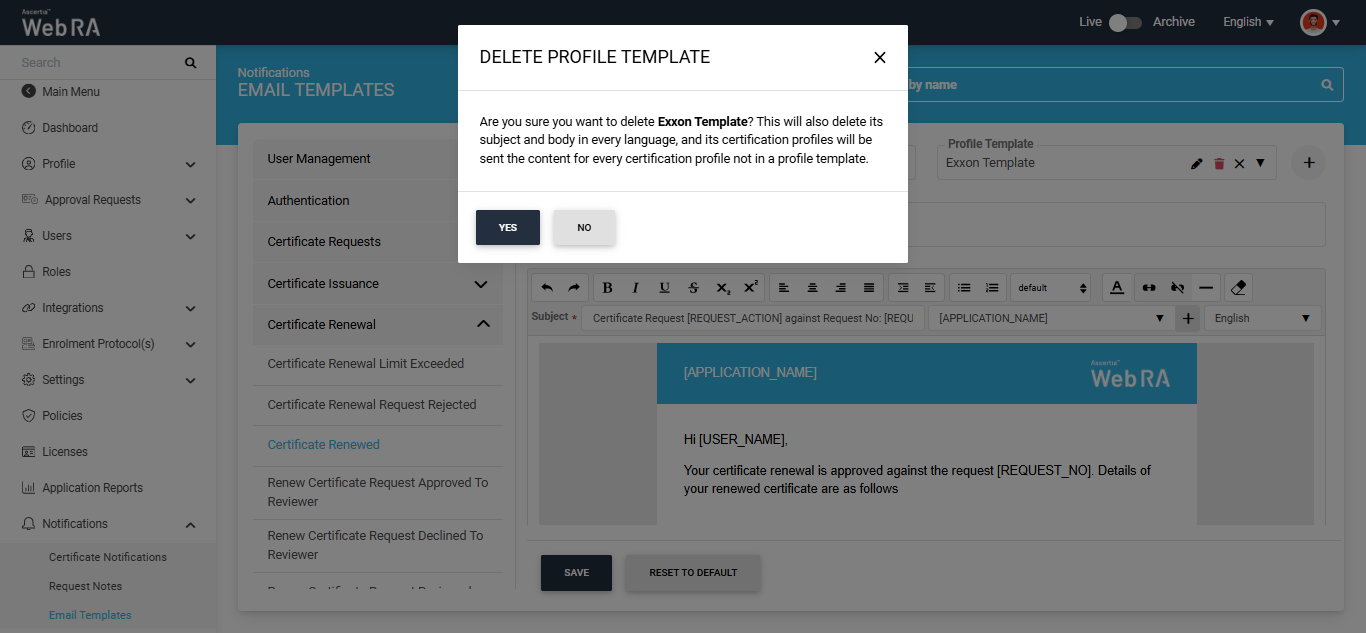
Click 'Yes' to confirm. The system deletes the profile template and displays the message 'Profile template <name> deleted successfully'. You do not need to click the 'Save' button.
|
|
Note: Deleting a profile template also deletes its subject and body in all languages. The certification profiles that were linked to it are then sent the default content of the template. |