SigningHub provides an efficient, fast and easy way to sign a pile of documents (up to 50) in one go. For this, use the "Bulk Sign" option to sign your (multiple) documents (in the "Pending" status) through a single click operation. Bulk signing duly works with document signing, reviewing, updating, in-person signing and adding your initials.
However, SigningHub does not allow you to sign those (pending) documents through bulk signing list, in which:
- Permissions (Password or OTP) have been set to open the document, or
- Permission (Document Signing Authentication) have been set for the recipient, or
- The set duration permission to open the document has expired, or
- The next configured recipient in a workflow is an undefined placeholder, or
- The set delegate duration period has expired, or
- The mandatory form fields assigned to you are empty
- Required Attachments recipient permission is configured
The availability of "Bulk Sign" feature is subject to your subscribed Service Plan and Enterprise Role. If you cannot find this option in your account, please ask your Enterprise Admin to upgrade your service plan and enable it in your Role>Document Settings.
Sign multiple documents
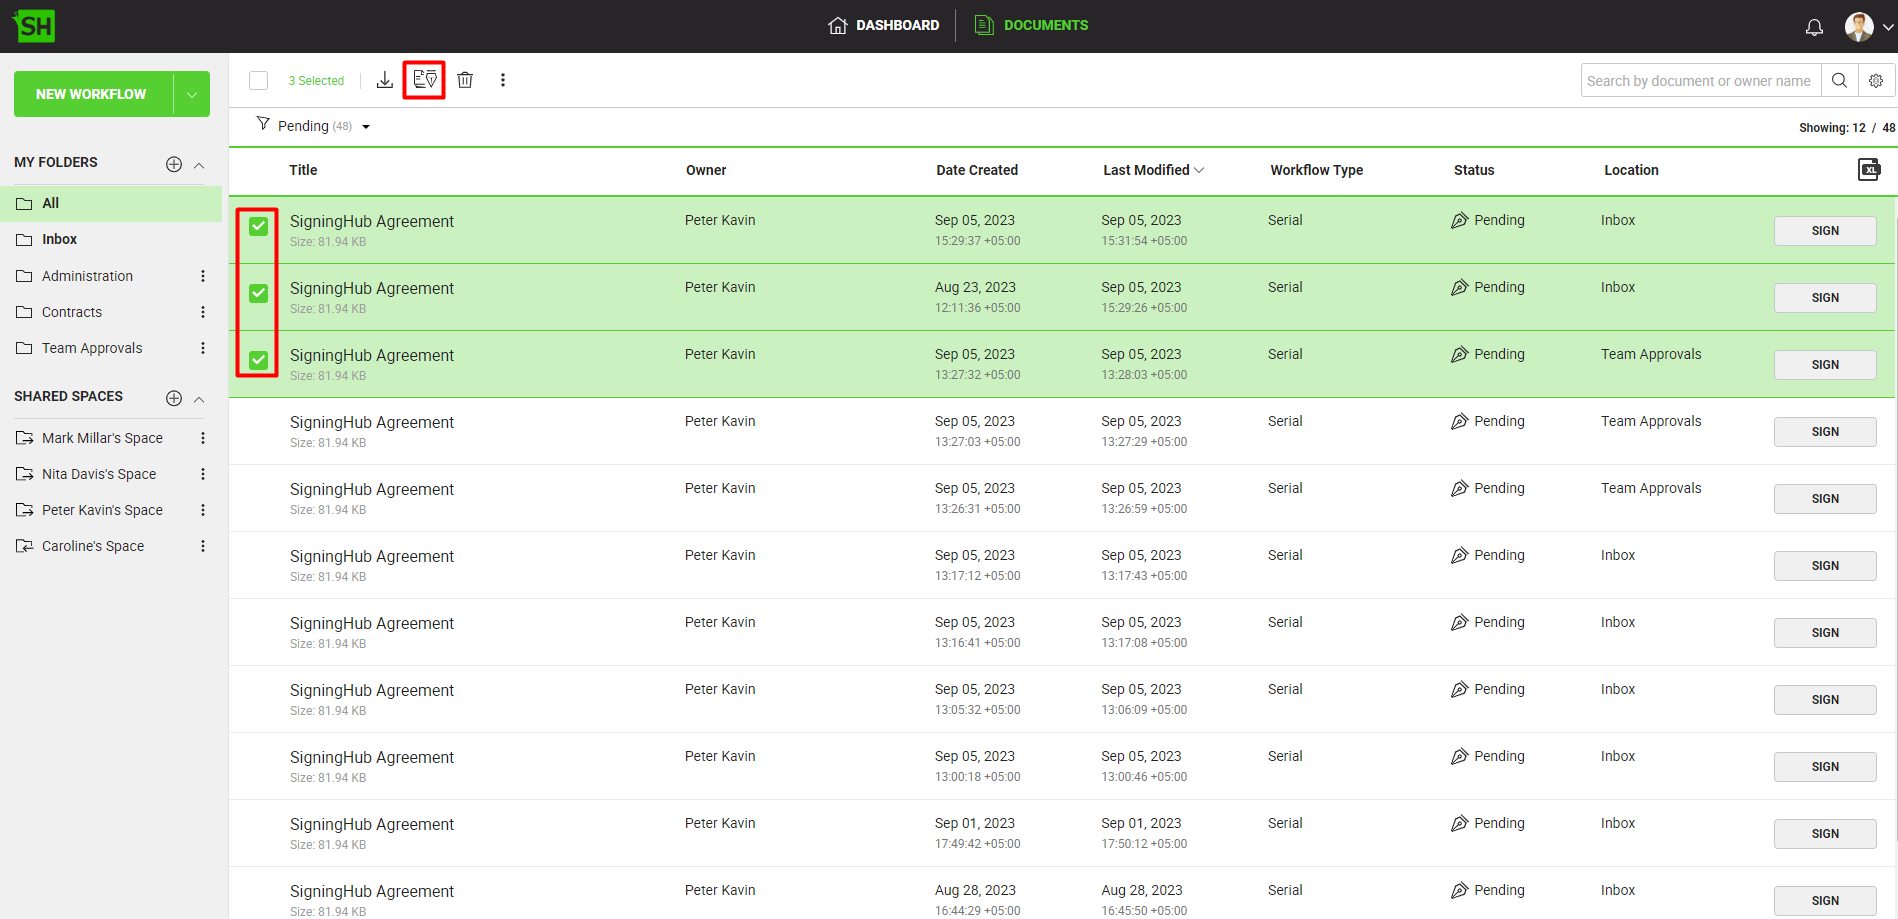
- Click the "Documents" option, available at the top of the SigningHub screen.
- From your documents list, locate and select the pending document(s) to sign. You can select up to 50 documents.
- Click
 from the appearing toolbar.

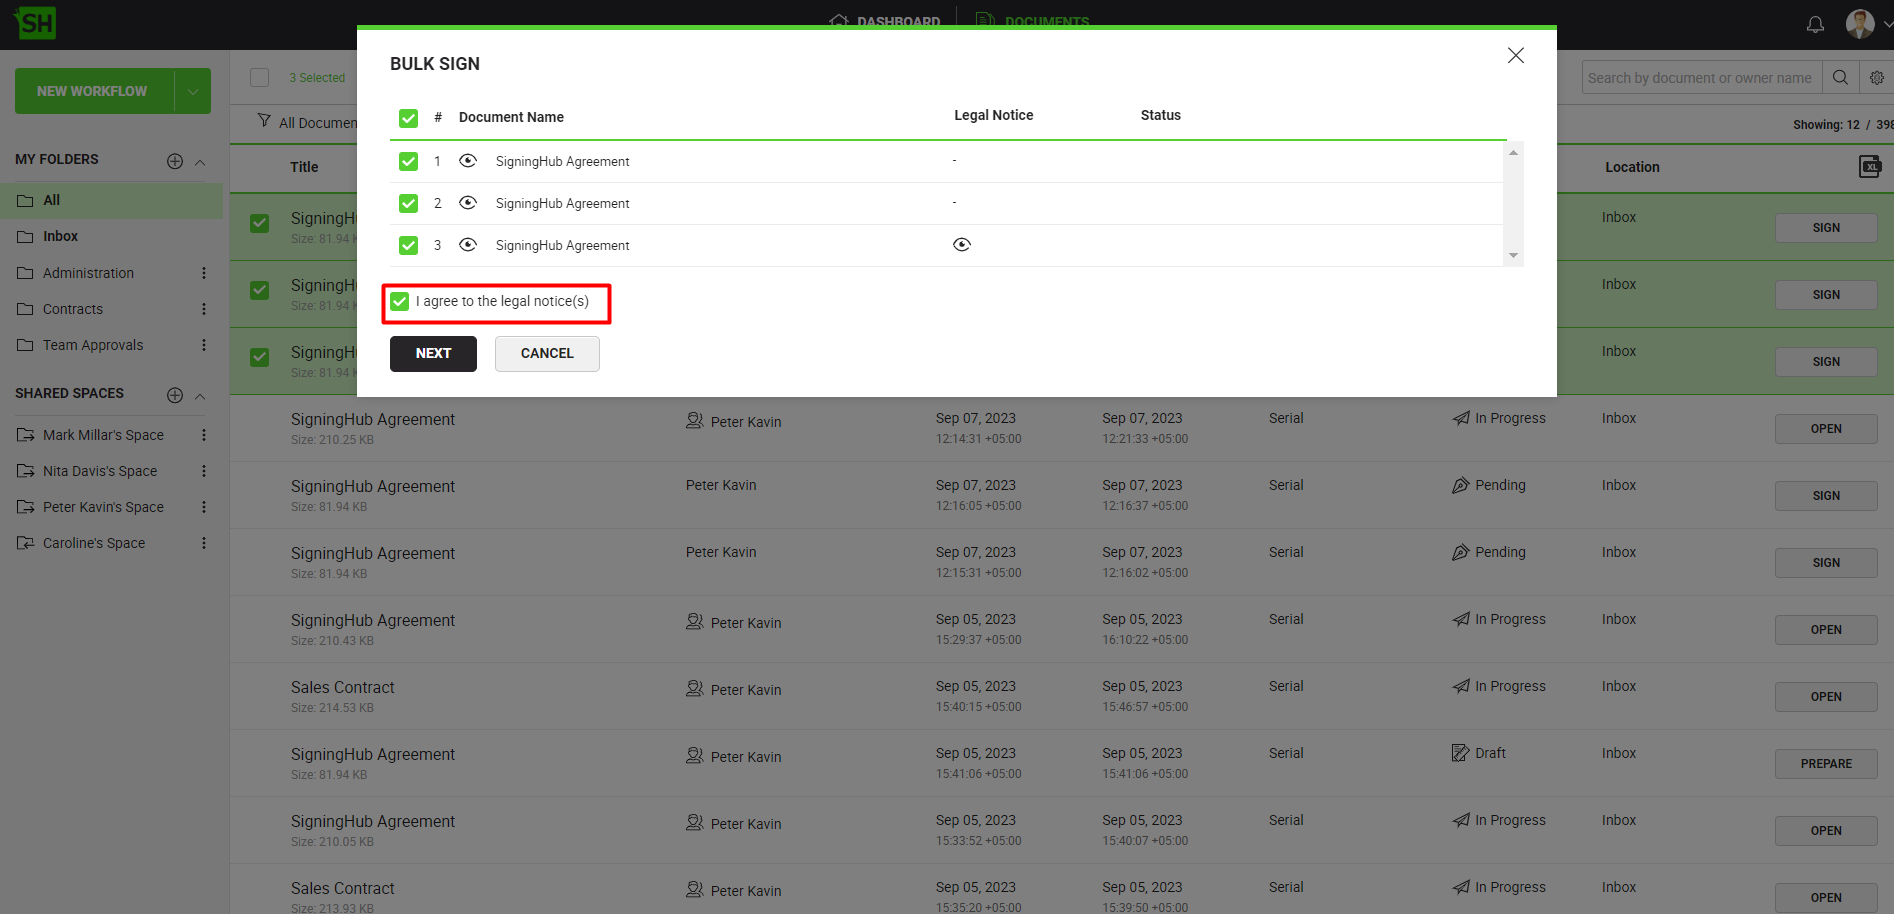
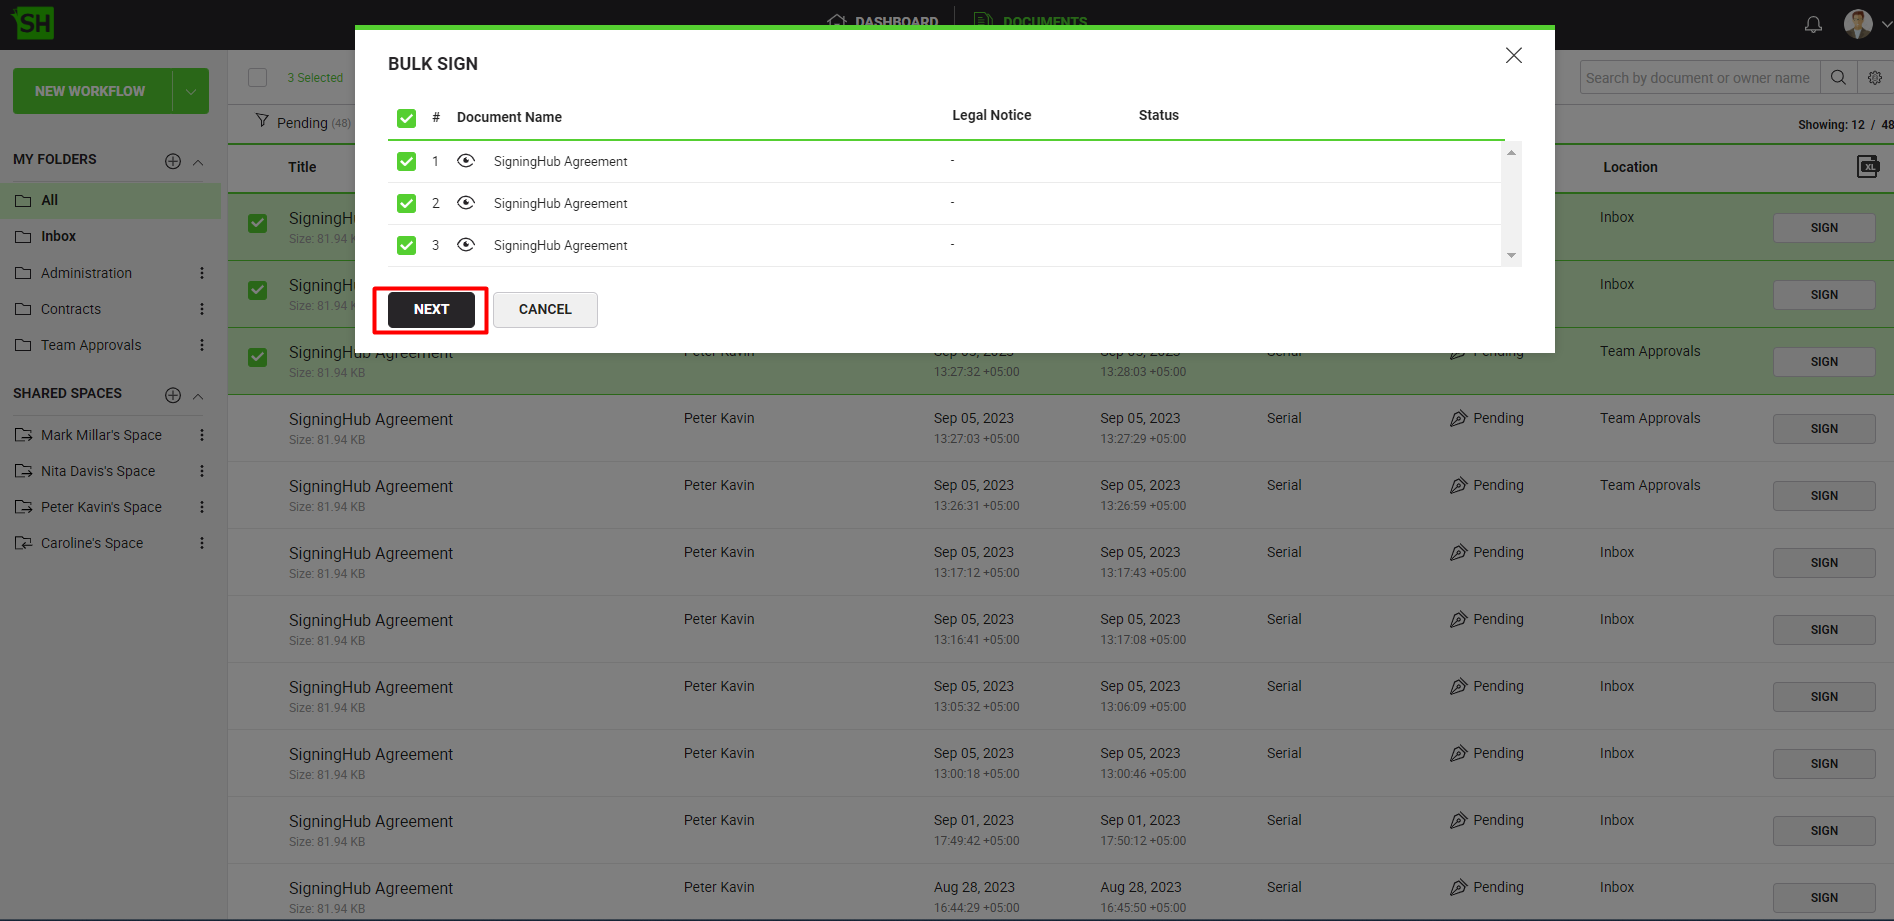
- The "Bulk Sign" dialog will appear, showing the list of selected "Pending" documents. Click
 adjacent to any document name to preview it before signing. In case a legal notice is configured with any of the selected documents,
  will appear against it under the "Legal notice" column header. Click it to review the legal notice details if required.
In case a document could not be signed, the respective reason will be displayed under the "Status" column header. Such documents will be automatically un-selected.
- Click the "I Agree to the legal notice(s)" check box to agree with all the configured legal notices with the selected documents. It is mandatory to agree with the legal notices before proceeding to sign.
In case you have reservations on a legal notice clause, just unselect that document from the list to exclude it from the documents to sign batch.
- Click the "Next" button to proceed to the documents signing.
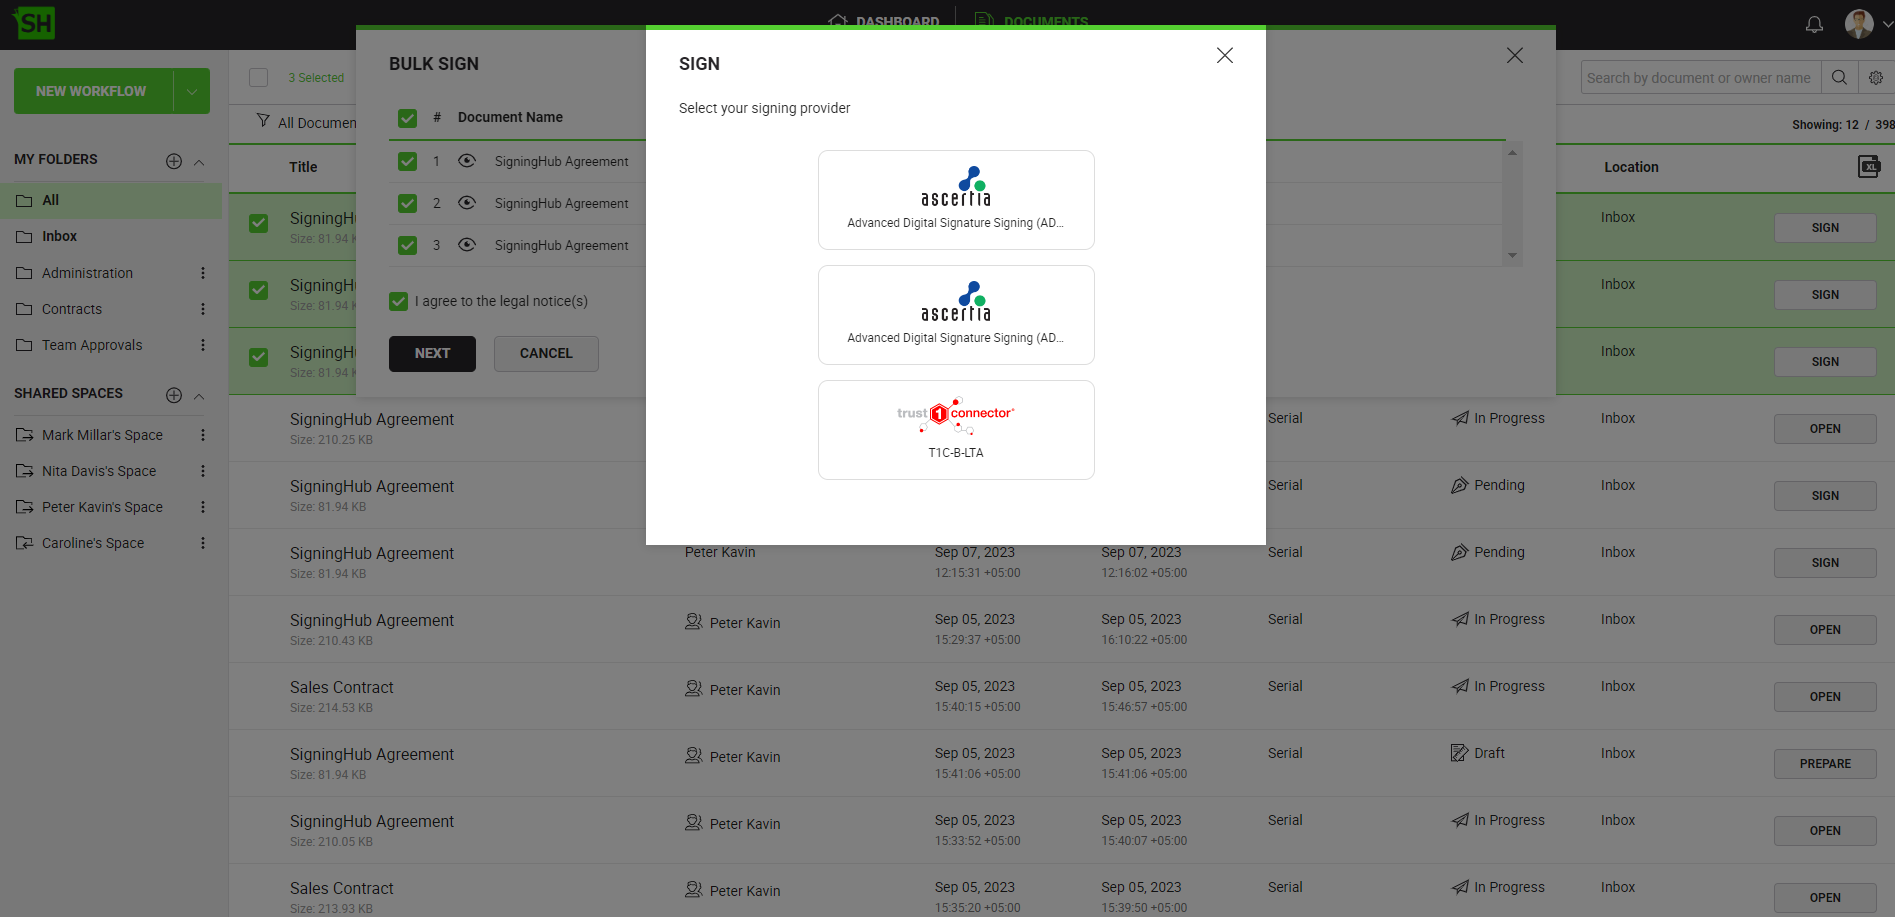
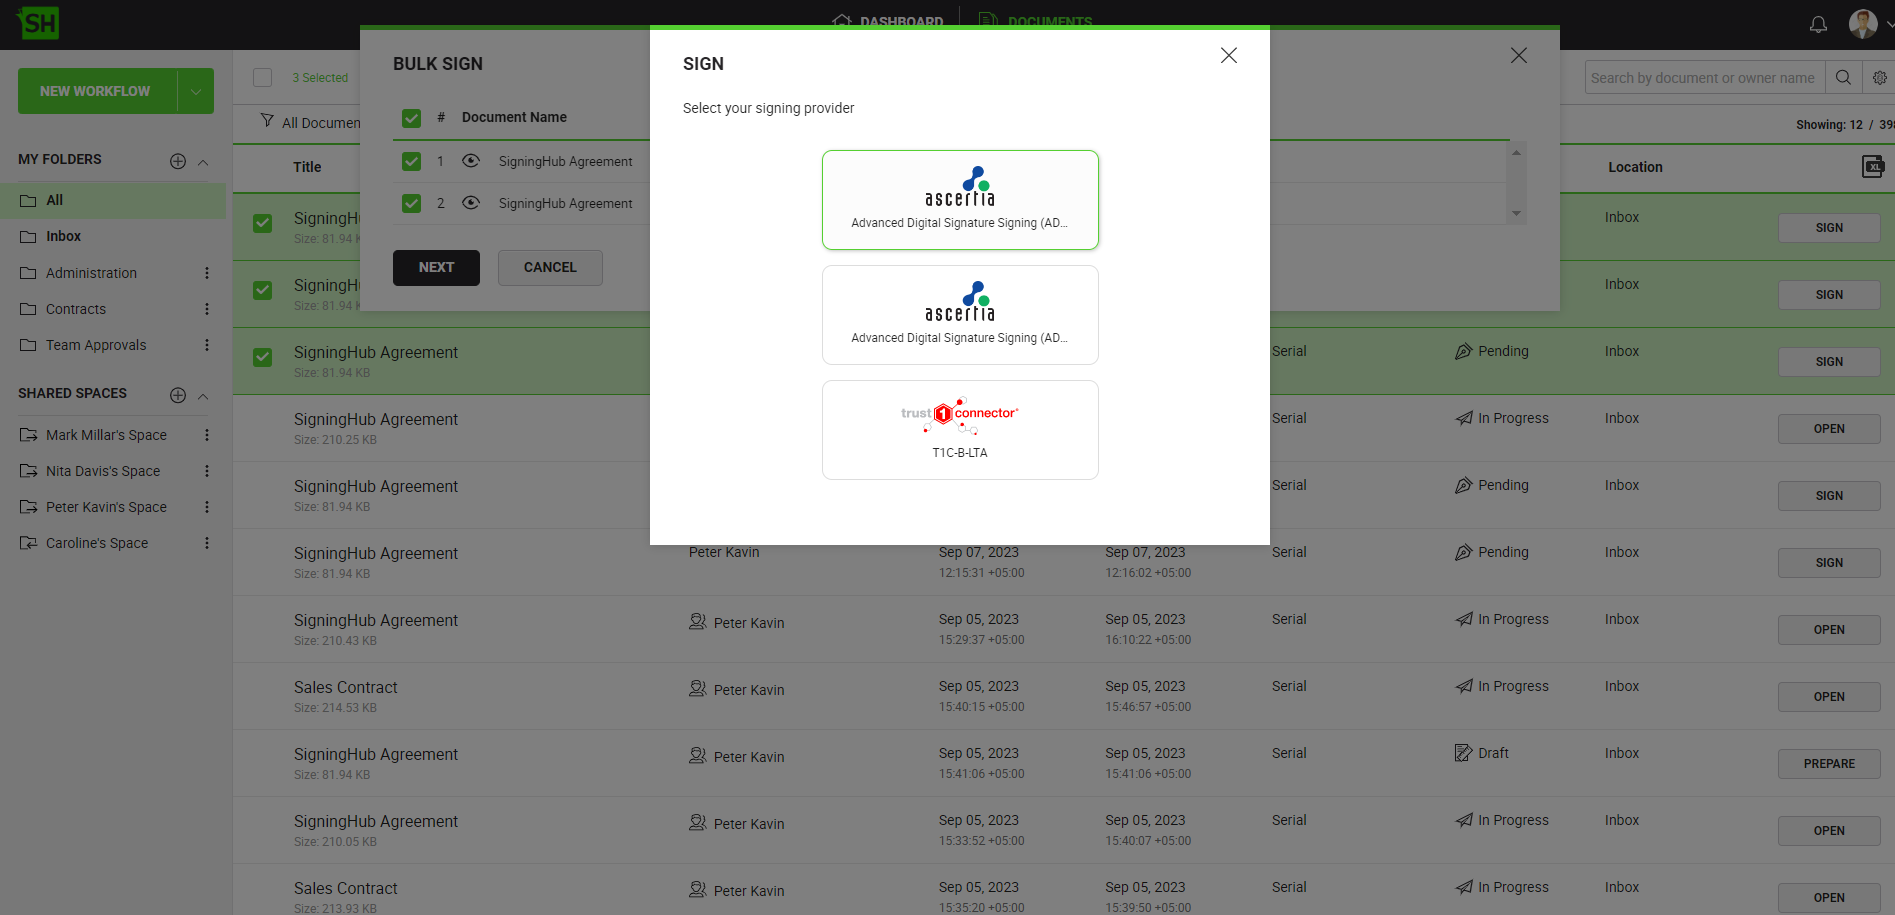
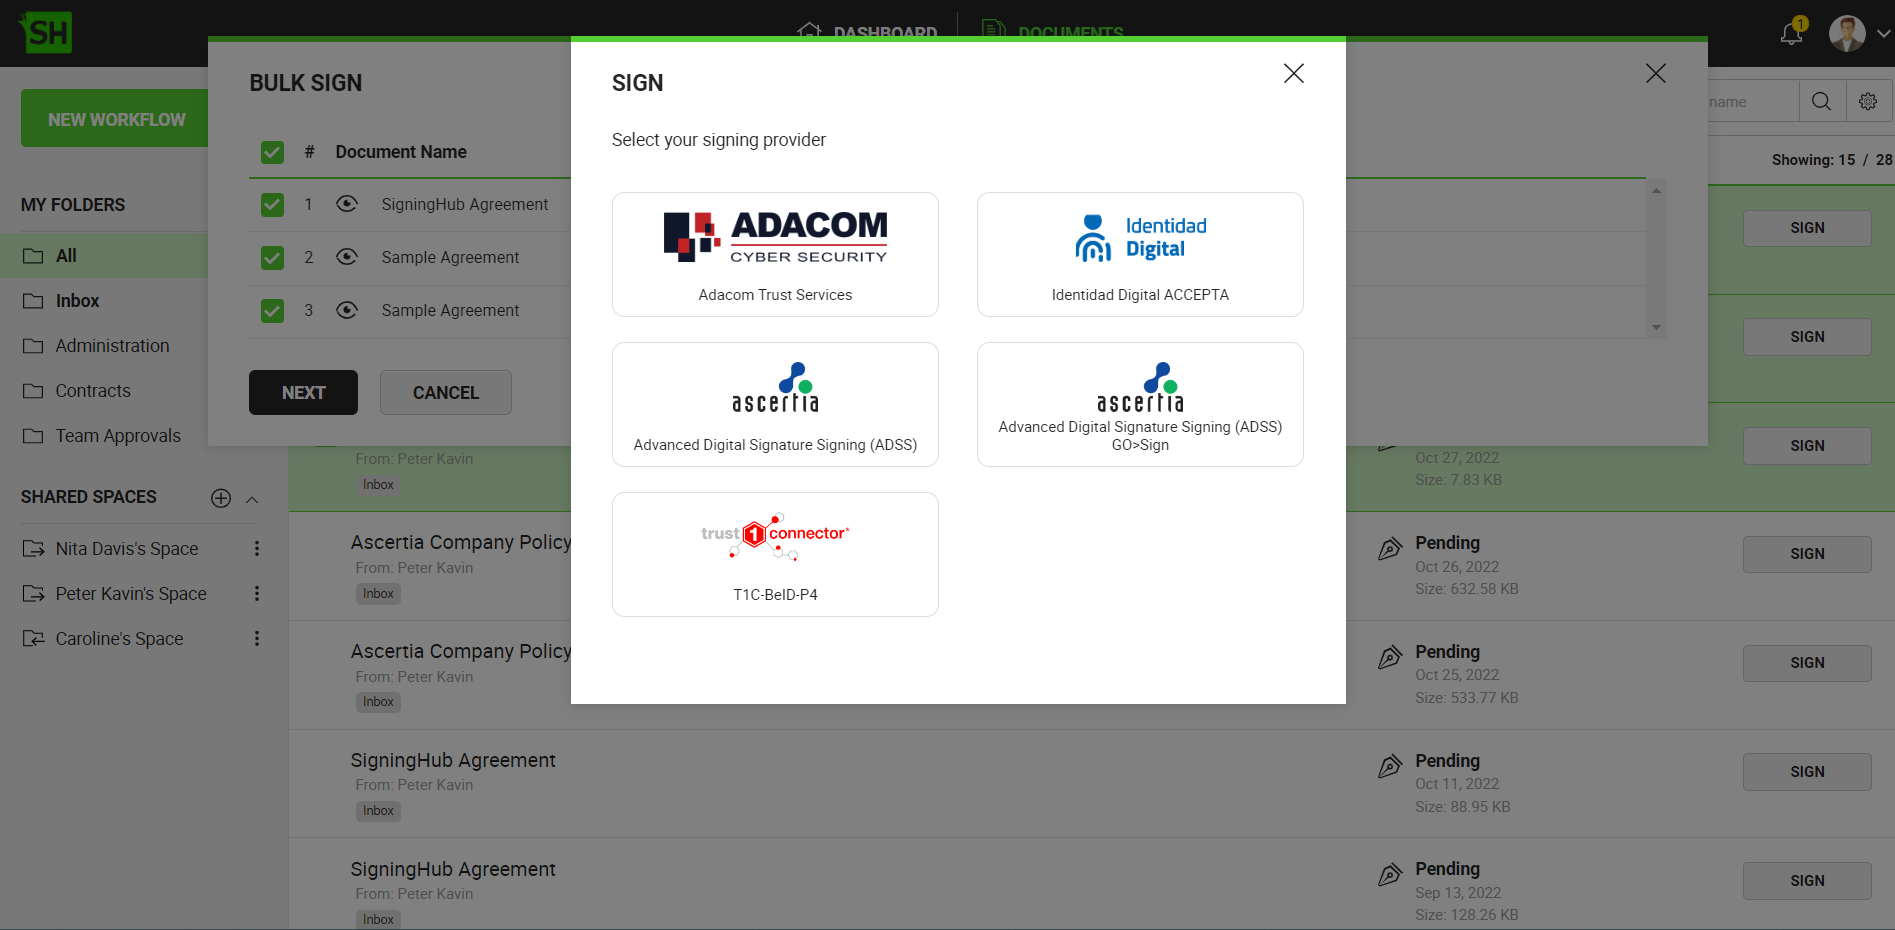
- After click on "Next" the the Signing servers dialog window will appear and display multiple signing servers which can be selected, based on the level of assurance of the signature fields set, by the document owner, in the documents and the level of assurance that are configured in your role. Signing servers are based on service plan configurations, and will display the signing server for server-side and client-side signing both. Select one of the signing servers to perform the signature.
- In case any document has an initial field, then SigningHub will display a dialog to add your initials first.
|

|
- See details how to add initials. Click "Next" after adding the initials. The same initials will be added in all the selected documents with initials fields
|
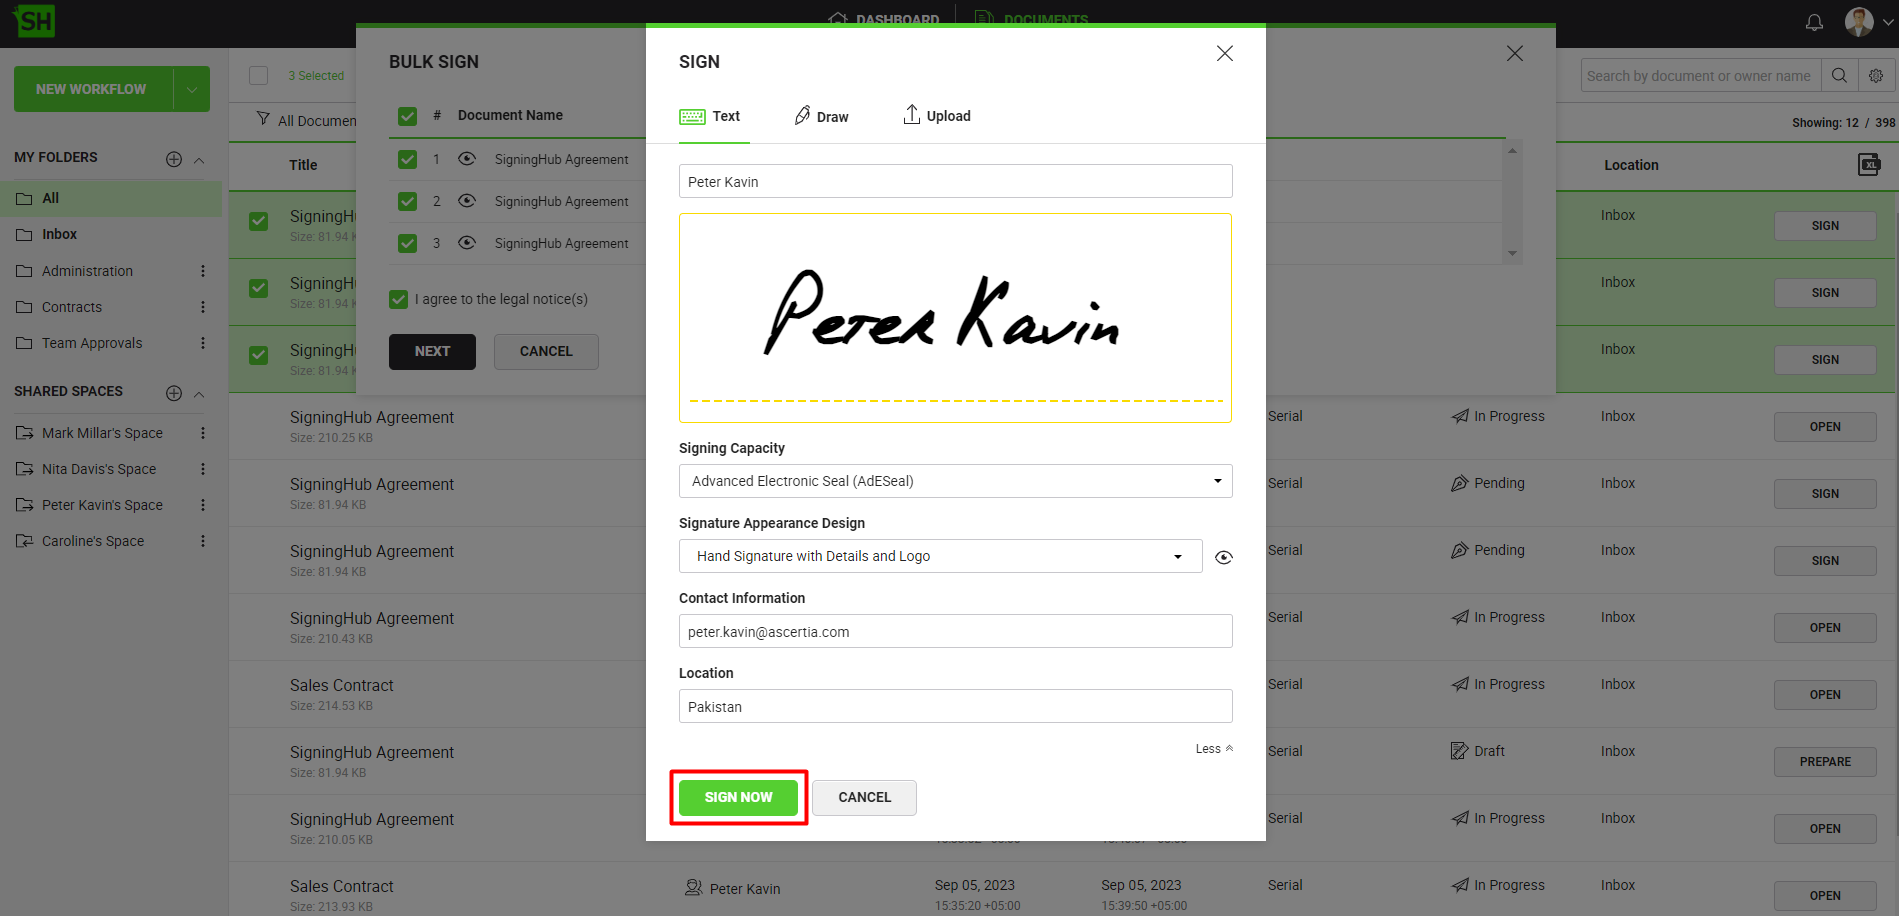
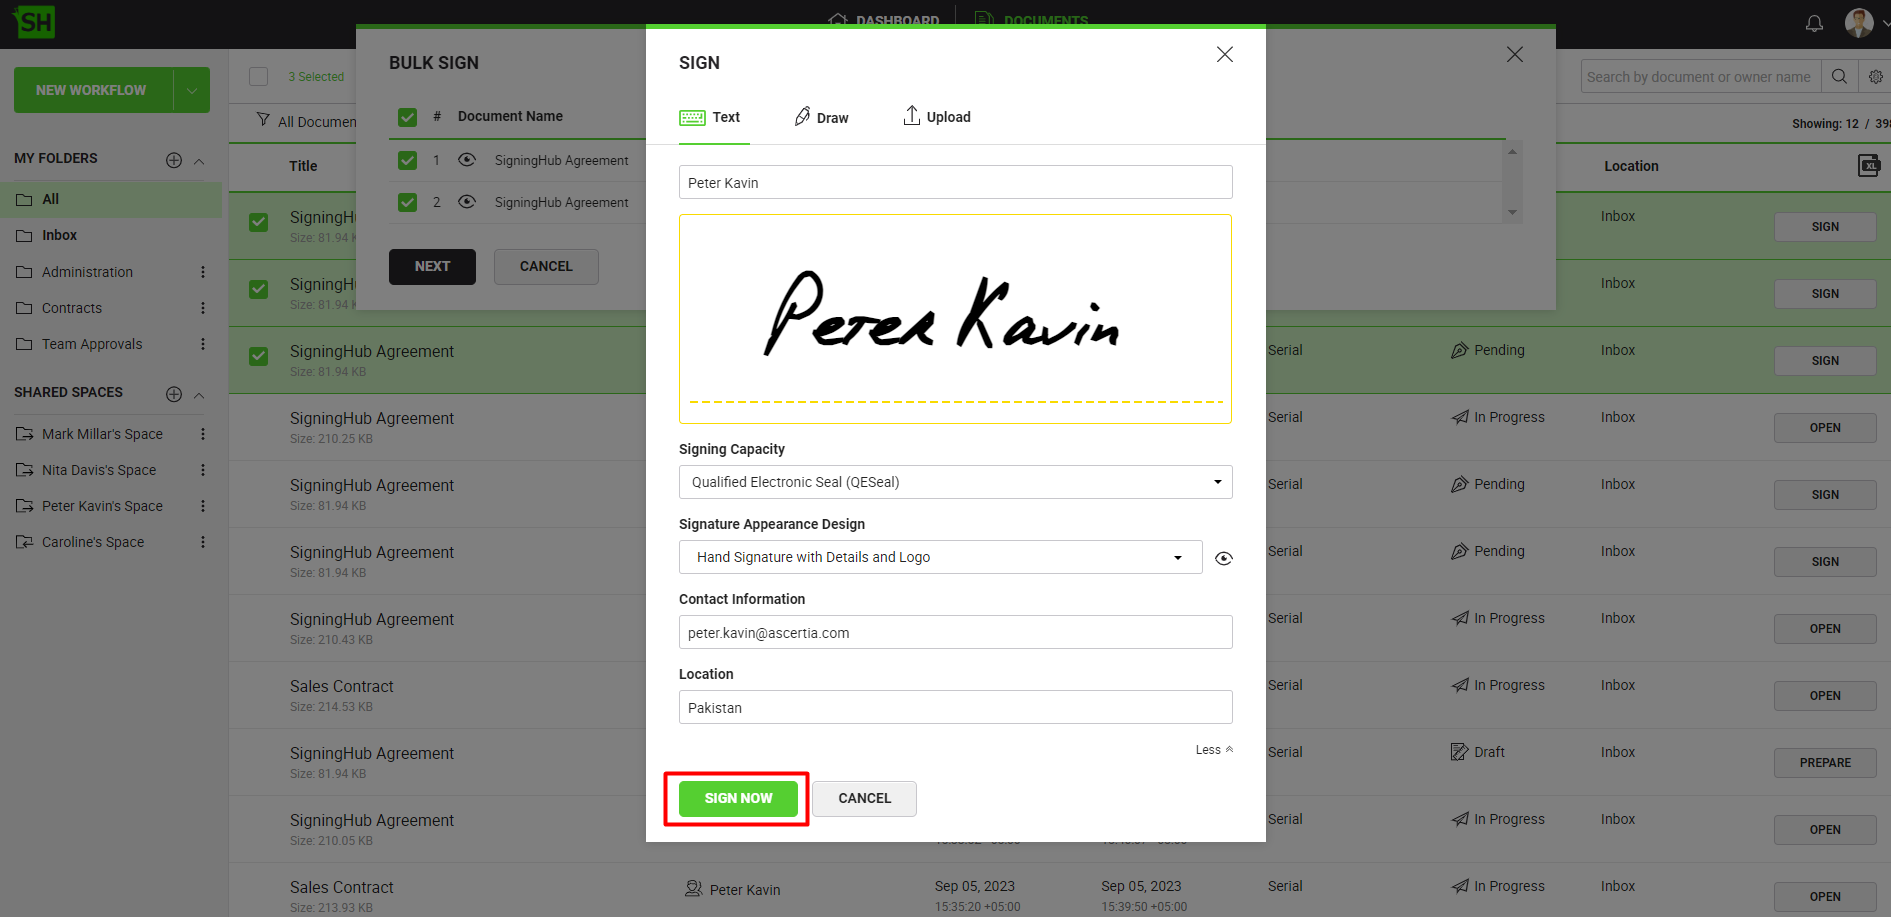
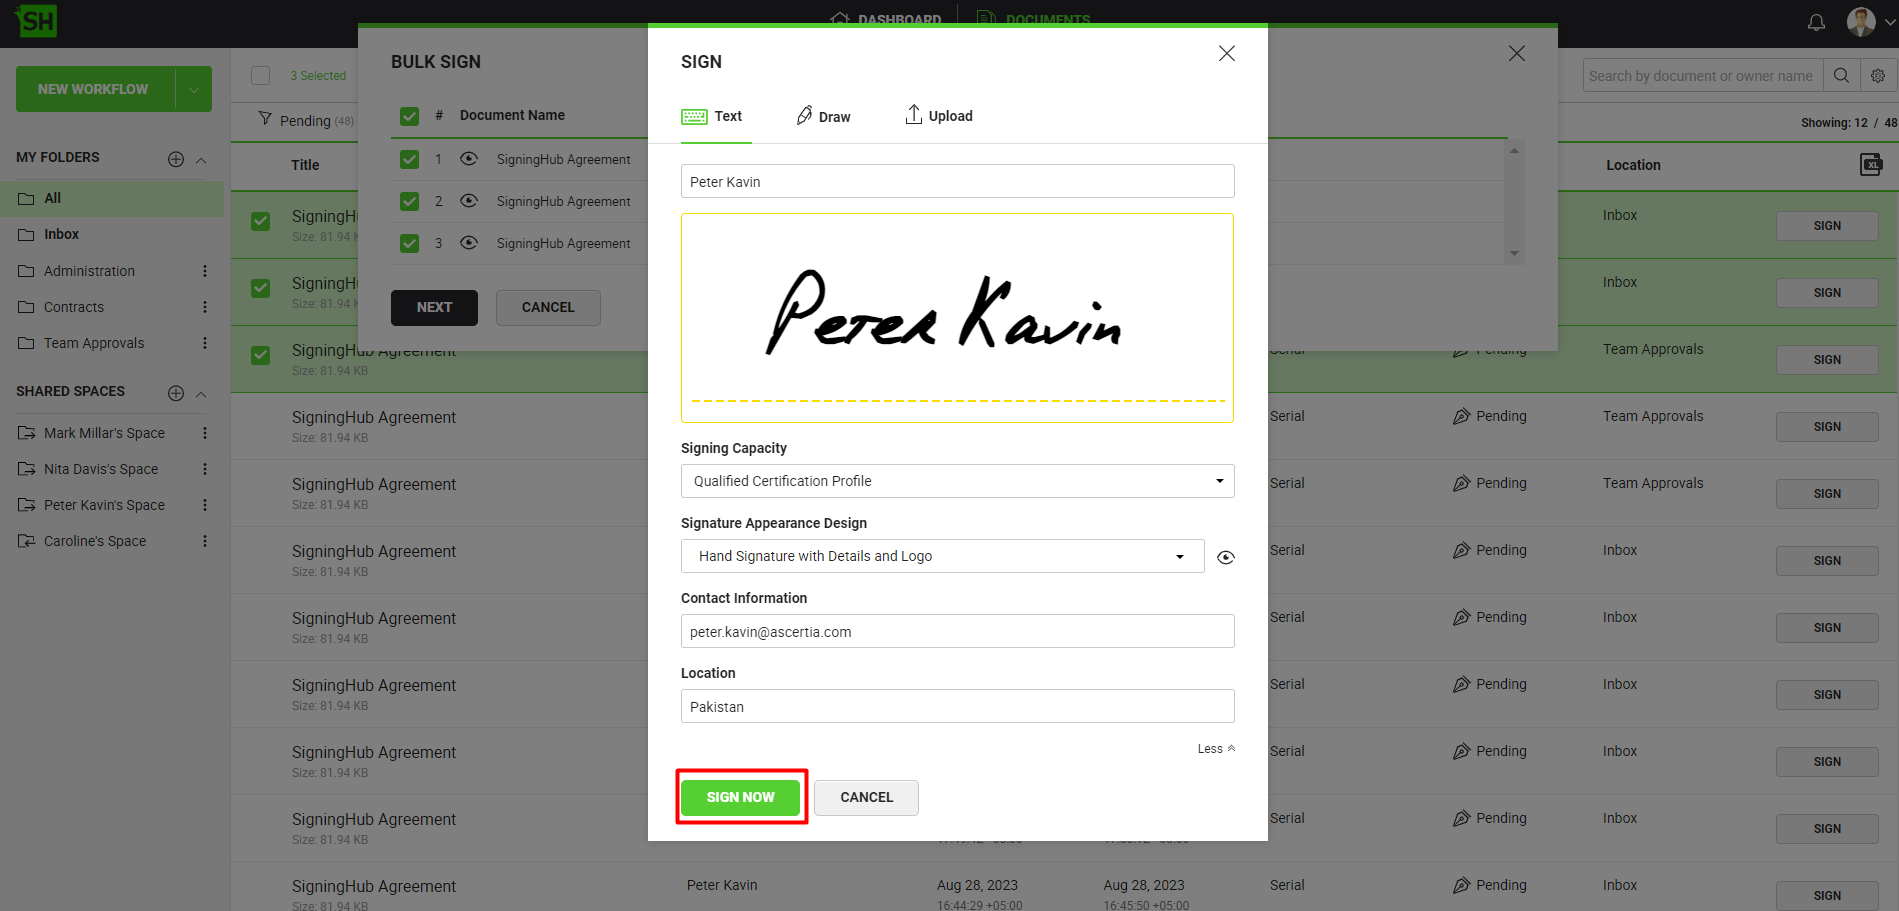
- The "Sign" dialog will appear to specify a visible signature type (i.e., Text, Draw, Upload or Signature Pad), the signing capacity, signature appearance design, contact information, and location. The options available in the "Signing Capacity" drop-down list will be grouped together based on the required level of assurance of the signature field assigned to the user and the level of assurance that are configured in your role. Configure the fields as required and click on the "SIGN NOW" button. For performing signatures using a Signature Pad, see here.
|

|
- If your textual signature is already filled-in with your fixed name, it is because the signature text editing is restricted in your enterprise role.
Your signature text can be edited under the "Signature" tab in your personal settings.
- Choose a desired appearance for your signature. The options being populated in the "Signature Appearance Design" field are the allowed appearances to your enterprise user role. You can also see this list in your personal Signature Appearance.Signature appearance will be auto filled and cannot be changed if it's restricted from enterprise roles signature settings to use specific appearance for the selected Signing Server.
- In case of bulk signing using a signature pad, the "Remember the captured signature for use throughout this document" option will not appear.
|
- Upon clicking the "SIGN NOW" button, if any "Authentication Method" is configured for the selected signing capacity under enterprise roles, an authentication dialog will appear. If no "Authentication Method" is configured for the selected signing capacity under enterprise roles, the document signing process will start. In the list of documents selected for bulk signing, all the signature fields with the same level of assurance that matches the selected "Signing Capacity", in the above step, will be signed.
|
|
- If you have selected CSC Signing Server to perform signature and "Authorisation Code" is selected as the "Auth Type" in CSC Connector, then on clicking the SIGN NOW button you will be shown an additional authorisation option, depending upon the authorisation settings configured in your CSC Server:
- Implicit
- Explicit (One Time Password (OTP)/PIN Number)
- OAuth Authorisation Code
- All unregistered users using the CSC Signing Server to perform signatures will be shown an additional authorisation option, as mentioned above, upon clicking the SIGN NOW button.
- If "Client Credentials" is selected as the "Auth Type" in the CSC Connector and a valid CSC User ID has been configured for the user, then on clicking the SIGN NOW button, no additional authorisation will be required for signing.
- There could be a possibility that both the options of OTP and PIN number are configured as a signing time authentication by your CSC Server.
- In case the Level of Assurance of a "Signature" field is set to "Simple Electronic Signature", then only Document Signing Authentication will work.
- In case of signing of XML document, optionally you may also specify "Commitment Type Indication". SigningHub populates values of this field in editable mode from your Personal Signing Details. When specified they will become a permanent part of your XML signature.
- In case of OTP authentication, the OTP method will be as per the configured OTP method in the document owner's service plan.
- "(Email)", in case only "Email OTP" is configured in the service plan
- "(SMS)", in case only "SMS OTP" is configured in the service plan
- "(SMS and Email)", in case both "Email OTP" and "SMS OTP" are configured in the service plan
|
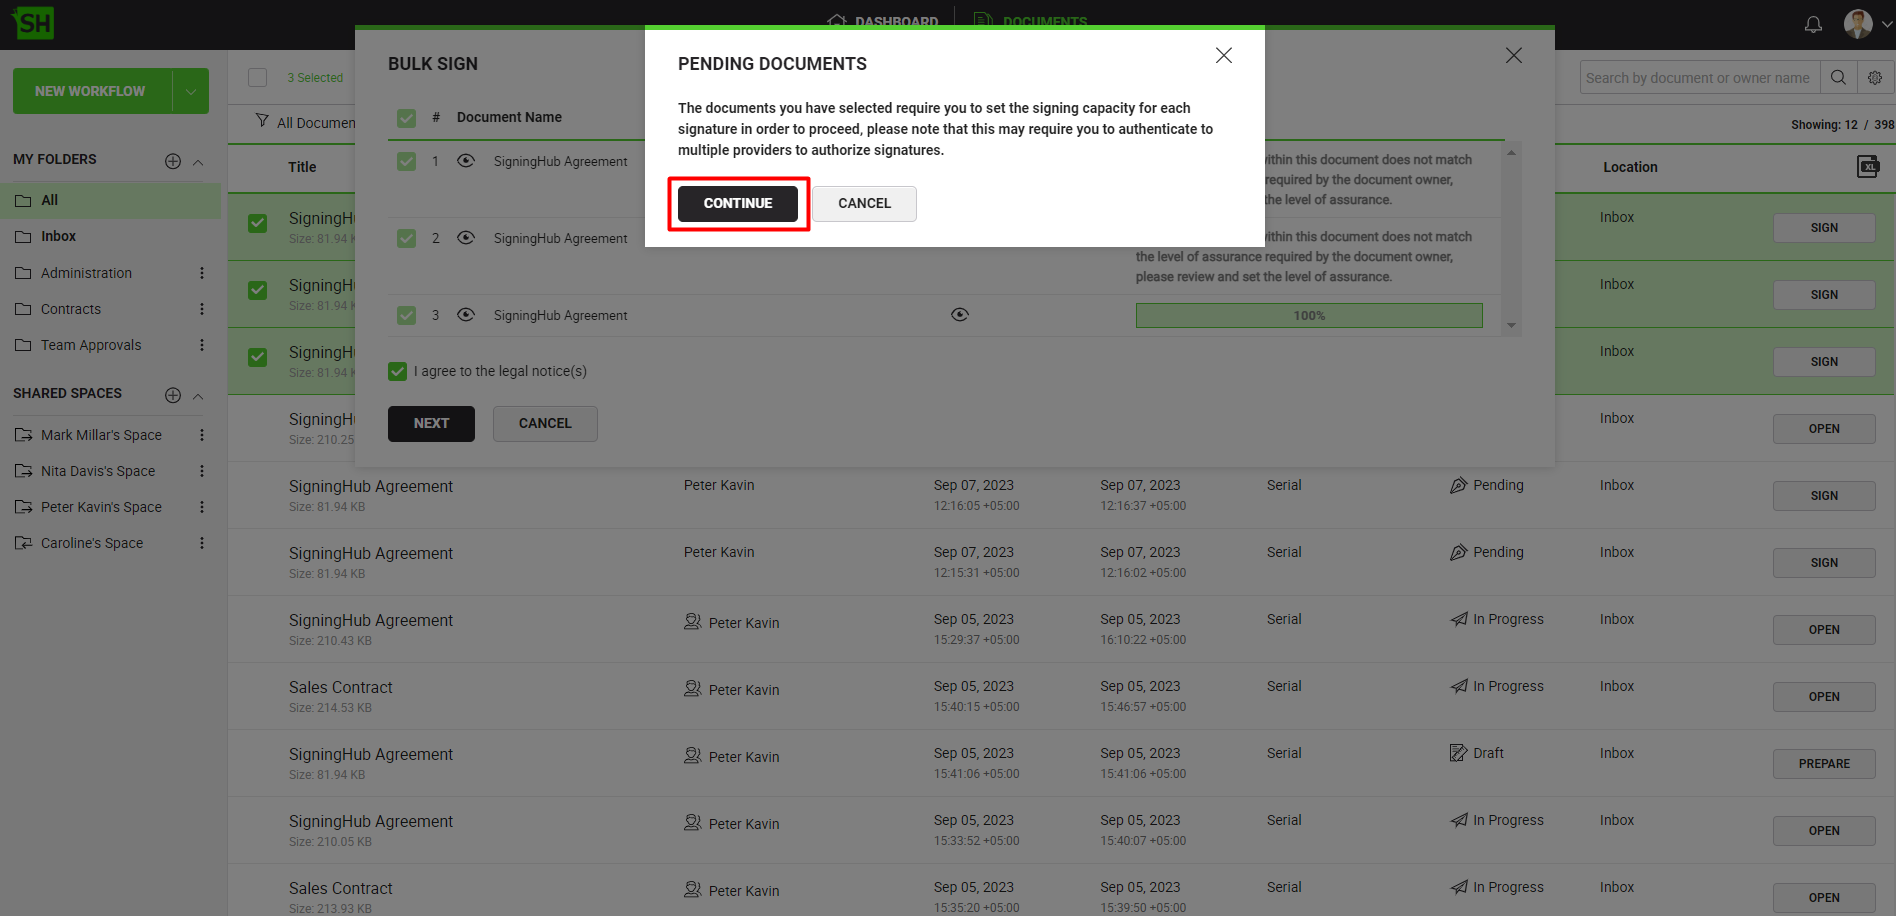
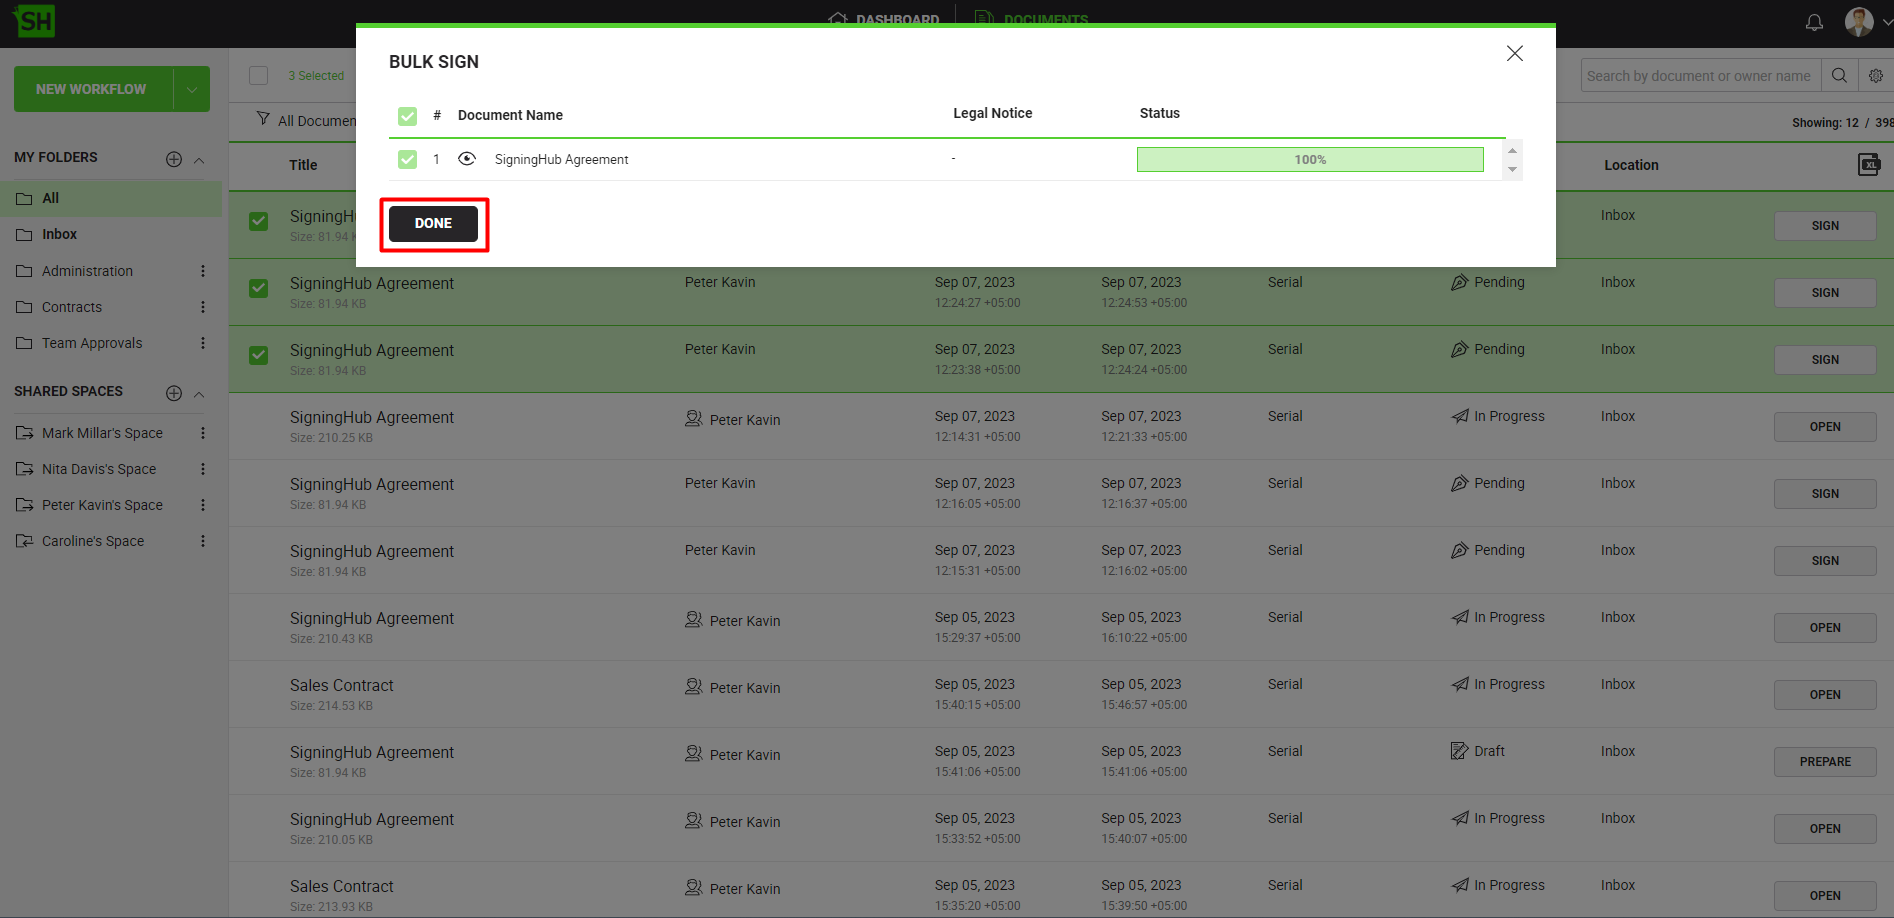
- The bar will read "100%" under the "Status" column, for the documents that you have successfully processed. In case a document could not be signed, the respective reason will be displayed under the "Status" column header. In case of documents that had signature fields with a different level of assurance that did not match with the selected "Signing Capacity", the "PENDING DOCUMENTS" dialog will appear, prompting the user to select a different "Signing Capacity" for the remaining documents. Click on the "Continue" button to proceed.
- From the "Bulk Sign" dialog, the documents which have been signed will be removed. Once again the signing servers dialog window will appear and display multiple signing servers, based on the level of assurance set by the document owner on the signature fields of the remaining documents and the level of assurance that are configured in your role. Select one of the signing servers to perform the signature.
- The "Sign" dialog will appear to specify a visible signature type, the signing capacity, signature appearance design, contact information, and location. Select the "Signing Capacity" for signing the remaining documents. The options available in the "Signing Capacity" drop-down list will be grouped together based on the required level of assurance of the signature field assigned to the user in the remaining documents. Configure the fields as required and click on the "SIGN NOW" button.
Repeat the last three steps until all the remaining documents are signed.
|
|
- If the user has authenticated once against an "Authentication Method" which is configured for a "Signing Capacity", the user will not be prompted to re-authenticate the same "Authentication Method" even if it configured against a different "Signing Capacity". In case a different "Authentication Method" has been configured against the new "Signing Capacity", the user will be prompted to authenticate against it.
|
- Click on the "DONE" button once the bulk signing is complete
Bulk Signing through Remote Authorised Signing (RAS)
- Click the "Documents" option, available at the top of the SigningHub screen.
- From your documents list, locate and select the pending document(s) to sign. You can select up to 50 documents.
- Click from the appearing toolbar.
- Click the "Next" button to proceed to the documents signing.
- Select the signing server against which Remote Authorized Signing has been configured, to perform the signature.
- Click the "SIGN NOW" button to proceed with signing.
- An authentication request will be sent to your registered mobile device for remote authorisation. In case you want to withdraw the remote authorisation request, click on the "Cancel Request" button.

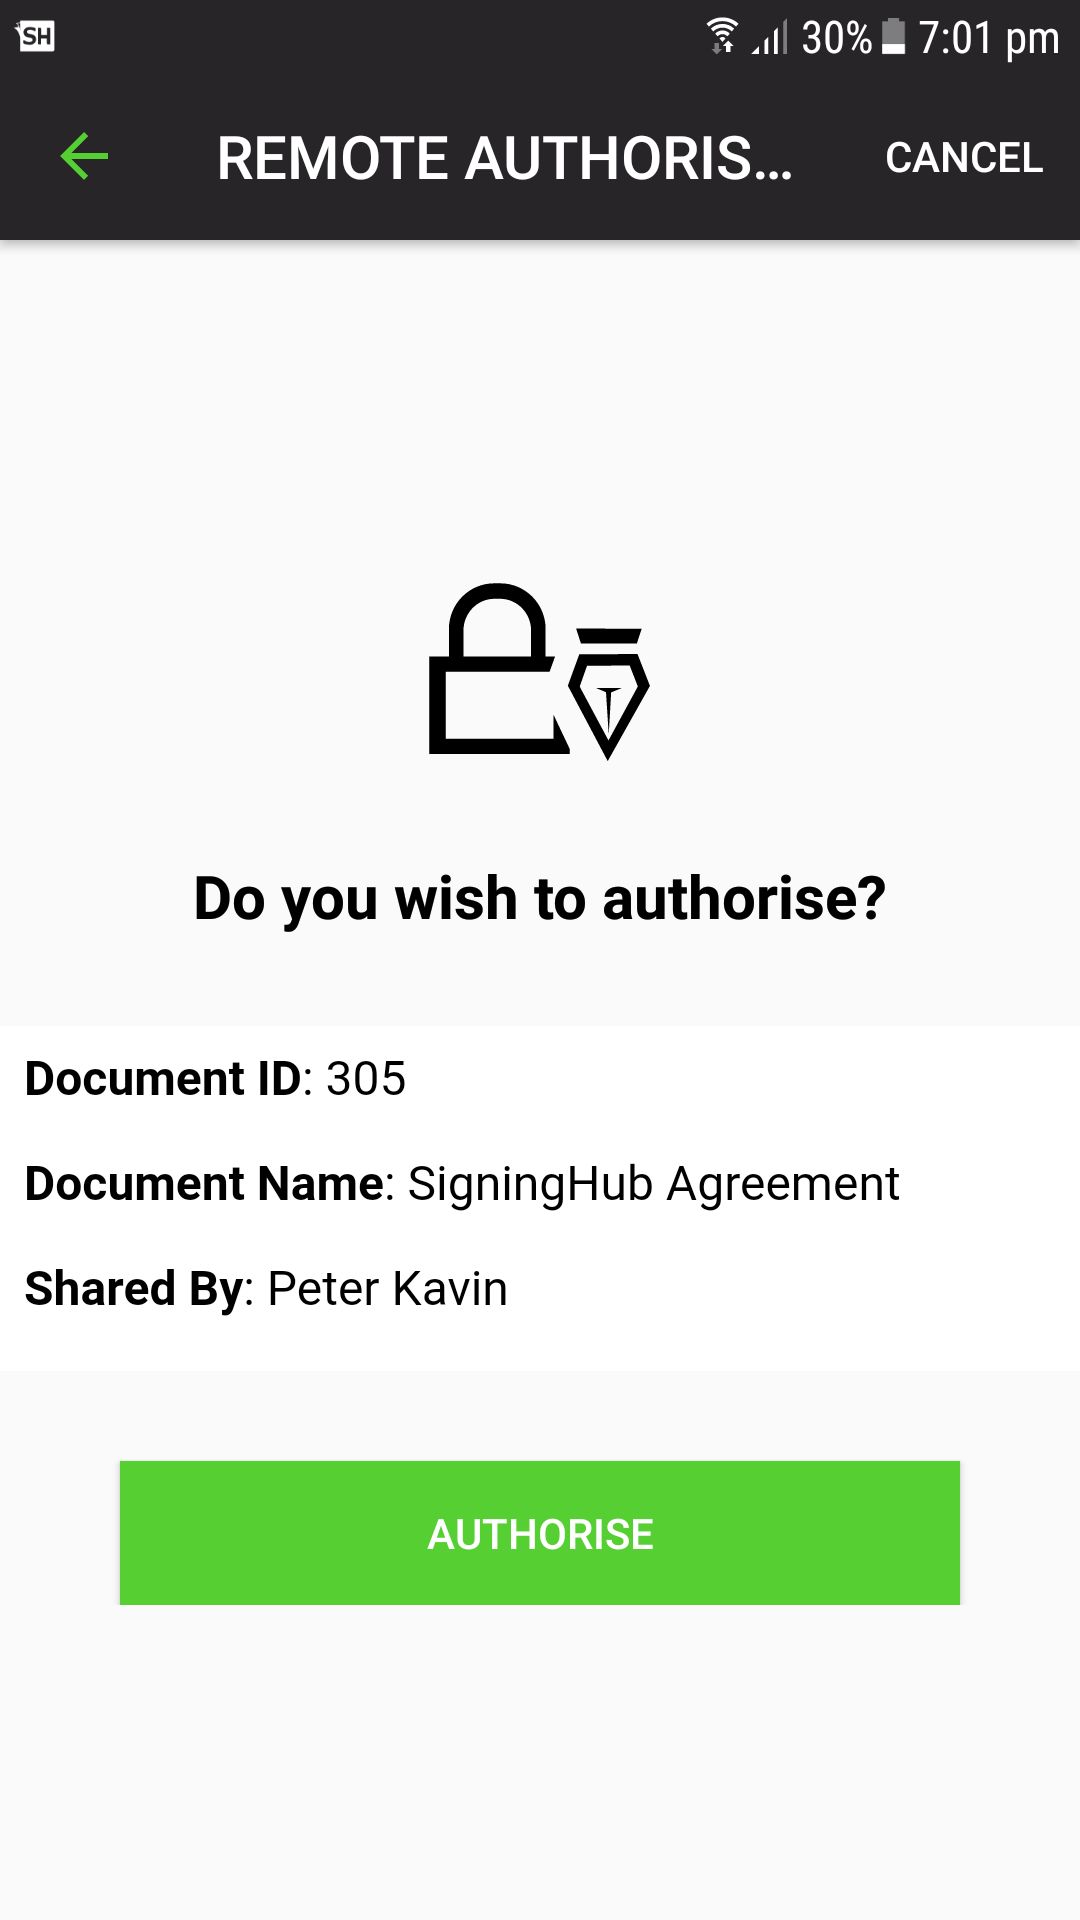
- Run SigningHub app (Android or iOS) on your mobile device and login with the same account credentials through which you have logged in from SigningHub web.
- A popup will appear on your mobile device to authorise your signature through touchID or PIN. Upon authorisation, the document is signed.
|

|
- Based on your signing details, the bulk signing feature supports both the server side signing and client side signing methods.
- SigningHub supports the "Bulk Signing" operation through Remote Authorised Signing (RAS) as well. This can be done by sending a single authorisation request from your mobile device running a SigningHub mobile app. For more details about what is Remote Authorised Signing, see the FAQs on Partner Portal.
- Font color will not be applicable in Signature Appearance while perform signature on any PDF/A document with "CMYK" color space in order to ensure PDF/A compliance.
- Bulk signing duly supports signing Word files and XML files.
- If the workflow type is "Only-Me" and the document package has 2 documents each having a signature field with a different level of assurance, when trying to "Bulk Sign and Share"; the first document will be signed and upon re-initiating the signing process the "Status" of the workflow will prompt an error message. Thus to sign such workflow, the user will have to restart the bulk signing process.
- SigningHub produces the "XAdES-Baseline-LTA" ETSI compliant signatures for XML document but for backward compatibility with ADSS Server version 6.9 or lesser SigningHub will produce the XAdES Extended signature on base of key "ES-X-L" added in web.config file.
- You must agree to all the legal notices configured with the selected documents before signing them.
- The system will prompt for OTP or password before showing the document preview, if it is enabled for any of the selected documents.
- You can sign up to 50 documents in one go through bulk signing. Contact sales if you are looking to extend this limit.
- Whenever a pending document is digitally signed, the digital signatures quota of the respective document owner's account is consumed, and hence their available count is decreased by one.
- The availability of "Bulk Sign" feature is subject to your subscribed Service Plan and Enterprise Role. If you cannot find this option in your account, please ask your Enterprise Admin to upgrade your service plan and enable it in your Role>Document Settings.
- In case the Level of Assurance of a "Signature" field is set to "Electronic Signature", then Signing Servers will not appear on the signing dialog.
- SigningHub supports the "Bulk Signing" operation with the selected signing capacity for a particular level of assurance similar to the one configured by document owner for the signature field.
- You cannot perform "Bulk Signing" without adding attachment if a mandatory attachment field has been assigned to you.
- In case of Simple Electronic Signature (SES), an enterprise user will only be able to use Signature Appearance Design, if the "Allow users to use the signature appearance for Simple Electronic Signatures" check box is enabled in the Configure Signature Appearance, against the user's role.
- In case of Simple Electronic Signature (SES), for an individual user, the Signature Appearance Design drop down is available but by default, no signature appearance is selected. In order to use the signature appearance the user can select any allowed signature appearance from the drop down.
- In the "Sign" and "Apply In-Person Signature" dialog, the user's default location will be shown, as configured in the user's personal settings. In case of an unregistered user:
- if the auto-detect location checkbox is checked, and the GeoIP connector has been configured, the system will pick the location and time zone using the GeoIP connector.
- If either the auto-detect location checkbox is unchecked, the GeoIP connector has not been configured, or the GeoIP connector is faulty or not functional, the system will use the location and time zone of the document owner.
- Based on the type of users, the following mentioned signature appearances will be available:
- In case of an enterprise user, all the signature appearances allowed in the user role.
- In case of an individual user, all the signature appearances allowed in the user's service plan.
- In case of an unregistered user:
- If the document owner is an enterprise user, all the signature appearances allowed in the document owner's user role.
- If the document owner is an individual user, all the signature appearances allowed in the document owner's service plan.
- In case of Simple Electronic Signature (SES) signature stamp, against the "Signed by" attribute:
- the system will show the name of the user as configured in user's profile in their personal settings.
- in case of an unregistered user, the system will show the name of the unregistered user as saved in the document owner's contacts.
- In case of Electronic Seal (eSeal), the user will now be able to select the allowed signature appearance design, signing capacity, contact information and location.
- The eID Easy Signing Server does not support bulk signing.
|
See Also