Managing SigningHub Enterprise Users Session States
Managing SigningHub Enterprise Users Session States
In order to maintain SigningHub Enterprise Users session states in ORACLE database, we need to execute the following steps:
- Copy the “session” folder from [Installation Directory/setup/db-scripts/Oracle/] in SigningHub Installation package and paste it in any directory on the Linux machine where Oracle database is installed.
- Invoke PUTTY and then connect to Linux Server.
- Connect to LINUX server using ORACLE operating system user name and password.
- Go to directory (CD ‘[File Path]’).
- In order to connect to the database user which was created above, execute the following command for Oracle 19c:
- sqlplus [User Name]@[Host]/[Service Name or SID]
|
Placeholder Names |
Description |
|
[User Name] |
Replace this placeholder with the name that you have used to create the User in step 7, under prerequisites. |
|
[Host] |
Database server IP or DNS name. |
|
[Service Name Or SID] |
Replace this placeholder with the service name or SID that you have given during ORACLE installation. |
|
[Password] |
Replace this placeholder with the password that you have given while creating the database user. |
- Now run the following command to execute the scripts that will maintain SigningHub Enterprise session states in ORACLE database:
- SQL> @InstallAllOracleASPNETProviders.sql;
- In order to run the default script, you need to install ORACLE SQL DEVELOPER Version 17.4.0.355. SQLplus has a limitation with query length. SQLplus supports 2,499 characters in query. The Error description is given below:
Input truncated to 7499 characters
SP2-0027: Input is too long (> 2499 characters) - line ignored
SP2-0027: Input is too long (> 2499 characters) - line ignored
- Download the ORACLE SQL Developer.
- Now double click on sqldeveloper.exe in the sqldeveloper folder.
- Now click the Connection tab.
- Click the plus sign to add new connection, see the below screenshot:

- The following screen will appear for the new connection:
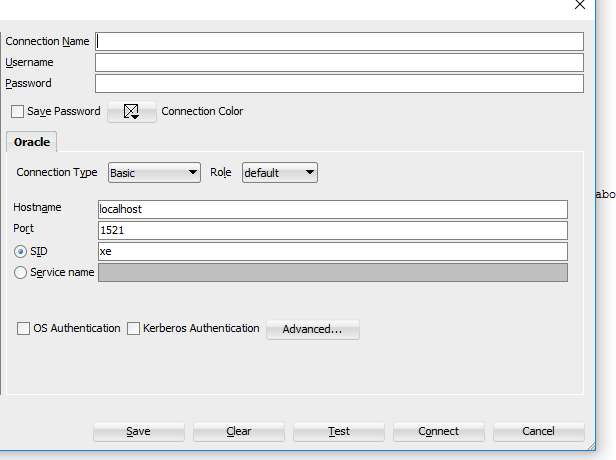
- Provide the information to connect to SigningHub database user.
|
Field Names |
Description |
|
User Name |
Provide the name that you have used to create the User in step 7, under prerequisites. |
|
Password |
Specify the password that you have given while creating the database user in 7, under prerequisites. |
|
Host Name |
Specify the Linux Service IP Address. |
|
Port |
Specify the default ORACLE port to connect to the database. |
|
Service Name Or SID |
Specify the service name or SID that you have given during ORACLE installation. |
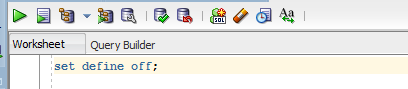
Copy the following command on Query Editor and click the Play button to execute the command, see the below screenshot:
- set define off;
|
|
|

- Remove “set define off” from the editor.
- Now copy the script from the ([Installation Directory/setup/db-scripts/Oracle/SigningHub-defaults.sql) file that exist in the SigningHub installation package, paste it in the editor, select the whole script, and then click the Play button.
- Execute the below command to save the changes.
- Commit;
- Now you may install SigningHub Enterprise by using the installer and selecting the “Install with existing database” option. Follow SigningHub Installation Guide for details. You just need to give oracle database “User Name” and “Password” which was created above.
|
|
|
See also
- Prerequisites
- Script File Execution
- Upgrading Database Schema of SigningHub Application
- Alter Database Character Set