Brand your enterprise account
SigningHub enables you to customise the colour scheming of your SigningHub enterprise account according to your company brand. There are 13 levels of customisation that could help an enterprise admin to tune each and every bit (i.e. company logo, Headings, top bar background, buttons background, toaster background, Email headers, etc.) of their SigningHub account in order to make it look exactly the same like their own enterprise brand.
Once you are done with branding your enterprise account, share your Enterprise URL with your enterprise users so that they may see the branded enterprise interface right from the login screen. You can even customise the error messages content (i.e. images and text), see details.
Brand your enterprise account
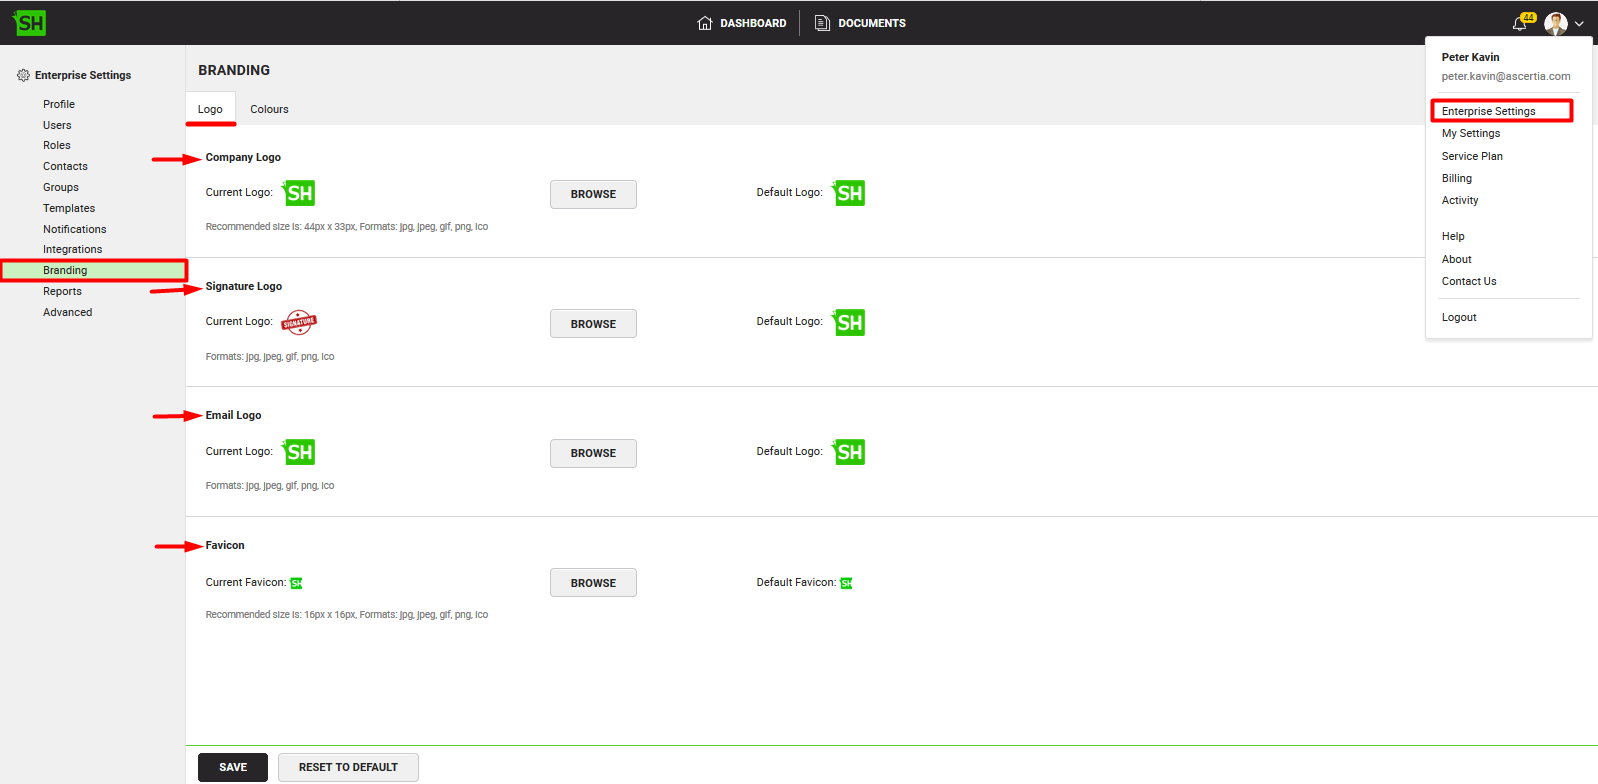
- Login with your enterprise admin credentials.
- Click your profile drop down menu (available at the top right corner).
- Click the "Enterprise Settings" option.
- Click the "Branding" option from the left menu.
The "Branding" screen will appear. - Click the "Logo" tab. Browse the images for your Company Logo, Signature Logo and Favicon as required. From here:
- The set Company logo will be shown on the login page and on the left side of the top bar.
- The set Signature Logo will appear on signature appearance if the user is allowed to manage logo under roles.
- The set Email Logo will appear in all enterprise and personal email notifications.
- The set favicon will be displayed in the title of your browser tab.

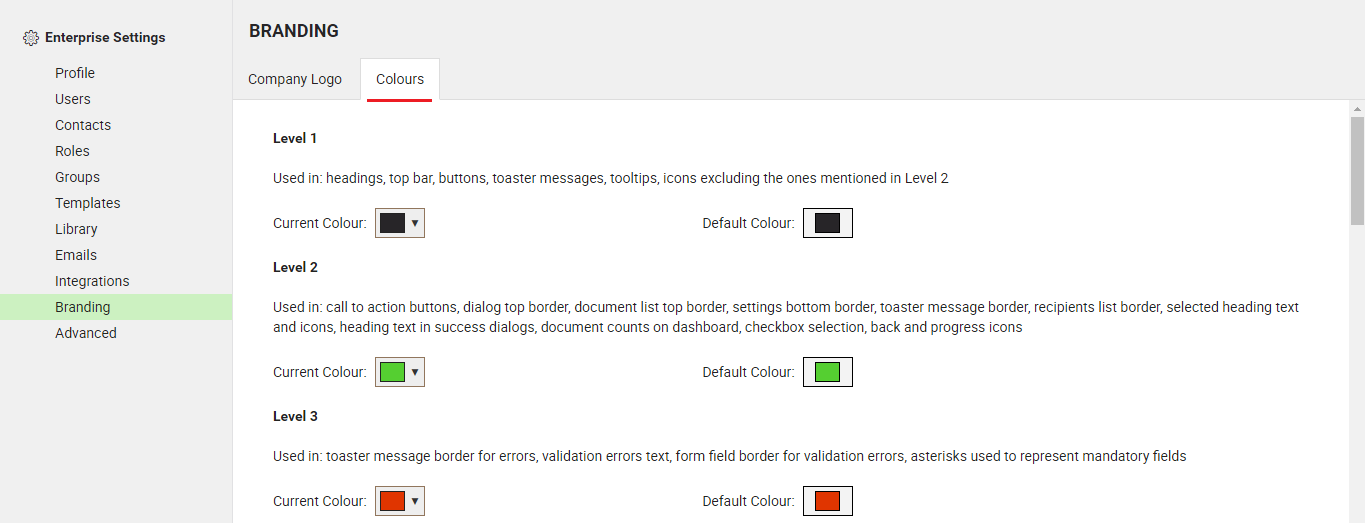
- Click the "Colours" tab, and customize the colour schemes of required levels. You can also use hex colouring codes to specify your choice colour.

For more details, see:
- Customise level 1 colour
- Customise level 2 colour
- Customise level 3 colour
- Customise level 4 colour
- Customise level 5 colour
- Customise level 6 colour
- Customise level 7 colour
- Customise level 8 colour
- Customise level 9 colour
- Customise level 10 colour
- Customise level 11 colour
- Customise level 12 colour and
- Customise level 13 colour pages
- Click the "Save" button to apply these changes.
In case you want to revert the changes to their default, click the "Reset to Default" button.
|
|
|
See Also
- Set up your enterprise profile
- Manage your enterprise users
- Manage your enterprise contacts
- Manage your users roles
- Manage your enterprise groups
- Manage your enterprise templates
- Manage your enterprise library
- Manage your electronic seals
- Configure your enterprise email notifications
- Integrate third party applications
- Manage your enterprise documents
- Configure advanced settings
- View Your Enterprise Logs
- View your enterprise reports

