Installation with Existing Database
Follow these instructions to install SigningHub Enterprise with an existing database.
Launch the installer by right-clicking the file name [SigningHub Installation Directory]/setup/install.bat and select Run as administrator. Follow the installation wizard as described previously until the Installation Type screen is shown: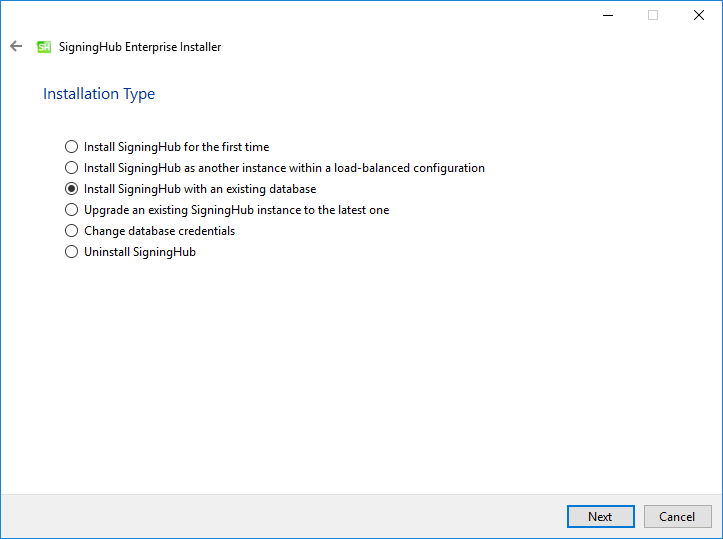
Click the Next button to show the License Agreement: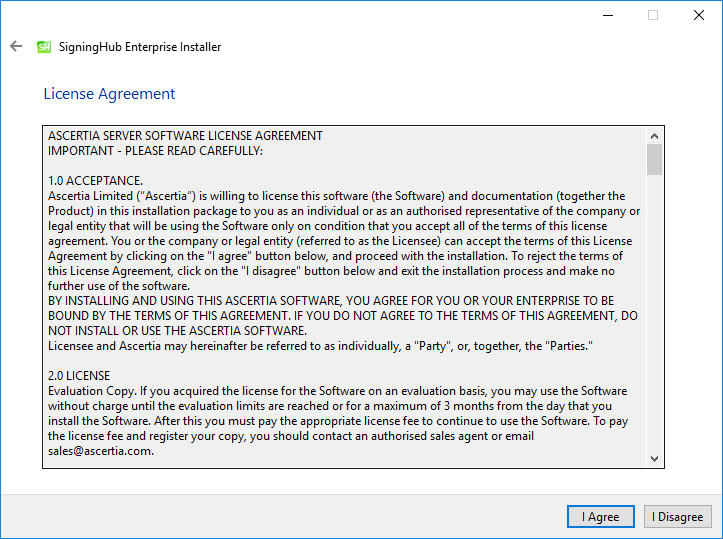
Click the I Agree button to proceed.
The following screen to prompt for database details is displayed: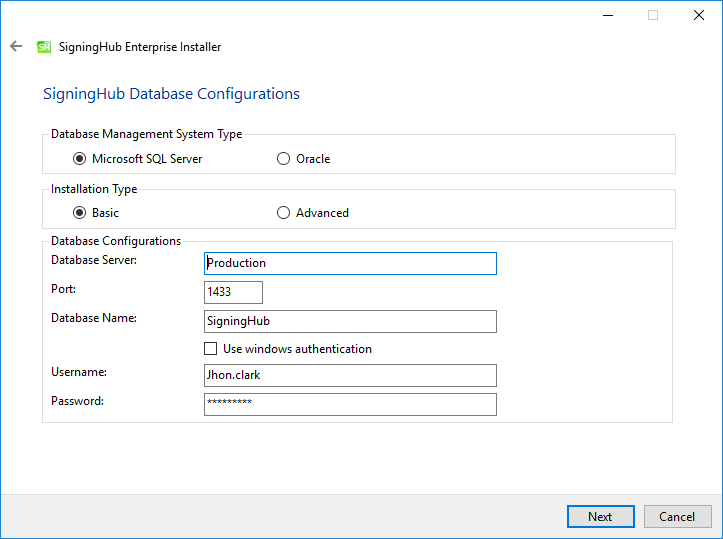
|
|
Note: Username and Password must not contain the following characters: [] () , ; ? * ! @ =. These characters are used to either initialize a connection or separate connection values. |

The information displayed above is an example and you should configure the relevant settings for your own environment.
|
|
The SigningHub Enterprise database schema and the version required by the installer must be the same.
|
Click the Next button to select the SigningHub data storage directory:
|
|
Document Storage Configurations screen will not appear if it is already configured in existing database. |

On the SigningHub Document Storage Configurations screen you can either choose a File System Storage or Azure Blob Storage or Database Storage.
If the Document Storage is either on local file system or on the local network path, then select the option File System Storage.
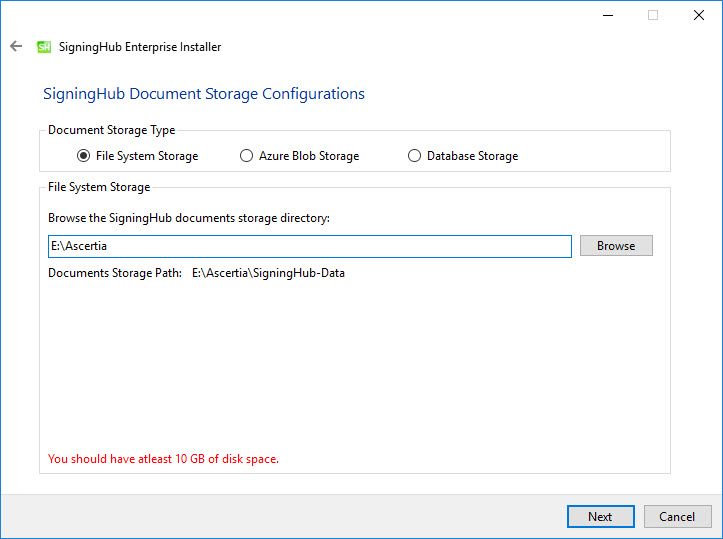
The information displayed above is an example and you should configure the relevant settings for your own environment.
Click Browse and specify a storage path to store the SigningHub data.
|
|
Document Storage path can be a local drive, a network drive or an Azure blob. If the path is on a local drive, then the installer will automatically assign the read/write permissions to the IIS_IUSRS user group.
|

If this is not a File System Storage and you choose the second option to Azure Blob Storage then the following screen is shown:
The information displayed above is an example and you should configure the relevant settings for your own environment.
The following table details the configuration options:
|
Configurations |
|
|
Item |
Description |
|
Account Name |
Account Name of the Azure. Note this must exist prior to the installation. |
|
Account Key |
Account Key of the Azure. Note this must exist prior to the installation. |
If this is not a File System Storage and you choose the third option to Database Storage then the following screen is shown: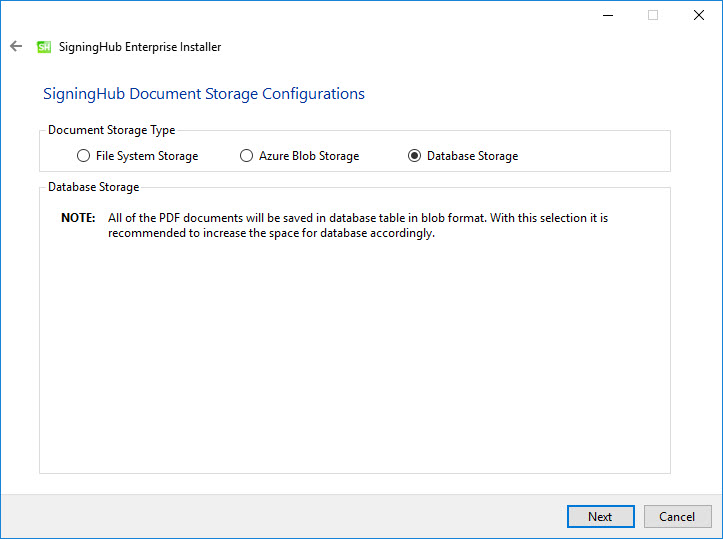
Click the Next button to proceed. The following screen for Redis Server will appear:
|
|
Redis Server Configurations screen will not appear if it is already configured in existing database. |

|
|
Redis is a light weight server, which works as back-plane and message broker for SigningHub application over an HTTP/s port. For further information, https://redis.io/
|

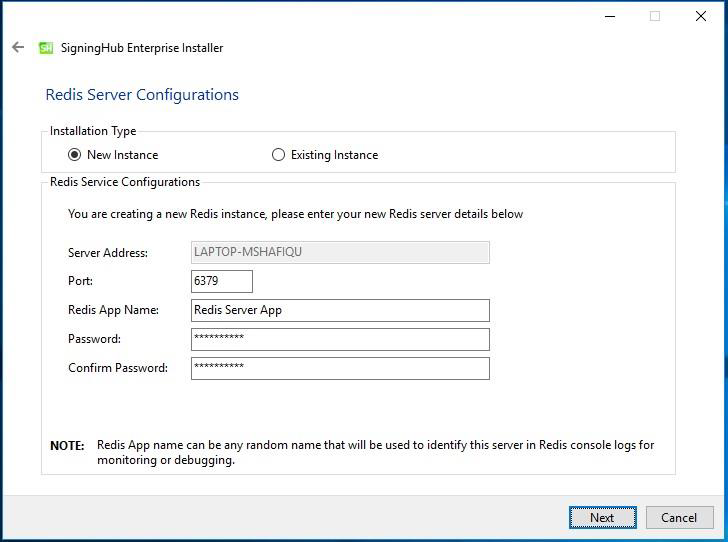
On the Redis Server Configurations screen you can either choose a New Instance or Existing Instance option.
If this is a new instance, then use the first option i.e. New Instance and provide the appropriate Redis server configurations.
The information displayed above is an example and you should configure the relevant settings for your own environment.
The following table details the configuration options:
|
Item |
Description |
|
Server Address |
Specify the Redis server address. This server is used to send real-time on-screen notifications for document sharing. In future will be used for cache and message broker. |
|
Port |
Specify the service port for the Redis server. It is automatically populated the available port |
|
Redis App Name |
Specify the name of Redis App. This can be any random name that will be used to identify this server in Redis console logs for monitoring or debugging. |
|
Password |
Specify the password to authenticate the Redis server. |
|
Confirm Password |
Specify the same password again as provided in the above password field to confirm it. |
|
|
Redis can enforce password-based security to save or read the key value pairs from the Redis server. To enable password-based security, follow these instructions:
|

|
|
Redis can disable asking for password for saving and reading the key value pairs from the Redis server. To turn off the password, follow these instructions:
For Load balanced deployments, only one instance of Redis is needed for SigningHub to work with. Rest of the instances of SignignHub will communicate with Redis using HTTP/s address and Port configured in SigningHub Admin. |

If this is not a new instance, and you are choosing the second option i.e. Existing Instance then the following screen will appear:
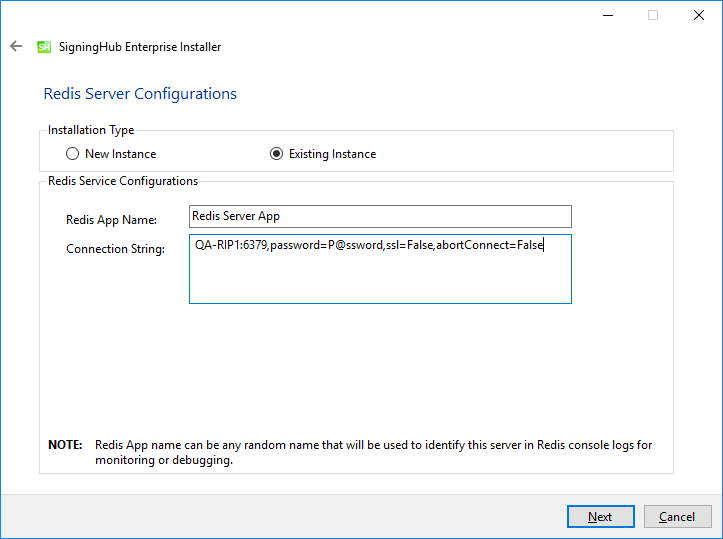
The information displayed above is an example and you should configure the relevant settings for your own environment.
The following table details the configuration options:
|
Item |
Description |
|
Redis App Name |
Specify the name of Redis App. This can be any random name that will be used to identify this server in Redis console logs for monitoring or debugging. |
|
Connection String |
The following is a sample connection string for a Redis Server: [Redis Server Address]: [port], password=[Redis Server Password],ssl=False,abortConnect=False |
Click the Next button to select specific modules:

Select the appropriate modules to install the required features.
Click the Next button to show the summary and complete the installation:
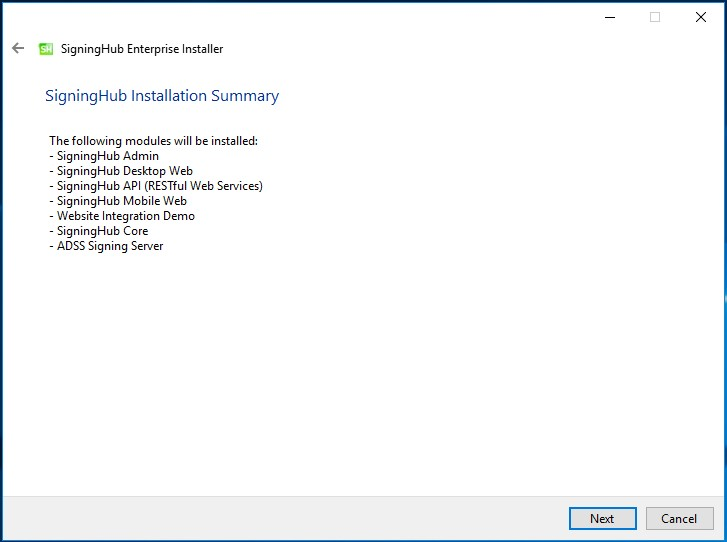
This screen shows the installation summary by listing the different product modules that will be installed.
If you think any listed item is incorrect then use the Back button (arrow towards the top-left of the dialogue box) to correct your choices before proceeding ahead.
Click the Next button to continue with the installation.
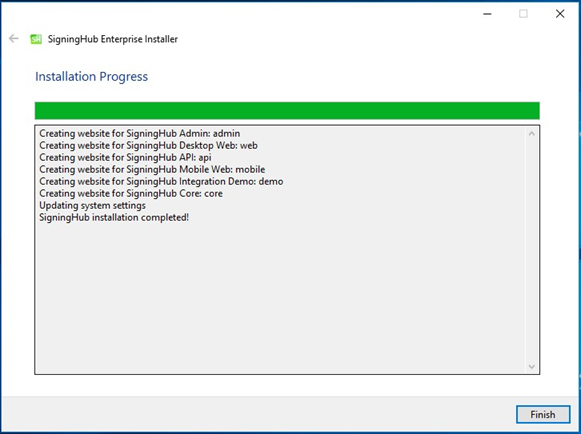
Click the Finish button to complete the installation process.