Manage third party integrations
SigningHub allows digital signatures to be easily integrated into any website/app through simple API calls. This is the smart way of adding Advanced Electronic Signatures into a web application that ensures a seamless experience for the end users.
SigningHub also facilitates multi-tenancy that enables an organisation to define custom signing policies for their external users (i.e. clients, partners, contractors, etc.). The external users are those recipients who are not a part of your enterprise. They would be either part of another enterprise, an individual user, or a guest (non-SigningHub registered user), and you require them to sign documents within a tightly integrated app environment. This feature is usually requested by the banks and financial institutions, who appreciate high-trust digital signing with tailor-made configurations to ensure a consistent signature style (appearance, details, etc.) for all users. For more details, visit Ascertia's Partner Portal for Configuration Guide.
You can integrate multiple web applications with your enterprise account. For details, see the Quick Integration guide and visit Ascertia's Partner Portal for API Guide.
With respect to security, and embedded iframes used by SigningHub for tight integration, the Integrations set-up allows you to specify the trusted domains of your business application. When you supply input variables under "Allowed Domains" SigningHub will create the appropriate Internet headers when the iframe is called by the business application. These are X-Frame-Options ALLOW-FROM for older browsers and CSP: frame-ancestors Header for the latest versions of Chrome for example. If you do not specify a value it will allow all parent domains to add this integration page in an iFrame.

Integrate a (third party) web application
- Login with your enterprise admin credentials.
- Click your profile drop down menu (available at the top right corner).
- Click the "Enterprise Settings" option.
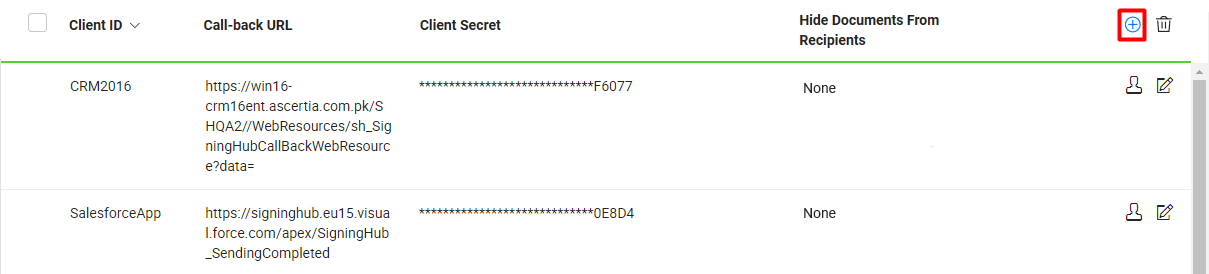
- Click the "Integrations" option from the left menu.
- Click
 from the grid header.
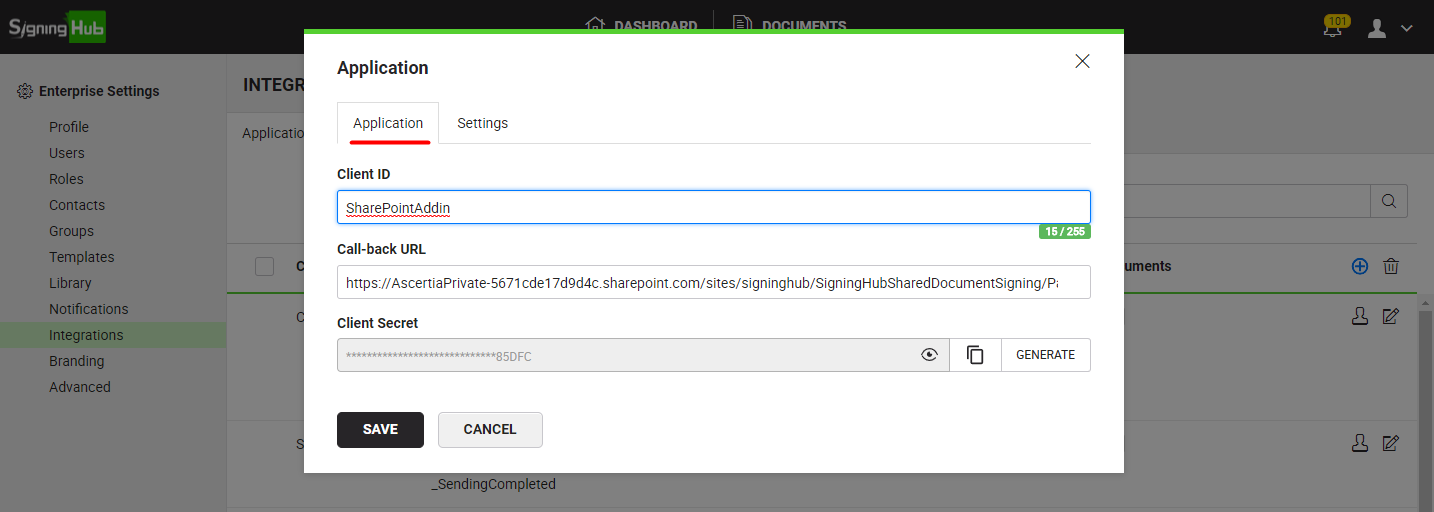
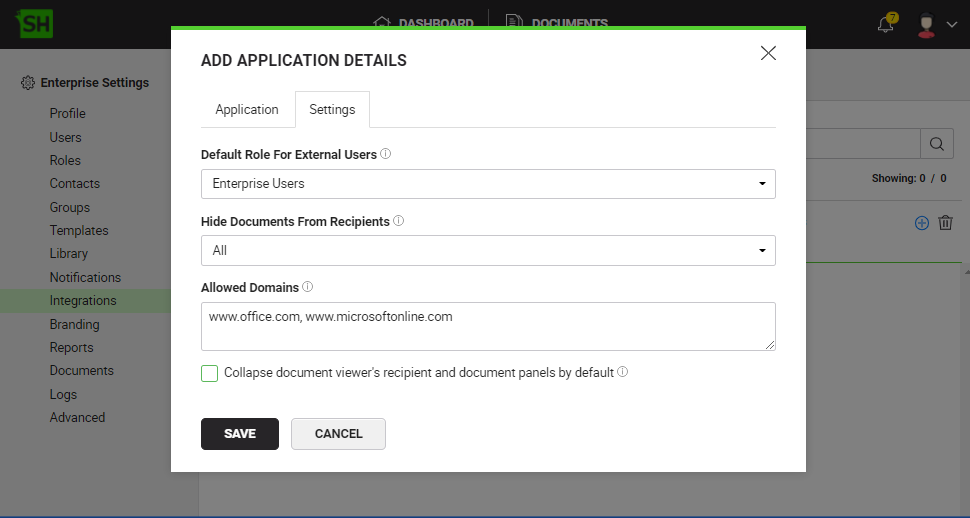
- A dialog will appear with two tabs (i.e. Application and Settings) to input API details as shown in the following image. Add the API configurations of integrating app in the Application and Settings tabs as required. See the fields description of these tabs in the "Application Integration" and "Integration Settings" tables below.
- Click the "Save" button.
|
Application Integration |
|
|
Fields |
Description |
|
Client ID |
Field to specify the client ID (application name) to be integrated, i.e. SalesforseApp. |
|
Call-back URL |
|
|
Client Secret |
Click the "Generate" link after specifying client ID and call-back URL. This will create a unique client secret (API key) for this integration. By default, the generated client secret is displayed partially masked to comply with the GDPR policy.
|
|
Integration Settings |
|
|
Fields |
Description |
|
Default Role For External Users |
This field is related to multi-tenancy functionality, see visit Ascertia's Partner Portal for Configuration Guide. The user roles can be managed from Enterprise Settings>Roles section. |
|
Hide Documents from recipients |
This field is related to multi-tenancy functionality and is used to hide your shared documents from the external users, visit Ascertia's Partner Portal for Configuration Guide.
|
|
Allowed Domains |
Specify the domain(s) that are allowed to embed the Document Viewer within the iframe. Only the specified domains would be able to embed the Document Viewer within the iframe. |
|
Collapse document viewer's recipient and document panels by default |
Tick this check box to open the Document Viewer inside the tight integration screen with collapsed left and right (i.e. Documents and Recipients) panels. However, users can still open these panels by clicking their respective icons. |
Edit an integration instance
- Login with your enterprise admin credentials.
- Click your profile drop down menu (available at the top right corner).
- Click the "Enterprise Settings" option.
- Click the "Integrations" option from the left menu. The instances of already integrated apps will be listed.
- Search/ move to the instance to edit and click
 adjacent to it. The "Edit Application Details" dialog will appear.

- Edit the required content (i.e. Application Name, Call-back URL, or Default Authentication Method).
- Click the "Save" button.
Delete an integration instance
- Login with your enterprise admin credentials.
- Click your profile drop down menu (available at the top right corner).
- Click the "Enterprise Settings" option.
- Click the "Integrations" option from the left menu. The instances of already integrated apps will be listed.
- Select the instance(s) to delete and click
 from the grid header.
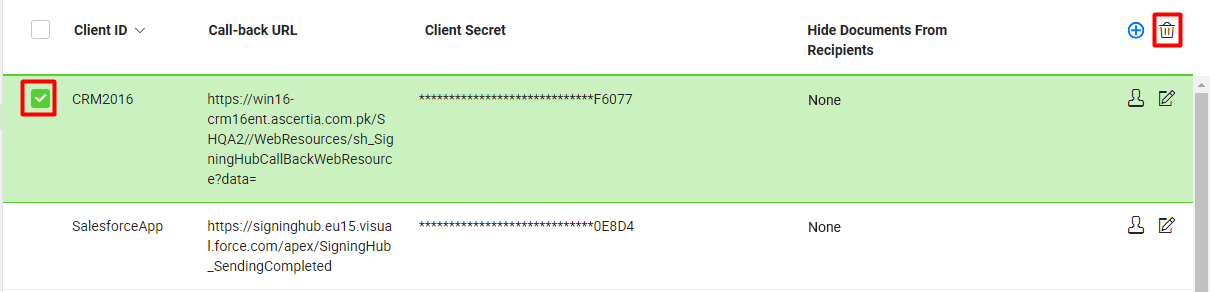
The selected integration(s) will be deleted.
|
|
|
