Assign custom roles to external users
SigningHub supports accounts multi-tenancy that enables an organisation to define custom signing policies for their external users (i.e. clients, partners, contractors, etc.). The external users are those document recipients who are not a part of your enterprise, they may be a part of other enterprise or individual or guest users, and you require them to sign your enterprise documents within a tightly integrated app environment.
In other words, if an Enterprise A requires their documents to be signed by the users of Enterprise B or guest users within an integrated app environment (i.e. Salesforce, SharePoint, MS Dynamics CRM, etc.), then they can assign a default or specific user role to these (external) users, to implement their (Enterprise A) signing policy on such users.
With a default user role assigned, all the external users can use a centralised signing policy as laid out in the "Signature Settings" and "Signature Appearance" tabs of the default role. However, in addition to a default role assignment, SigningHub also lets you assign custom user roles to external users on individual basis as required.
In this way, when such external users attempt to sign your enterprise documents, SigningHub will supersede the signing policy (defined in the default role or in their enterprise role or their personal) with the ones defined in the user roles you have assigned to them. This is useful when an organisation needs to enforce a customised signature policy for certain external users. For more details, visit Ascertia's Partner Portal for Configuration Guide.

Assign custom role to an external user
- Login with your enterprise admin credentials.
- Click your profile drop down menu (available at the top right corner).
- Click the "Enterprise Settings" option.
- Click the "Integrations" option from the left menu.
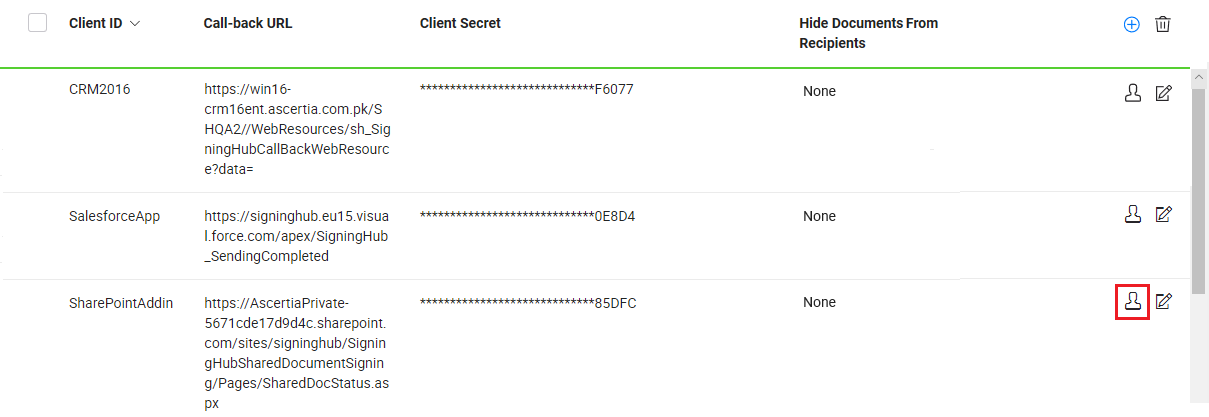
- Click
 against the integrated app instance in which your want to add an external user for custom role.
 - A dialog will appear to manage the external users for this integration. Click
 from the grid header.
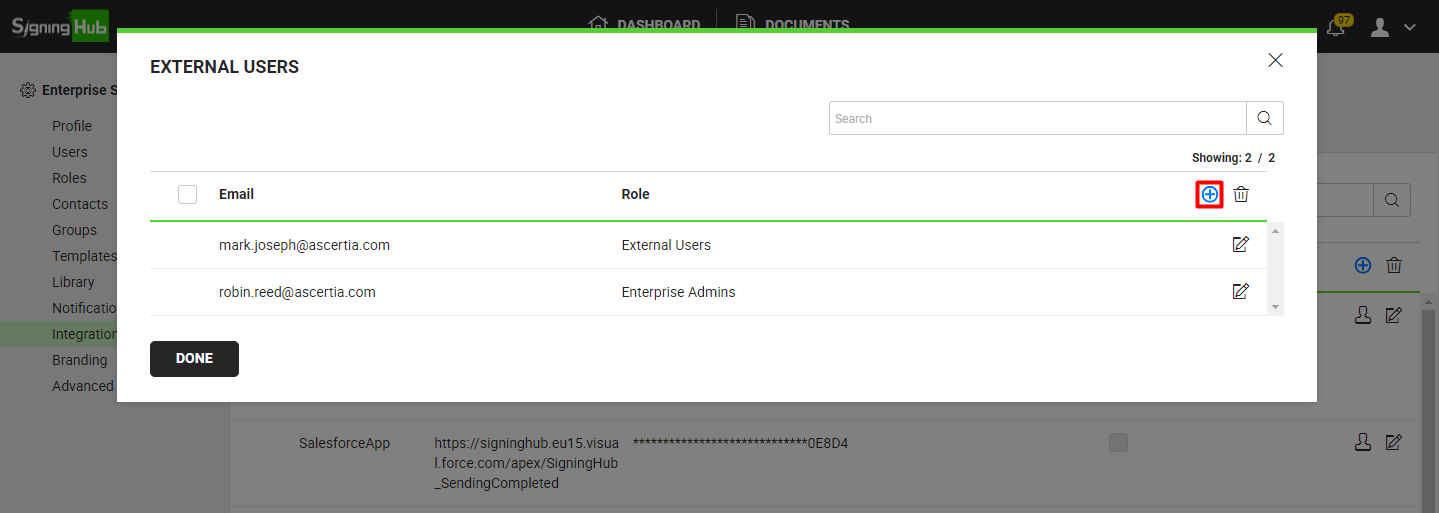
- A dialog will appear to input external user information as shown in the following image. Specify the information of external user as required, see the fields description in the "External Users" table below.
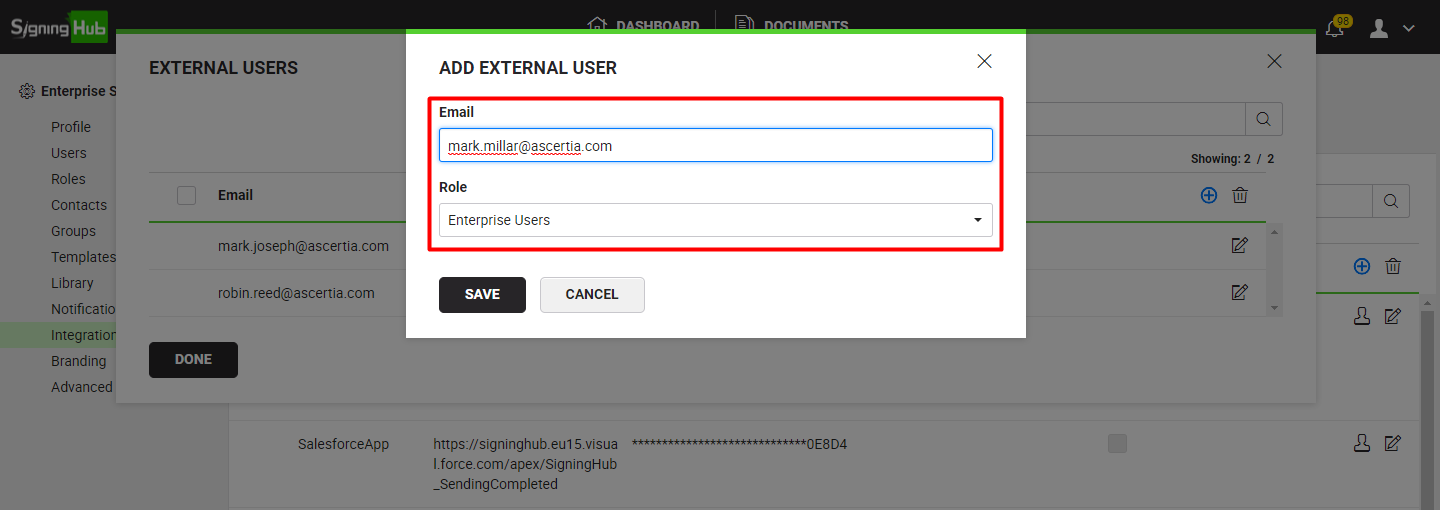
- Click the "Save" button.
|
External Users |
|
|
Fields |
Description |
|
|
Field to specify email id of an external user to whom you want to assign a custom user role within this integrated app. |
|
Role |
Select an appropriate role for this external user. The user roles can be managed from Enterprise Settings>Roles section. |
Edit a custom role assignment
- Login with your enterprise admin credentials.
- Click your profile drop down menu (available at the top right corner).
- Click the "Enterprise Settings" option.
- Click the "Integrations" option from the left menu.
- Click
 against the integrated app instance in which your want to edit an external user.
- A dialog will appear to manage the external users for this integration. Search/ move to the external user to edit and click
 adjacent to it. The "Edit External User" dialog will appear.
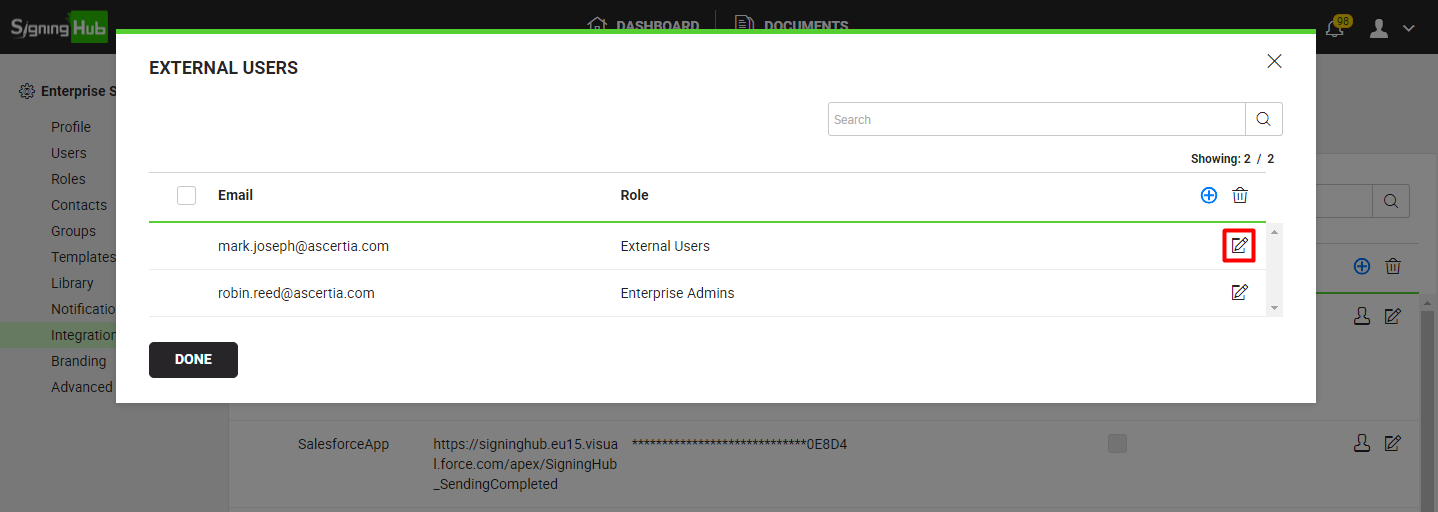
- Edit the required information (i.e. Email and/ or Role).
- Click the "Save" button.
Delete a custom role assignment
- Login with your enterprise admin credentials.
- Click your profile drop down menu (available at the top right corner).
- Click the "Enterprise Settings" option.
- Click the "Integrations" option from the left menu.
- Click
 against the integrated app instance in which your want to delete an external user.
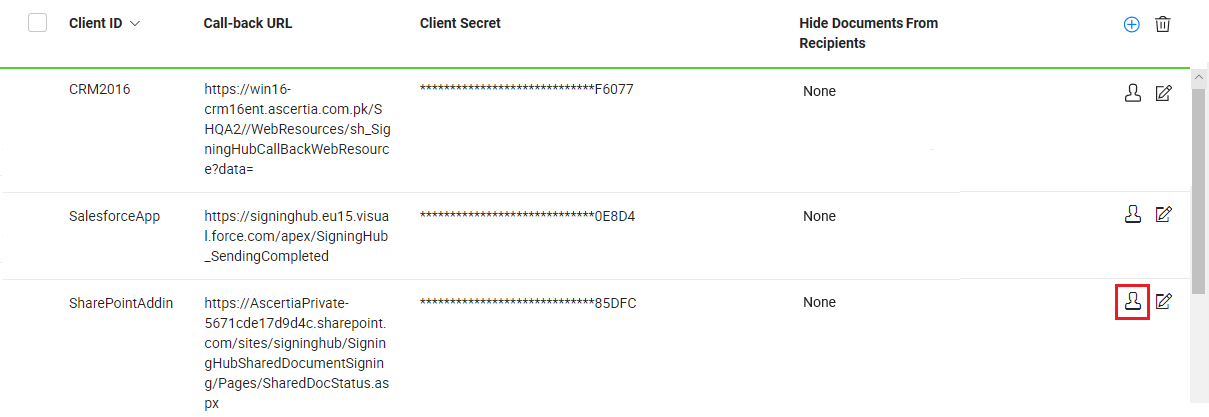
- A dialog will appear to manage the external users for this integration. Select the external user(s) to delete and click
 from the grid header.
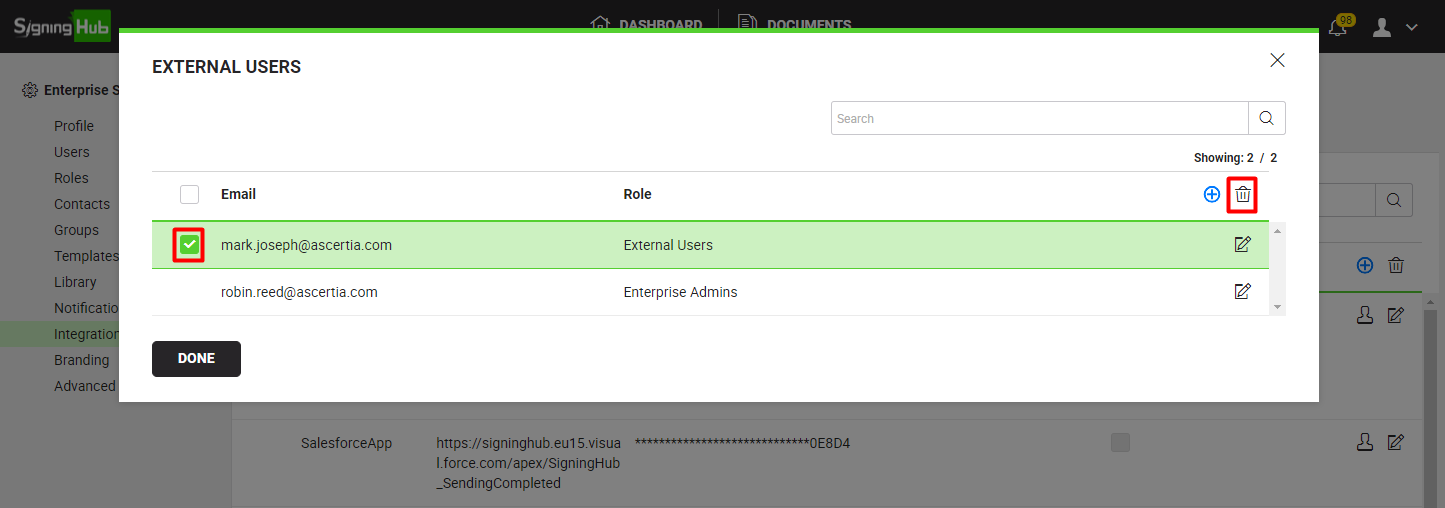
The selected external user(s) will be deleted.
|
|
|

