Manage your templates
If you have standard files that you need to send out over and over again, you can create a template of that document, and apply on the same documents (when required) to quickly reuse all the workflow configurations. You can add recipients, form fields, initials, in-persons, signature type, signature position, signing sequence, configure reminders, certify document and much more in a document template.
The individual and enterprise users can manage (Add, Clone, Edit, and Delete) their personal templates, while the enterprise users can also use the enterprise templates as maintained by their enterprise admin. The saved templates can then be applied on the similar documents for efficient and robust re-usability of these workflow configurations.
View your enterprise templates (applicable to enterprise users only)
- Click your profile drop down menu (available at the top right corner).
- Click the "My Settings" option.
- Click the "Templates" option from the left menu.
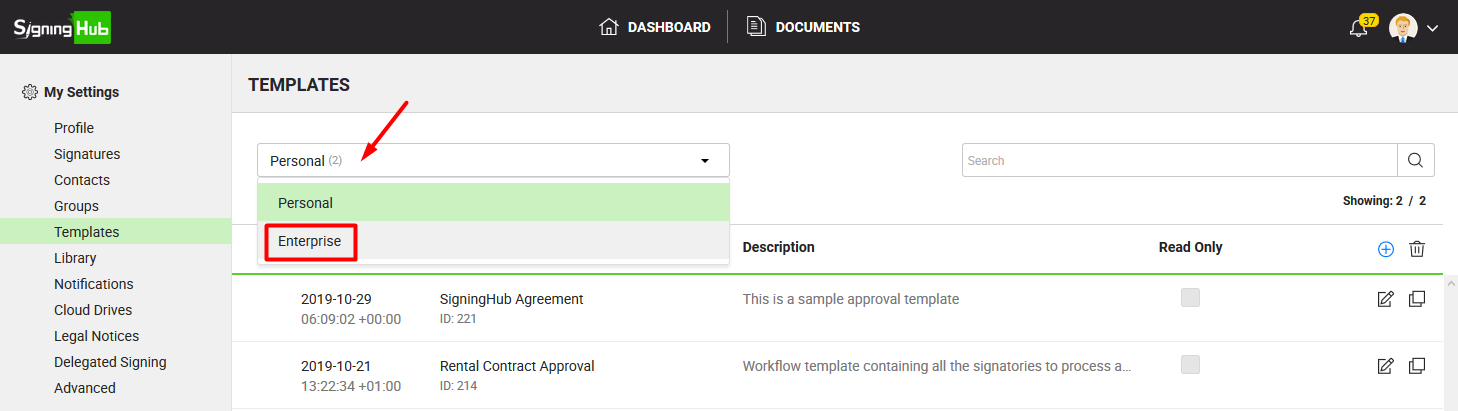
- Select the "Enterprise" option from the drop down available at top left of the screen. The adjacent count shows the total number of enterprise templates.
Your enterprise templates will be listed.
View your personal templates
- Click your profile drop down menu (available at the top right corner).
- Click the "My Settings" option.
- Click the "Templates" option from the left menu.
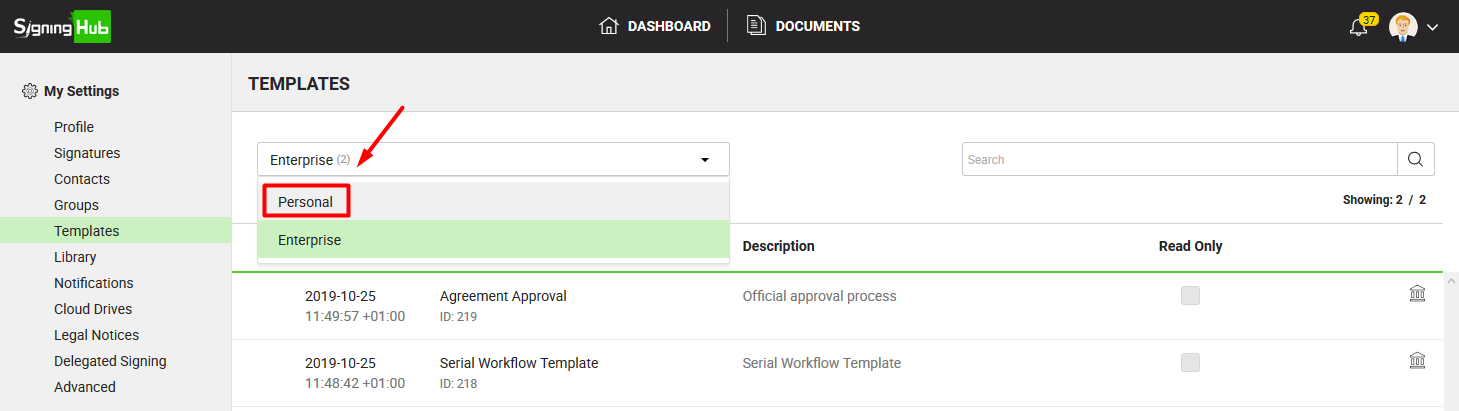
- In case you are logged in as an Enterprise user, select the "Personal" option from the drop down available at top left of the screen. The adjacent count shows the total number of personal templates.
Your personal templates will be listed. After listing, you can manage (add, edit, and delete) these templates.
Create a new template
- Click your profile drop down menu (available at the top right corner).
- Click the "My Settings" option.
- Click the "Templates" option from the left menu.
- In case you are logged in as an Enterprise user, ensure "Personal" is selected from the top left drop down of the screen.
- Click
 from the grid header. The "Create Template" screen will appear.
- Add a document for this template. All the workflow related configurations will be done on this document.
- Configure certified signature preferences as required.
- Add recipient(s) and placeholder(s) as required.
- Configure workflow type/ order.
- Configure special privileges for each recipient/ placeholder as required.
- Configure recipient permissions.
- Configure document access security
- Configure auto reminders
- Configure post processing
- Add email message as required.
- Click the "Next" button to proceed to the document viewer screen.
- Add data fields for the recipients as required.
- Add signature fields
- Add in-person signature fields
- Add initials fields
- Add form components
- Configure form filling settings for a PDF form
- If required, mark this template as a Read-only template
- Once you have set the required configurations, click the "Done" button.
- A dialog will appear, specify the name and description of this template, and click the "Save" button.
Make a clone of your personal template
At times you need to create multiple templates with a little variations. The best way to achieve this is to create a template with all the configurations and then make clones of it. You can then edit each template clone as per requirement.
- Click your profile drop down menu (available at the top right corner).
- Click the "My Settings" option.
- Click the "Templates" option from the left menu. Your existing personal templates will be listed.
- In case you are logged in as an Enterprise user, ensure "Personal" is selected from the top left drop down of the screen.
- Search/ move to the template to clone and click
 adjacent to it.
- A dialog will appear. Specify name of the clonal template and its description as required, and click the "Save" button. The clonal template name must be different than the original template name.
Select the "Read Only" checkbox, if you want to save the clone as a read-only template.

Edit your personal template
- Click your profile drop down menu (available at the top right corner).
- Click the "My Settings" option.
- Click the "Templates" option from the left menu. Your existing personal templates will be listed.
- In case you are logged in as an Enterprise user, ensure "Personal" is selected from the top left drop down of the screen.
- Search/ move to the template to edit and click
 adjacent to it. The document viewer screen of template will be opened in editable mode.
- Edit the required content as explained above. You can edit template name, description, signers, reviewers, placeholders, signer information fields, signing actions, form filling, document permissions, certify document settings, workflow type, post processing, email configurations and signing/ reviewing sequence.
Use from left side of the screen to change certify document settings, while
  of right side of the screen will let you manage the recipients.
 - Click the "Done" button.
Rename your personal template
- Click your profile drop down menu (available at the top right corner).
- Click the "My Settings" option.
- Click the "Templates" option from the left menu. Your existing personal templates will be listed.
- In case you are logged in as an Enterprise user, ensure "Personal" is selected from the top left drop down of the screen.
- Search/ move to the template to rename and click
 adjacent to it. The document viewer screen of template will be opened in editable mode.
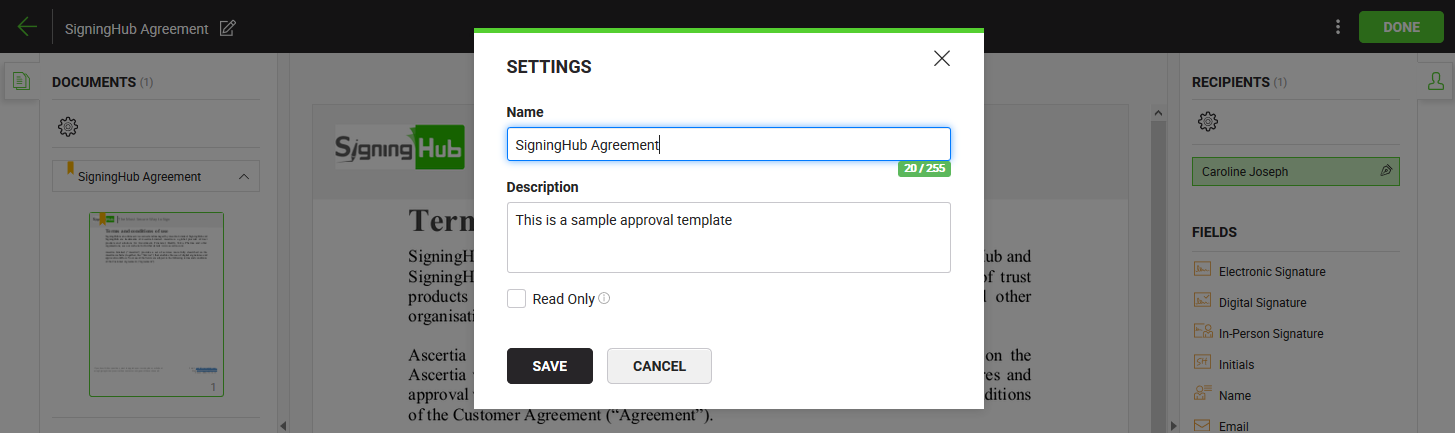
- Click
 from the document viewer screen header, as marked with the red arrow.
- A dialog will appear showing the previous name of template in editable mode. Specify the new name and description of this template as required, and click the "Save" button.
Delete your personal template(s)
- Click your profile drop down menu (available at the top right corner).
- Click the "My Settings" option.
- Click the "Templates" option from the left menu. Your existing personal templates will be listed.
- In case you are logged in as an Enterprise user, ensure "Personal" is selected from the top left drop down of the screen.
- Select the template(s) to delete and click
 from the grid header.
|
|
|

See Also
- Set up your SigningHub profile
- Configure Signature Settings
- Manage your contacts
- Manage your groups
- Manage your library documents
- Configure your notifications
- Enable cloud drives
- Manage your legal notices
- Delegate settings
- Optimise your account storage
- Delete your account