How to Integrate Static Pages with SigningHub Registration and Billing
- Introduction
- How it works?
- Configure the "Create Account Web Page" in SigningHub Admin
- Configure a Connector in SigningHub Admin
- Enable Billing in SigningHub Admin
- Configure Billing in a Service Plan in SigningHub Admin
- Stripe Configurations
- Taxamo Configurations
- Update Static HTML Pricing Pages
- Stripe Service Plan Mapping
- User Registration and Billing
This use case details the steps required to integrate static pricing pages with SigningHub’s registration and billing system. It includes configuring the "Create Account" web page, enabling billing features, and setting up a Stripe connector in SigningHub Admin. Additional steps cover configuring billing within a service plan, creating a new product in Stripe, and integrating Taxamo by obtaining API tokens and setting up webhook URLs. The process concludes with updating static HTML pages and Stripe mapping files to ensure seamless integration and accurate payment processing.
- Configure the 'Create Account Web Page', in SigningHub Admin.
- Configure a Stripe connector, in SigningHub Admin.
- Enable Billing, in SigningHub Admin.
- Configure Billing in a Service Plan, in SigningHub Admin.
- Create a new product, in Stripe
- Get API tokens and configure webhook URL, in Taxamo.
- Update Static HTML pages.
- Update the Stripe mapping file.
- Complete the user registration and billing process.
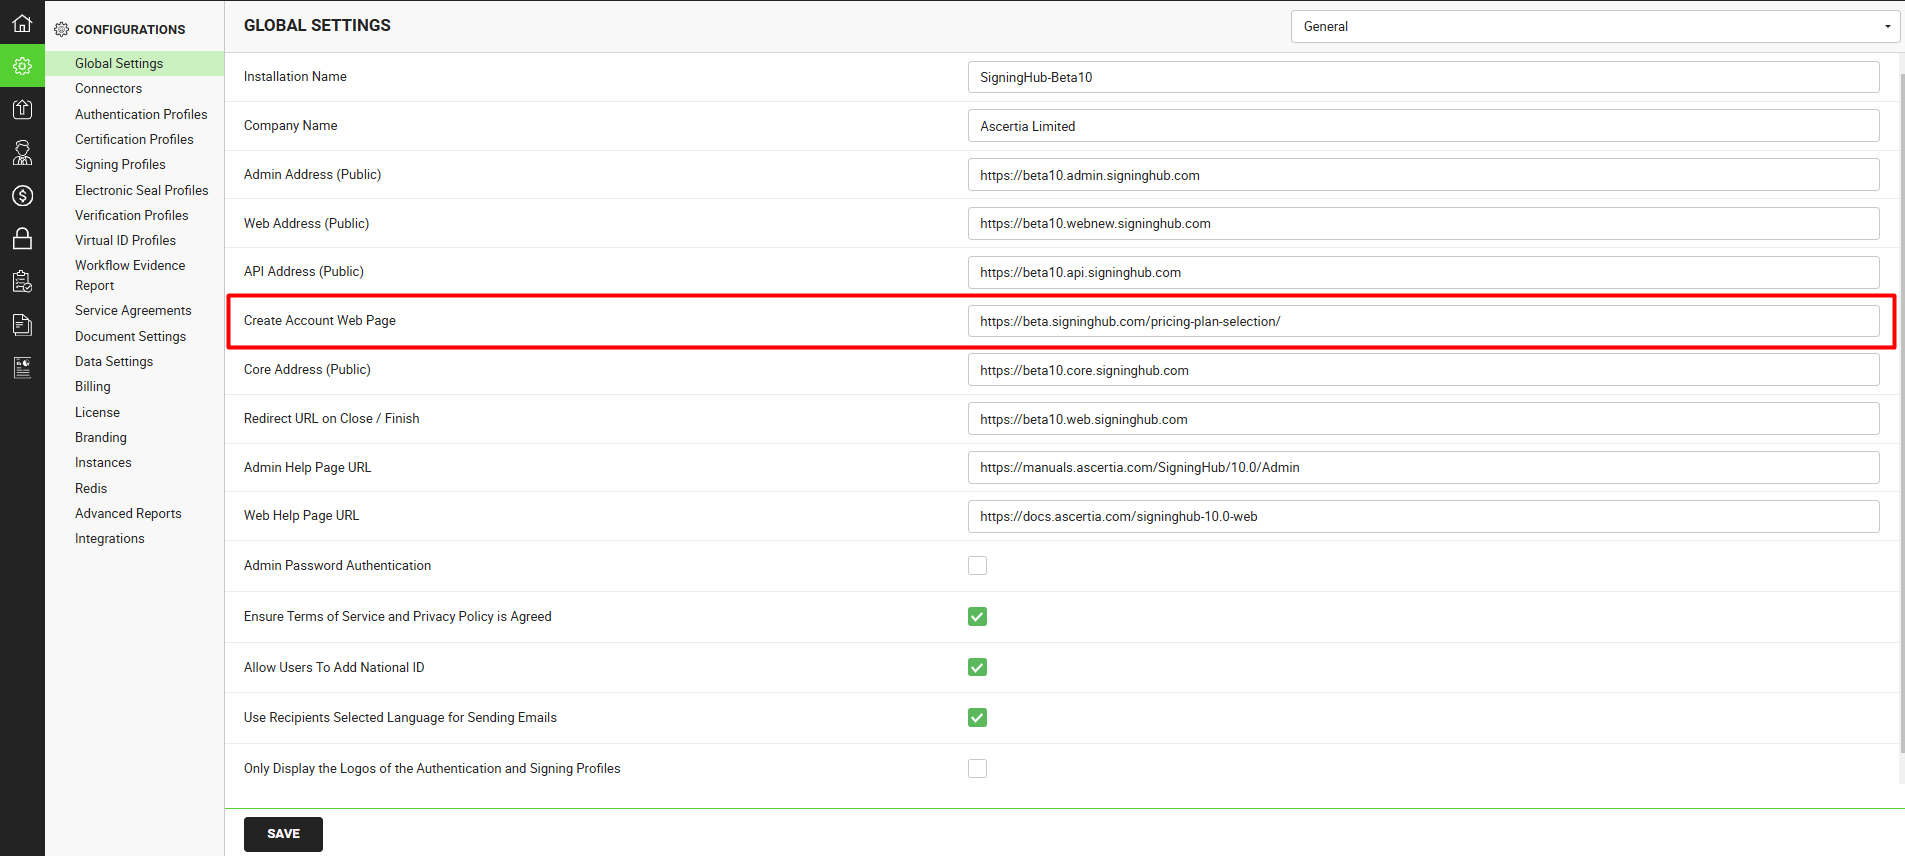
Configure the 'Create Account Web Page' in SigningHub Admin
Navigate to 'Global Settings' under the 'Configurations' section in SigningHub Admin.
- In the "Create Account Web Page" field, input the static pricing page URL where the user registration process will initiate.
Configure a Connector in SigningHub Admin
To see in detail, how to create a Stripe Connector in SigningHub, click here.
Make the following configurations to a connector in SigningHub Admin:
- In the "Basic Information" section, choose "Stripe" as the "Provider".
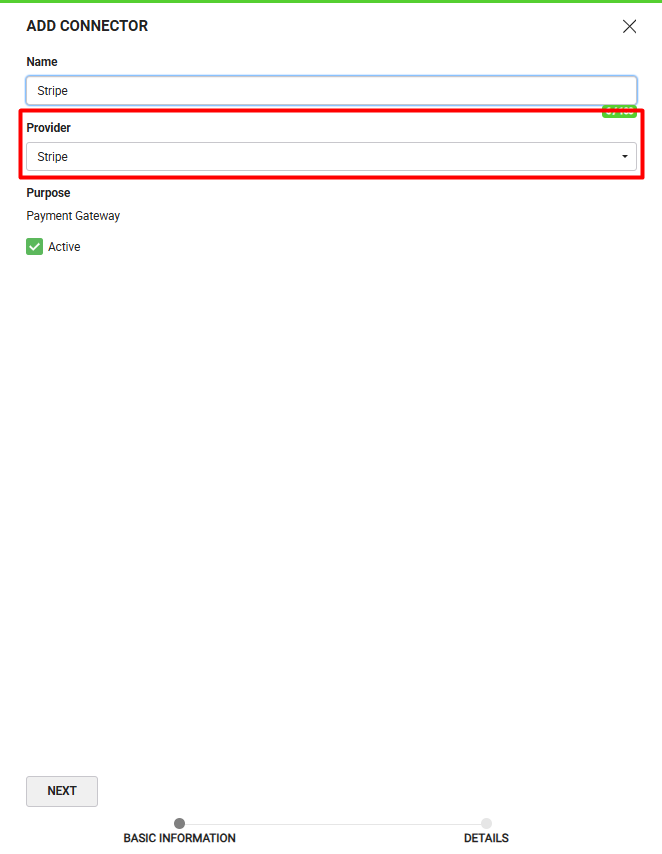
- In the "Details" section, fill in the required fields.

|
|
|

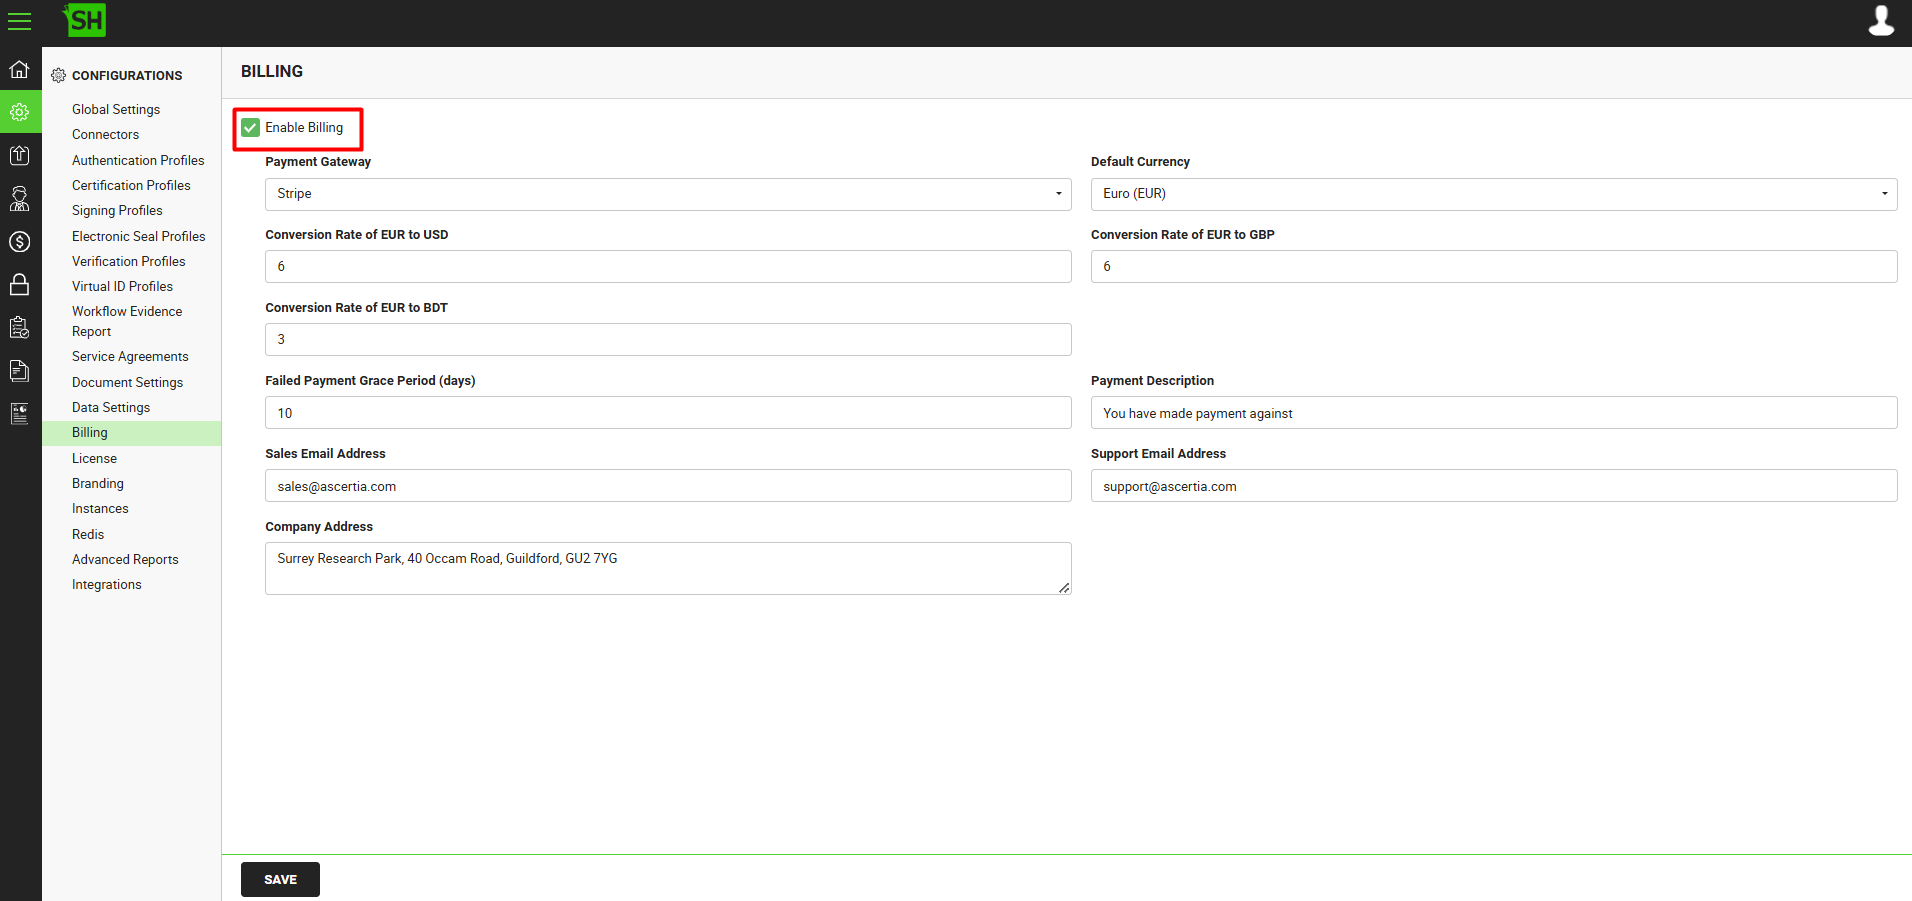
Enable Billing in SigningHub Admin
Navigate to 'Billing' under the 'Configurations' section in SigningHub Admin.
- Check the 'Enable Billing' checkbox, and fill in the necessary details:
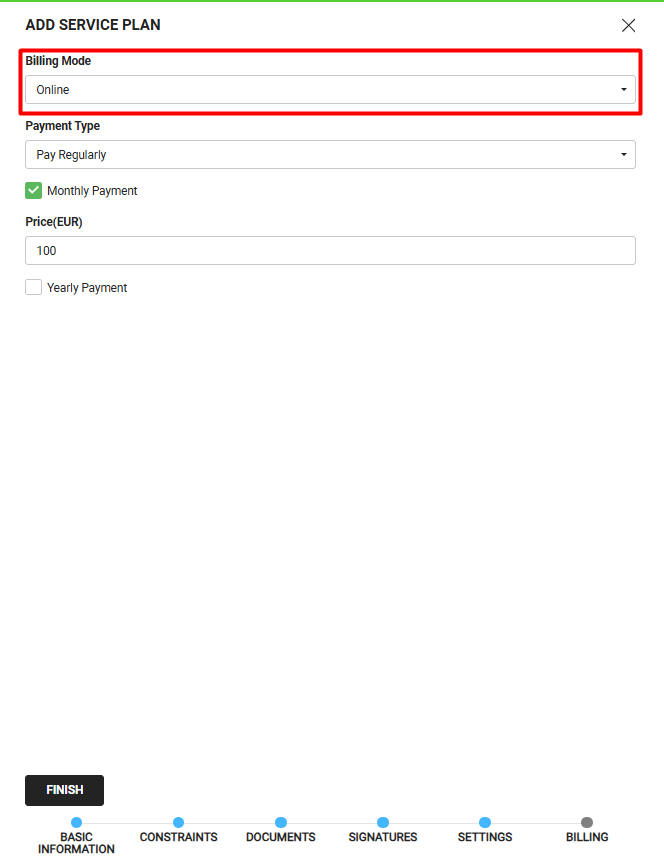
Configure Billing in a Service Plan in SigningHub Admin
To see in detail, how to create a service plan in SigningHub, click here.
Make the following configurations to a service plan in SigningHub Admin:
- In the 'Billing' section of the service plan, set the 'Billing Mode' as 'Online', and select the required payment type, as shown below:
Stripe Configurations (Only for Pay Regularly Plans)
Make the following configurations to your Stripe Account:
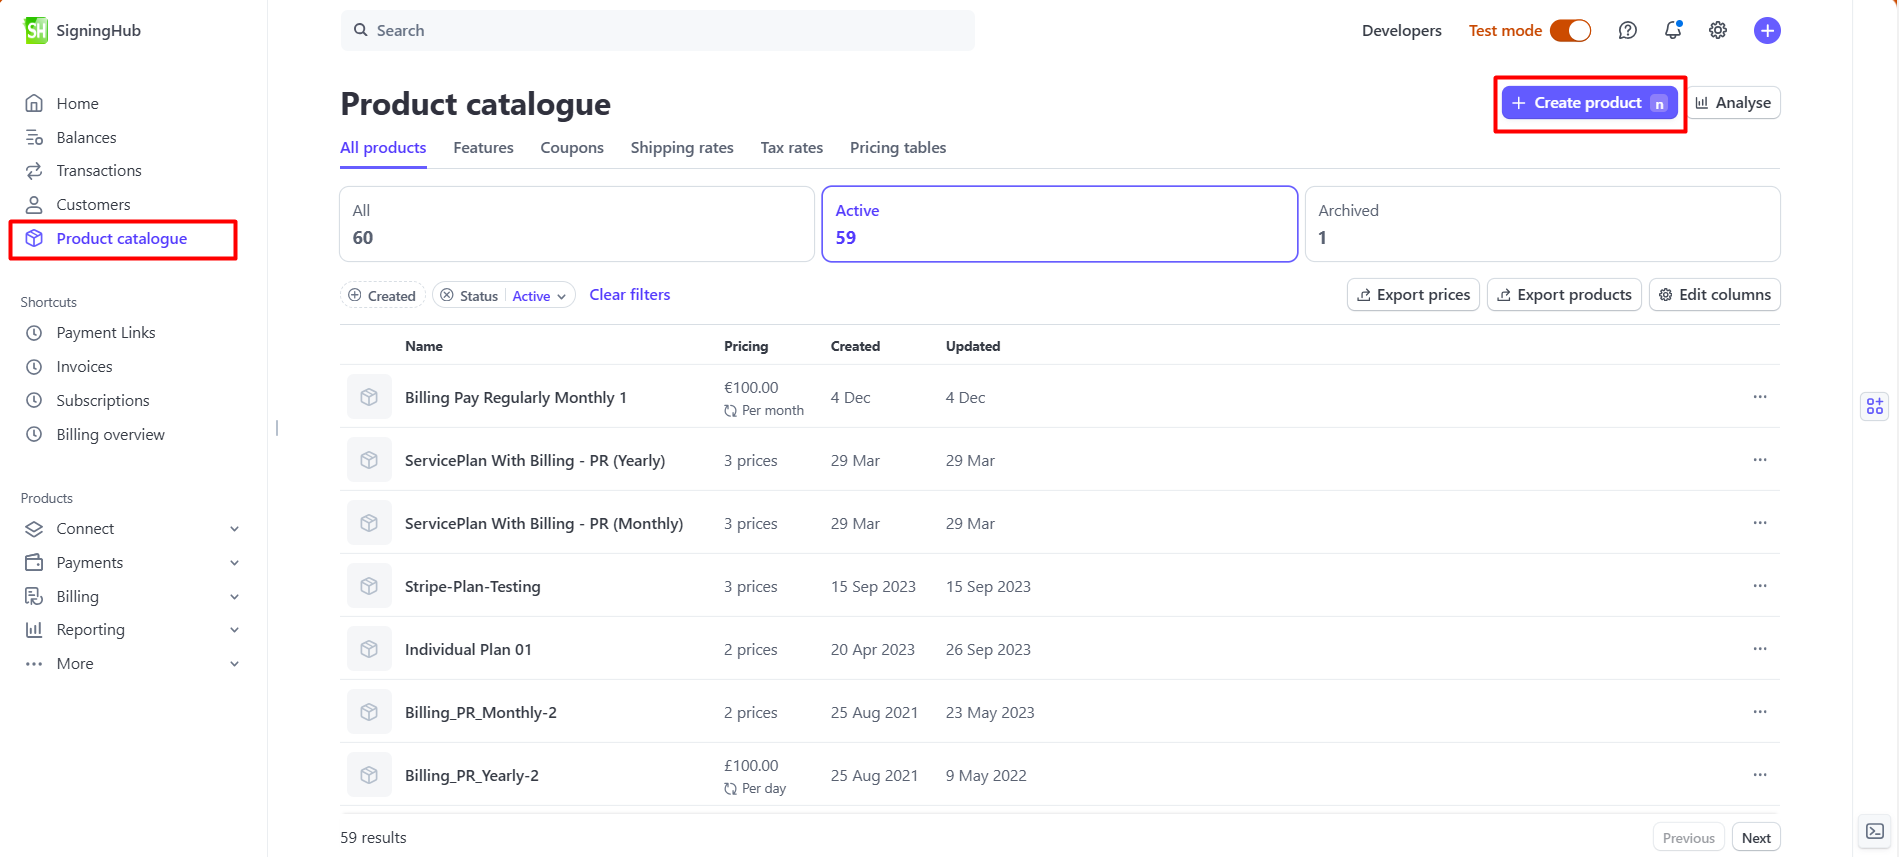
- Go the Product catalogue section, and click on the 'Create product' button.
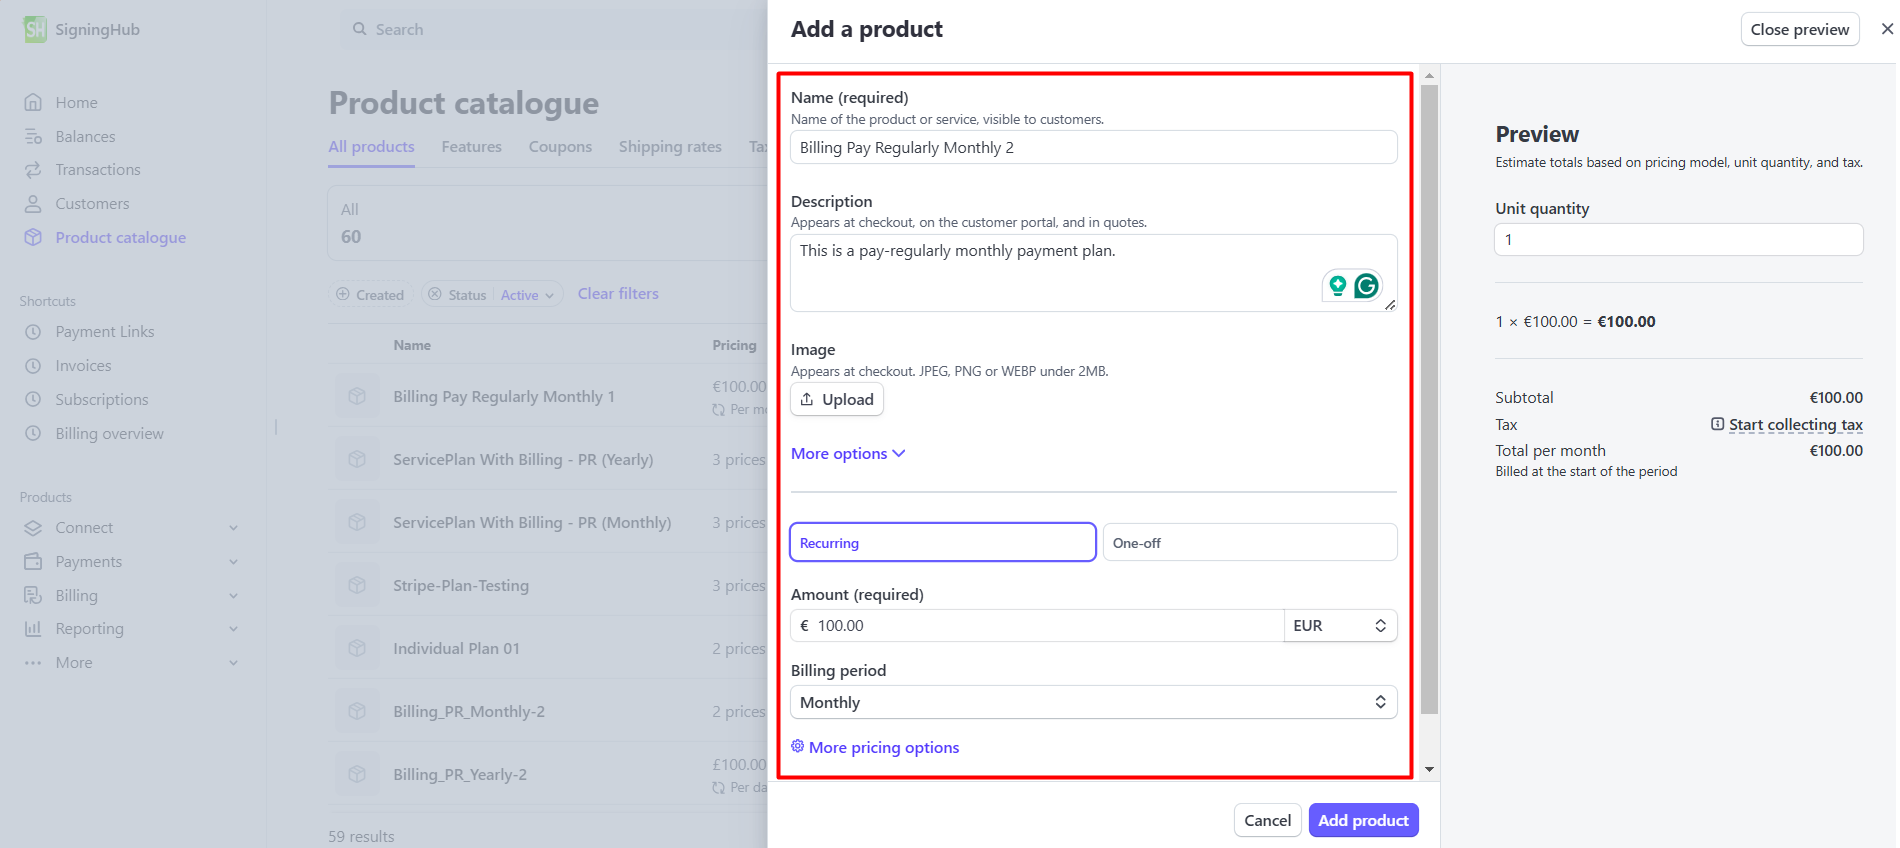
- Specify the details of the product, as required.
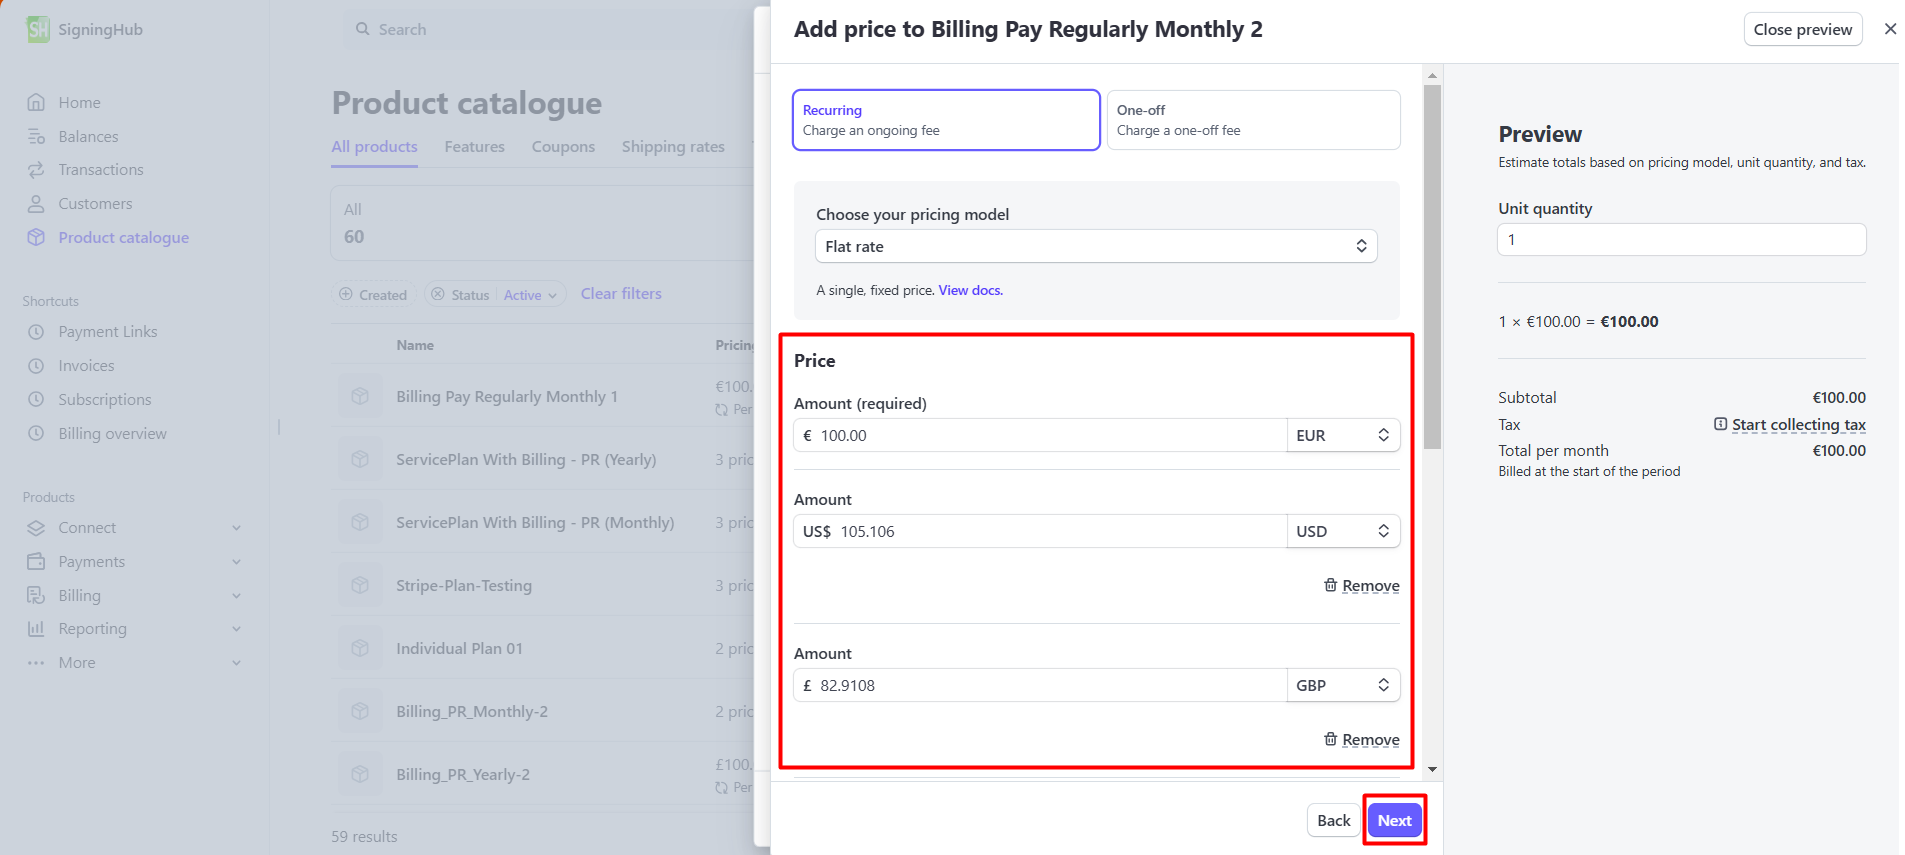
- Click on the 'More pricing options' button to add three different prices in Stripe; one for each currency supported in the SigningHub Admin (USD, EUR, GBP). After adding the prices, click on the "Next' button.
Ensure the billing period (monthly or yearly) is set accordingly for each price.
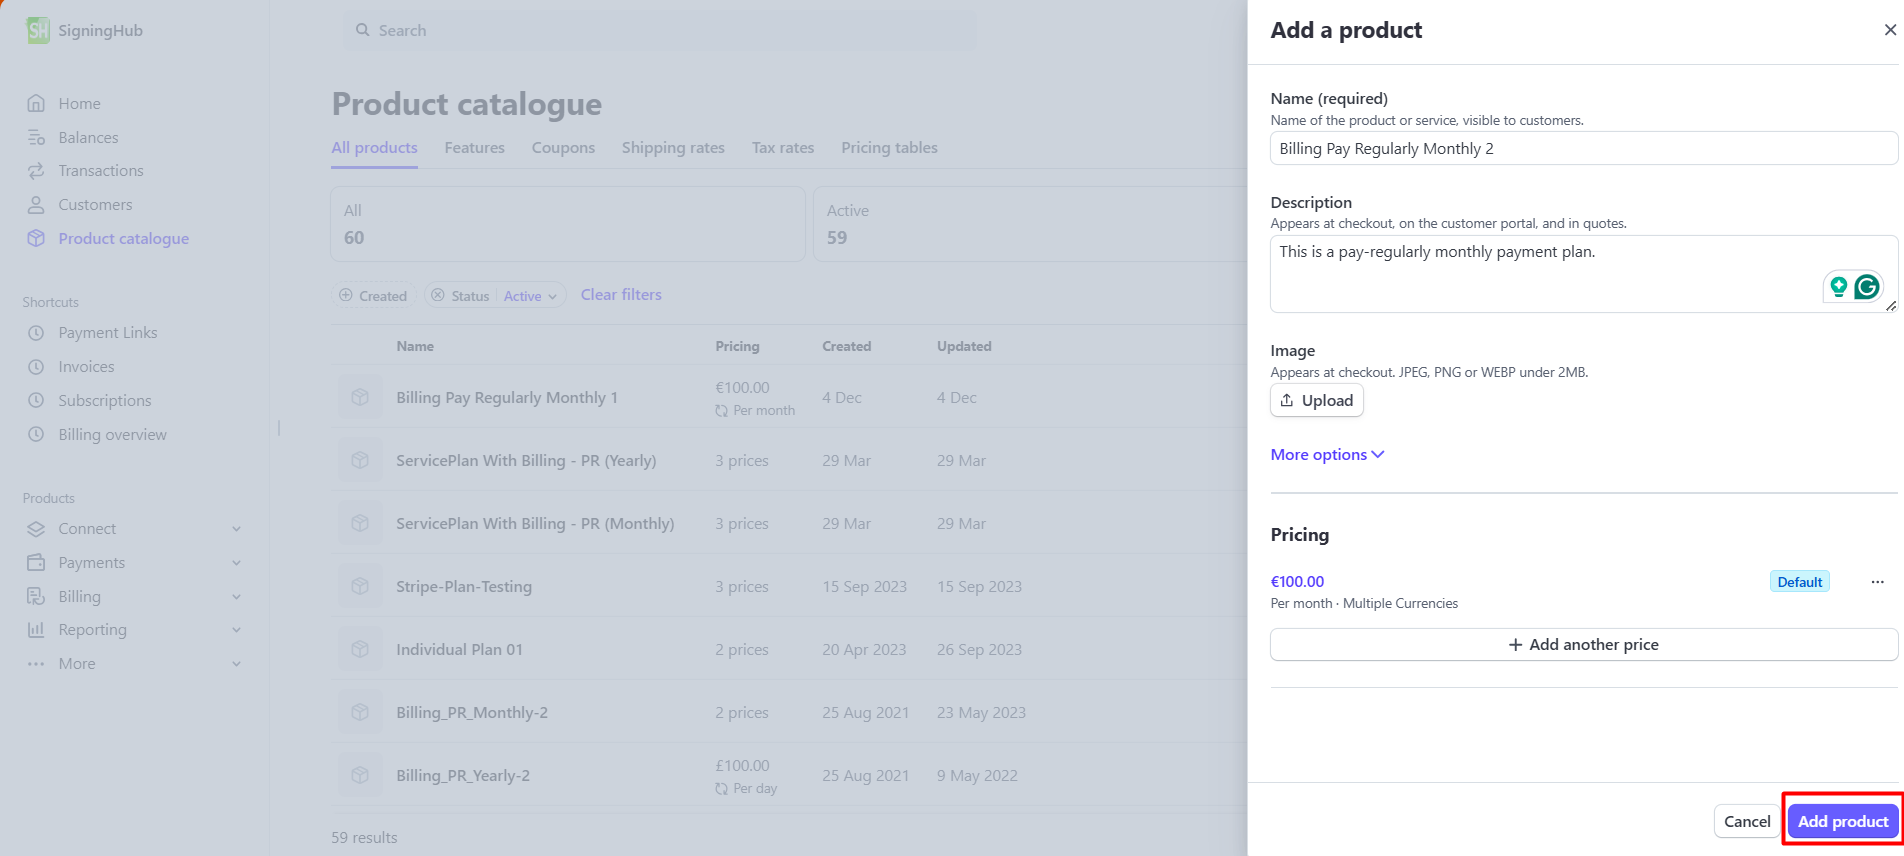
- Click on the 'Add product' button.
- Either click on the created product from the product listing or click on the 'View product' button.
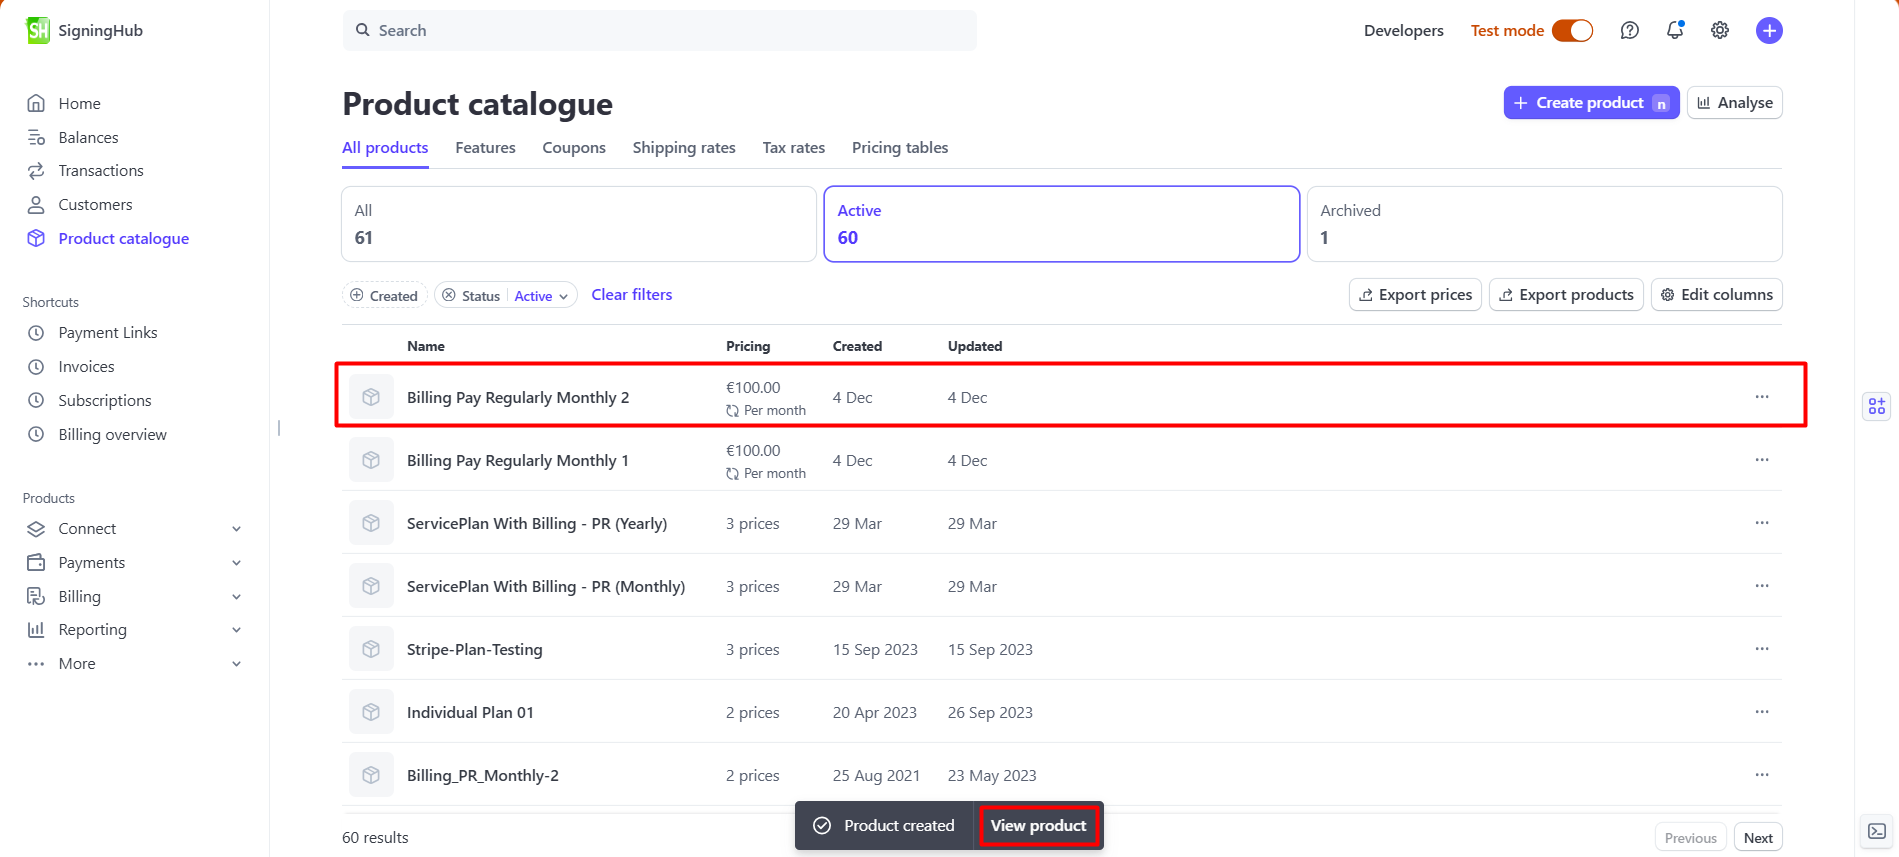
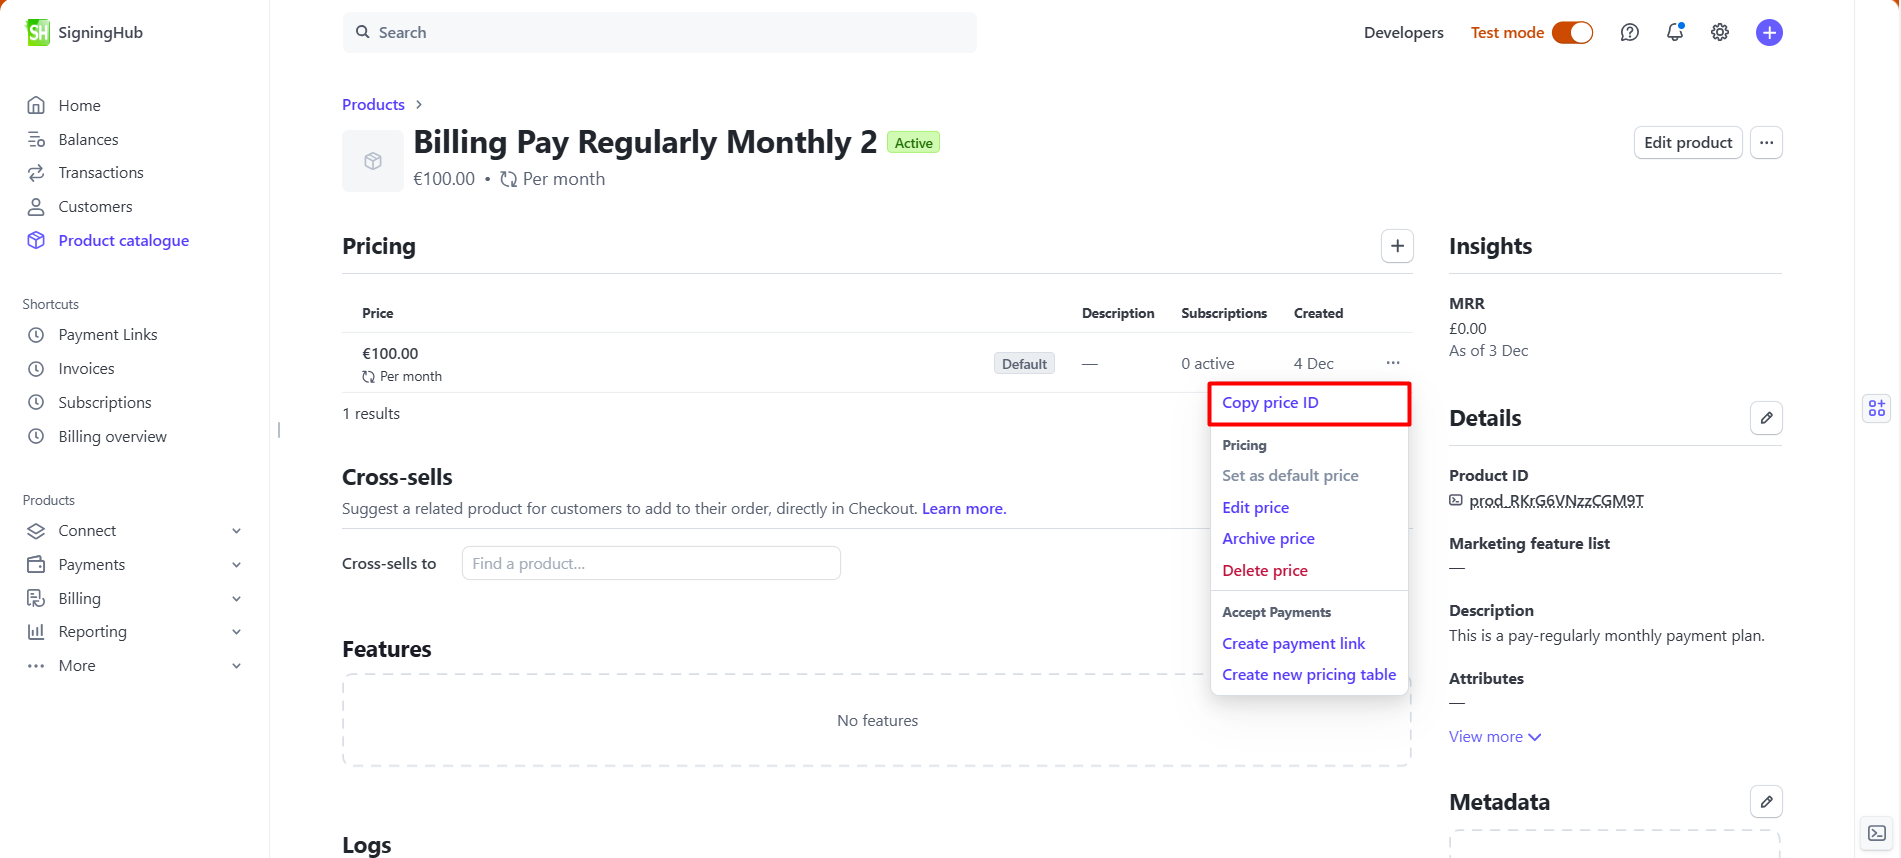
- Click one the overflow menu button, and click on the 'Copy price ID' option. Save this information to be used later.
The Price ID (API ID for each product price) generated by Stripe will be used on the static HTML pricing pages to reference the correct service plan pricing.
Taxamo is utilized in this integration to manage VAT calculations and compliance with tax regulations. It ensures accurate tax handling for seamless billing and payment processing.
Make the following configurations to your Taxamo Account:
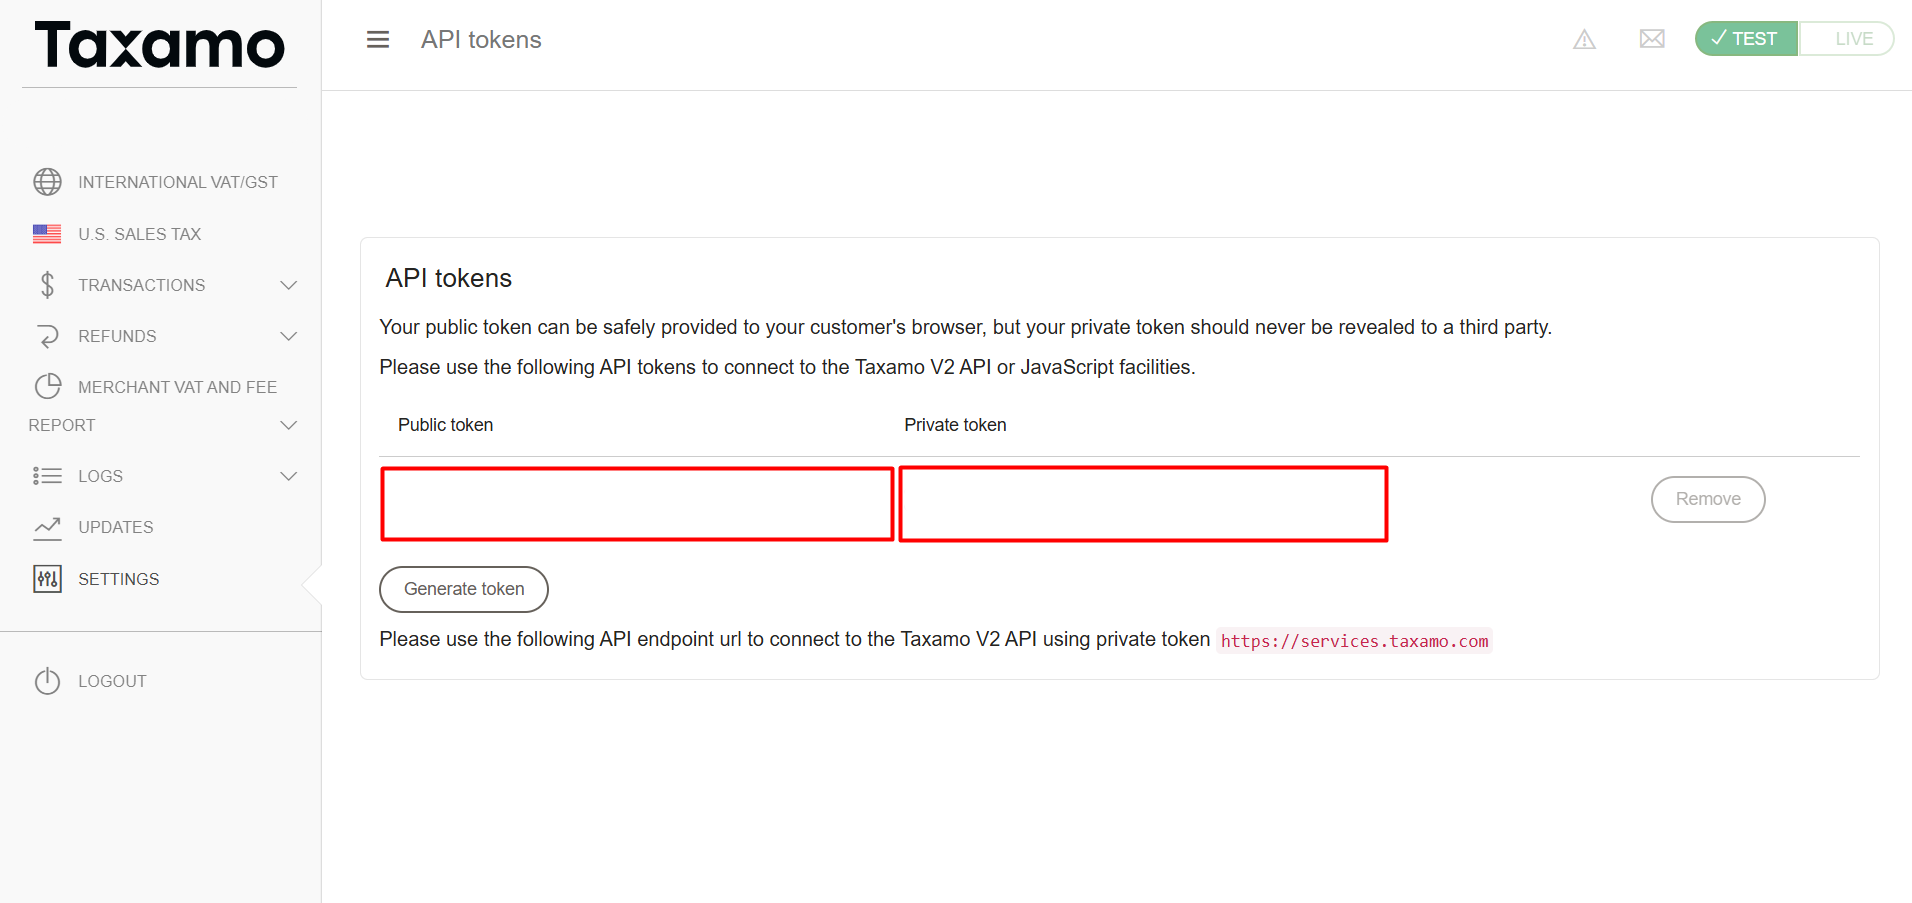
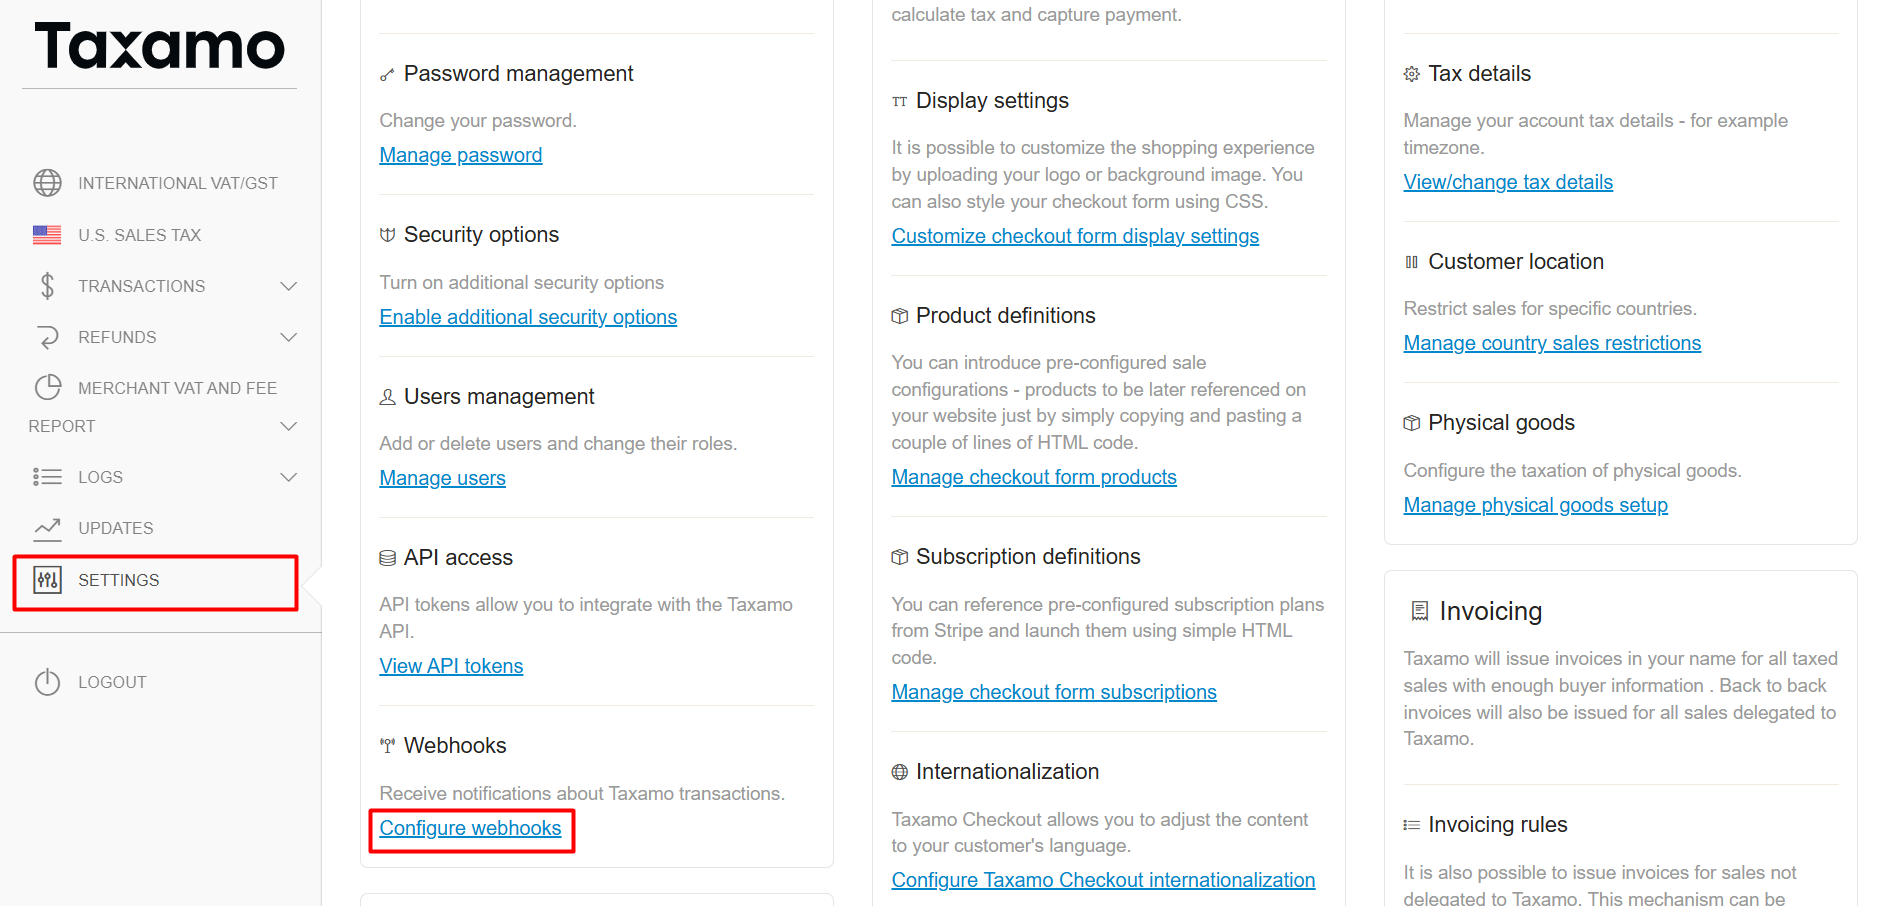
- Go to the 'Settings' section and click on the 'View API tokens' option.
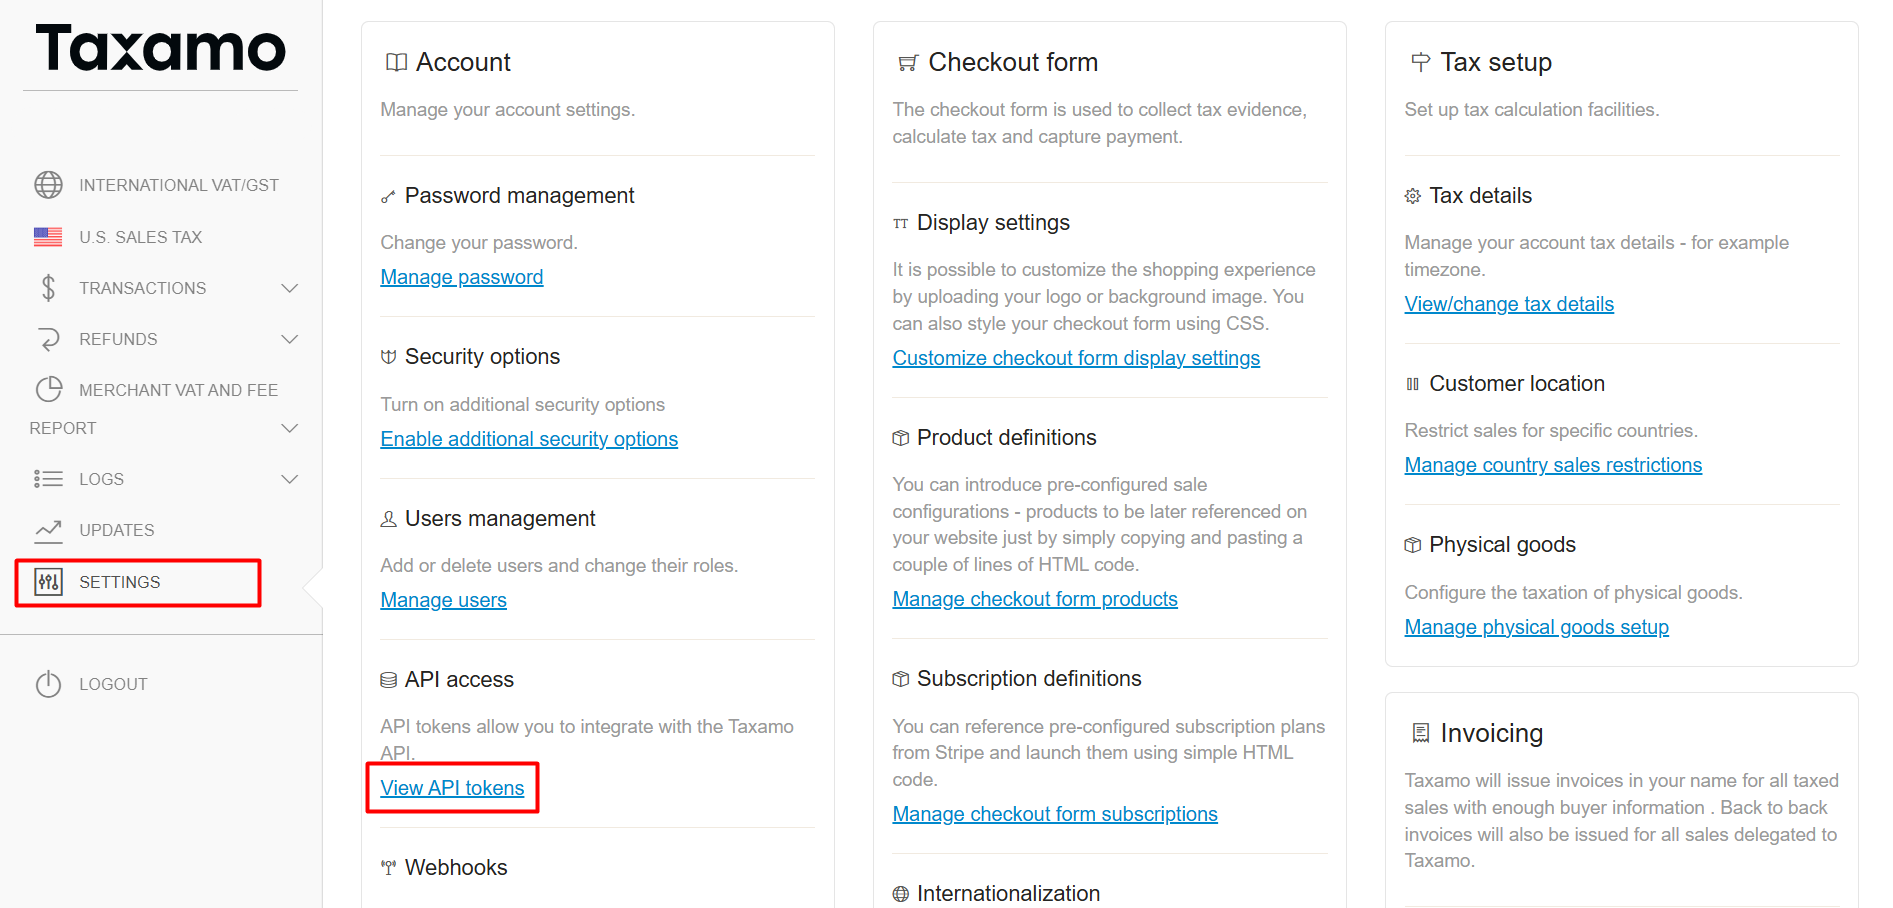
- Copy the 'Public token' and the 'Private token'. These tokens need to be configured in the Stripe connector within the SigningHub Admin.
- Go to the 'Settings' section and click on the 'Configure webhooks' option.
- Click on the 'Configure new endpoint' button.
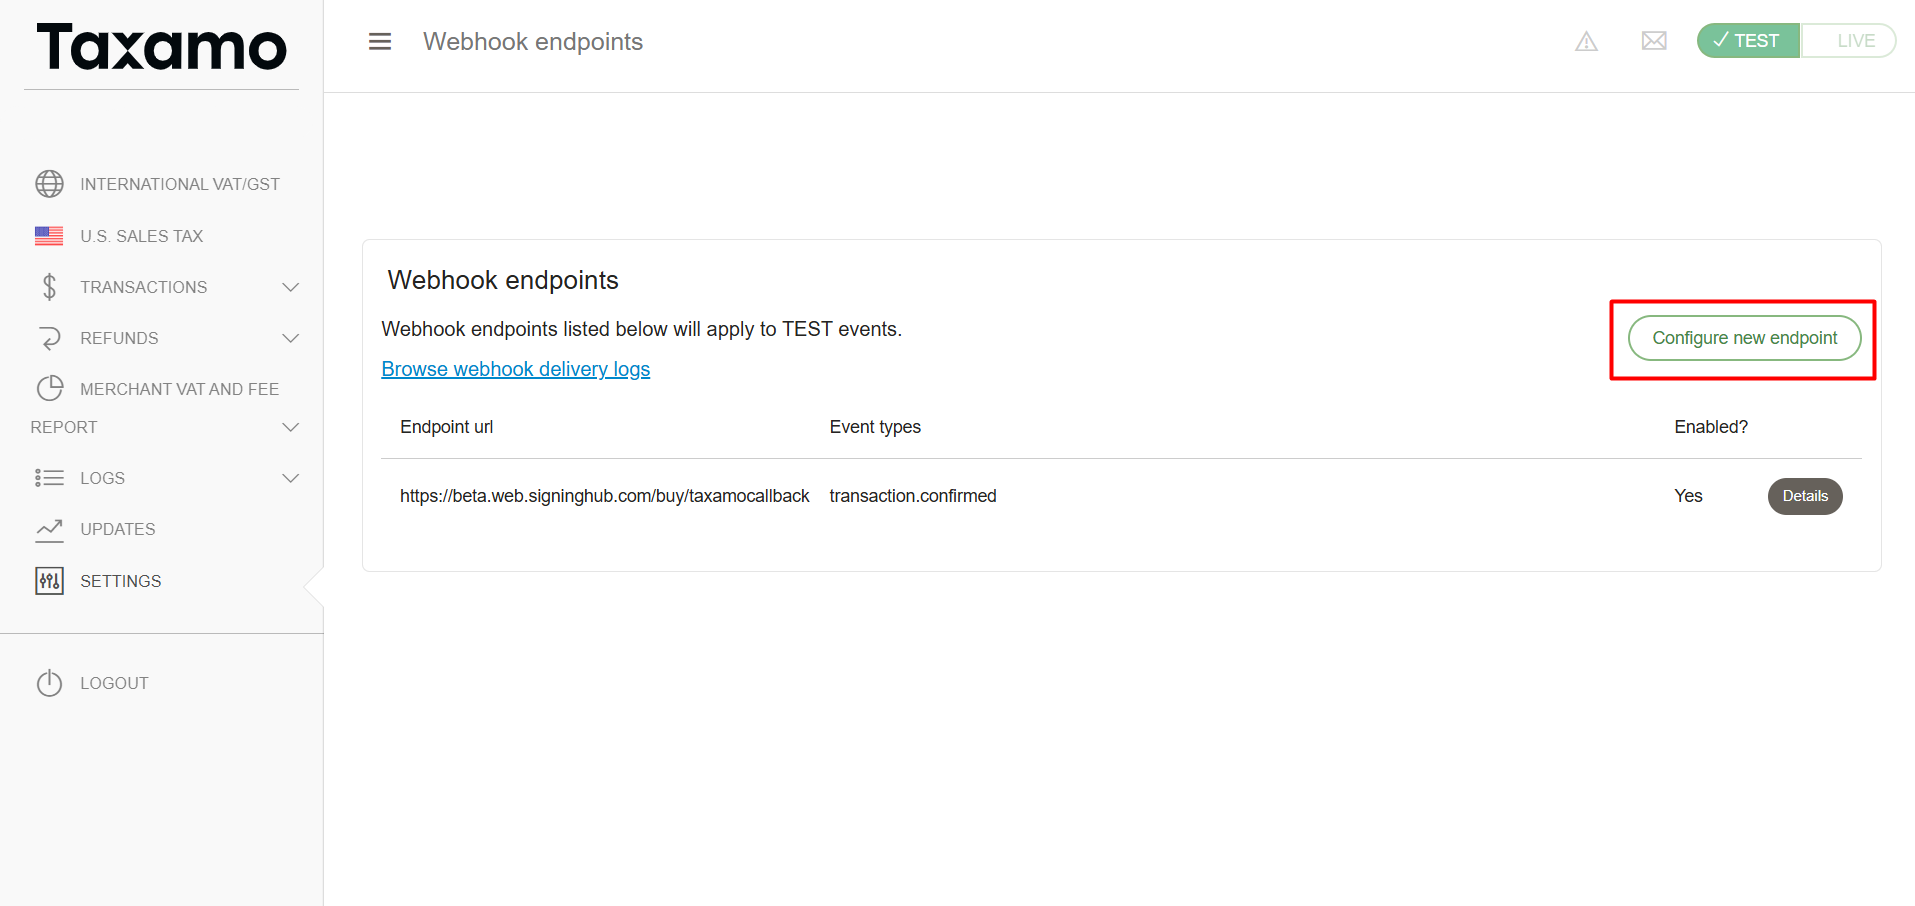
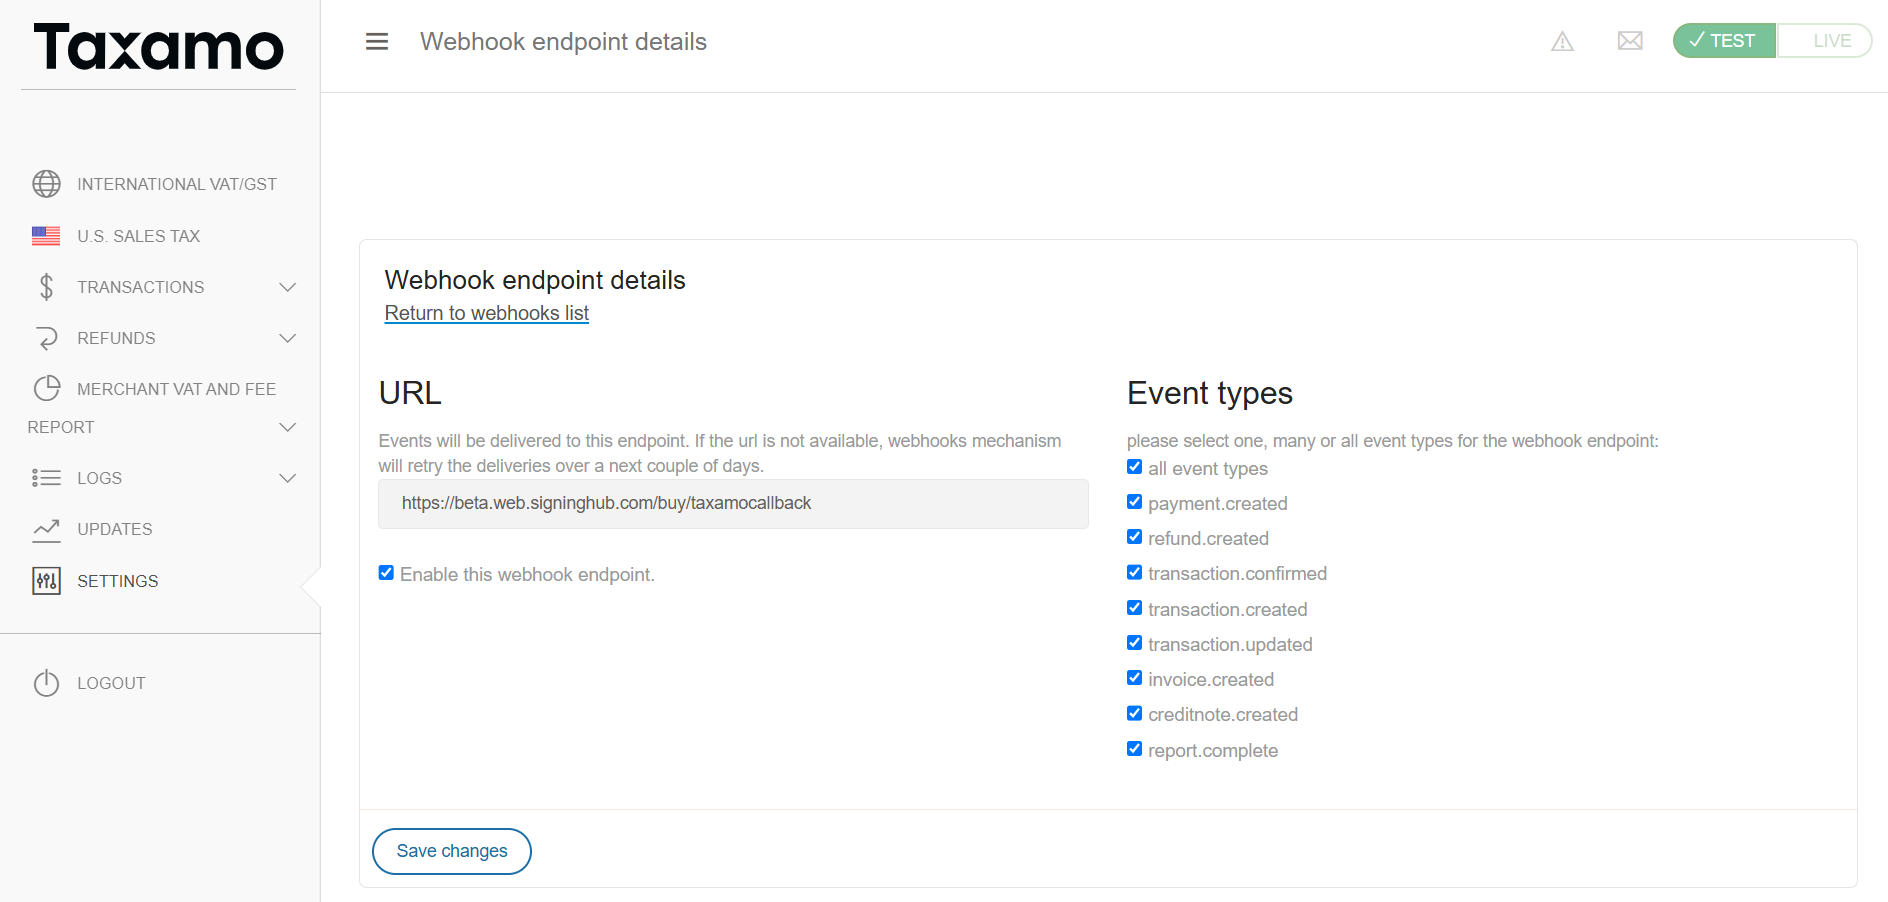
- Specify the URL and the event types, then click on the 'Save changes' button.
|
|
|

Update Static HTML Pricing Pages
It is crucial to update the static pages whenever service plans are modified or added, particularly for recurring payment plans.
|
Requirements |
Description |
||
|
Service Plan IDs |
Each available service plan ID should be clearly referenced on the static pages. |
||
|
Plan Selection |
Users should be able to choose their desired plan directly from the static page. |
||
|
Payment Interval for Recurring Plans |
For service plans with recurring payments, users should be able to select the payment interval; Monthly or Yearly. |
||
|
Currency Selection |
Users should be able to select their preferred currency, such as EUR, USD, or GBP. |
||
|
Data Transmission to SigningHub |
After users select a plan, payment interval, and currency, this information must be passed seamlessly to the SigningHub Registration or Upgrade page. |
||
|
Redirection to SigningHub |
Once all the necessary information is collected, users should be redirected to the SigningHub platform with the following URL structure:
|

|
|
|
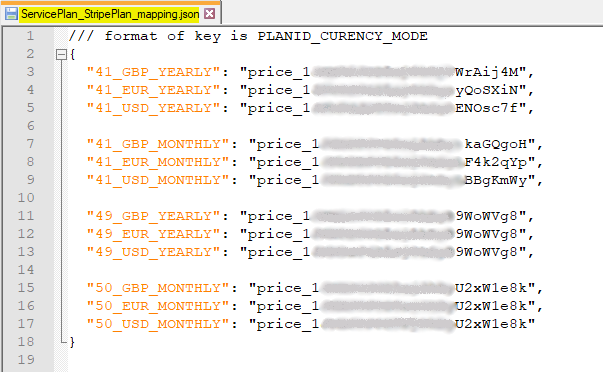
The Stripe mapping file, ServicePlan_StripePlan_mapping.json, located in the Default folder, must be updated periodically for regular payment plans. (No updates are required for Pay-As-You-Go (PAG) plans.)
For each plan with monthly and yearly pricing, three keys must be added to cover USD, EUR, and GBP prices. The key format should follow this structure:
[Plan ID from SH Admin]_[Currency]_[Billing Mode]
- Plan ID: The unique ID from the SigningHub Admin panel.
- Currency: The currency being used (USD, EUR, GBP).
- Billing Mode: The payment interval (Monthly or Yearly).
The corresponding value is the price configured on Stripe for the service plan in that specific currency.
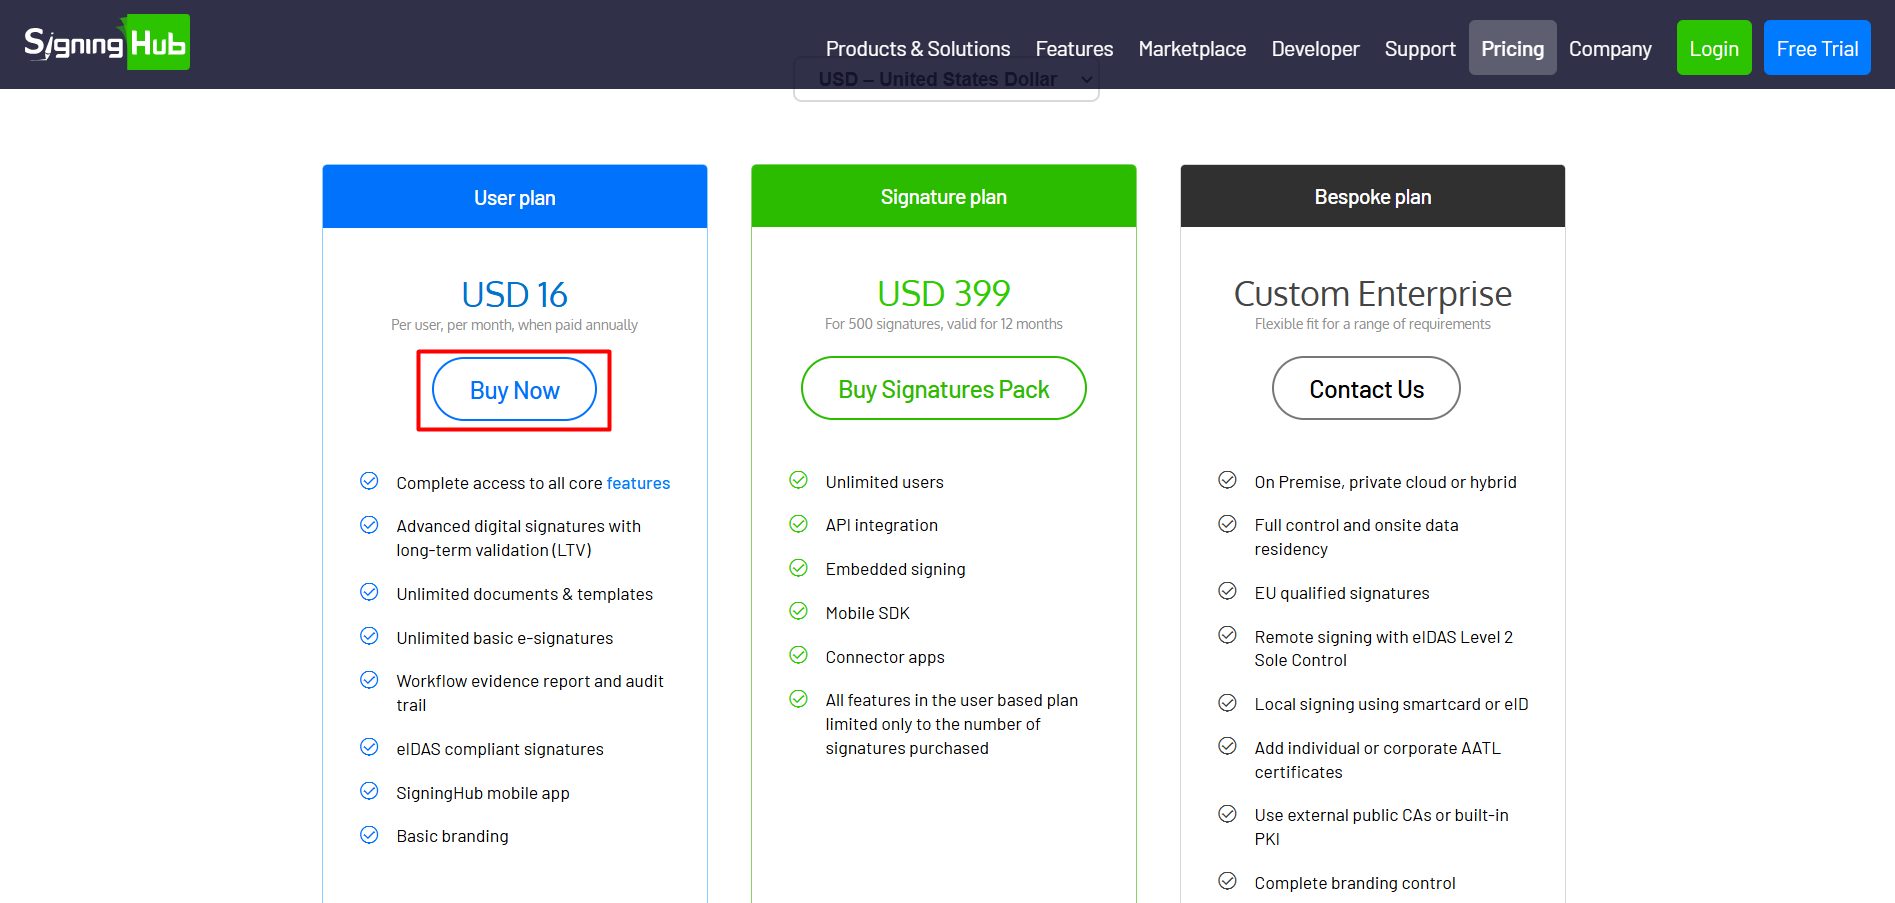
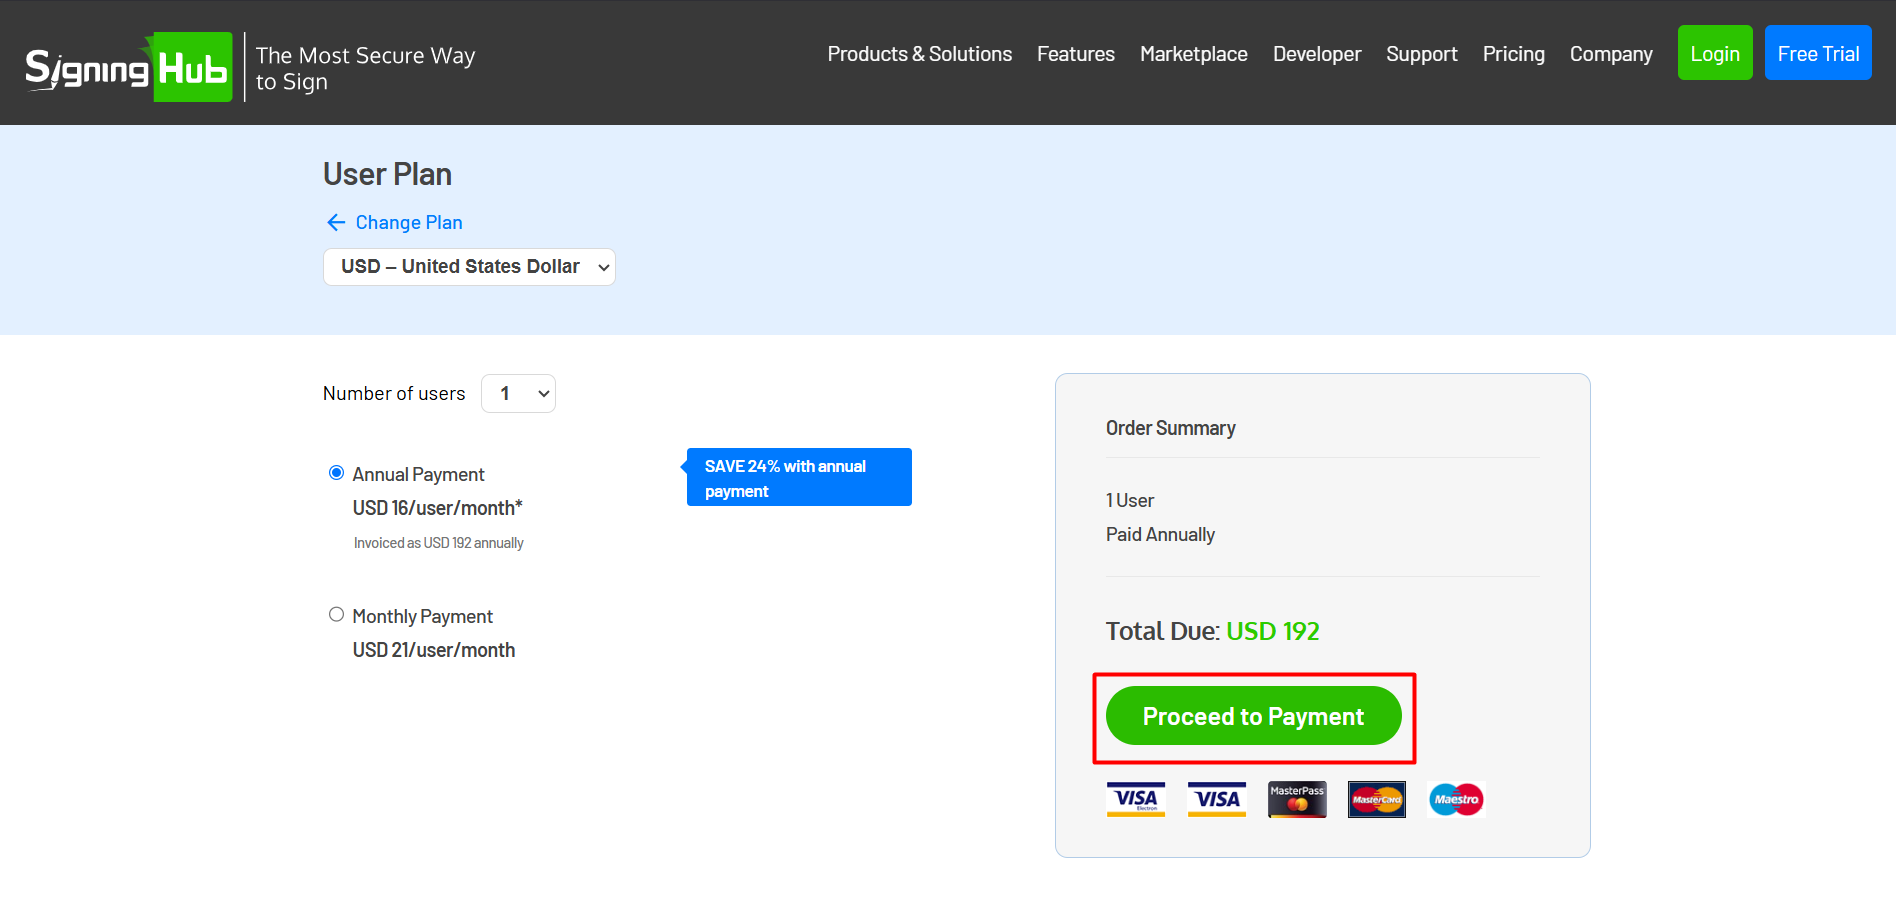
- After the configurations, when a user initiates the process from the static page, as earlier configured in SigningHub Admin. Select the plan you want to buy.
- Click on the 'Proceed to Payment' button.
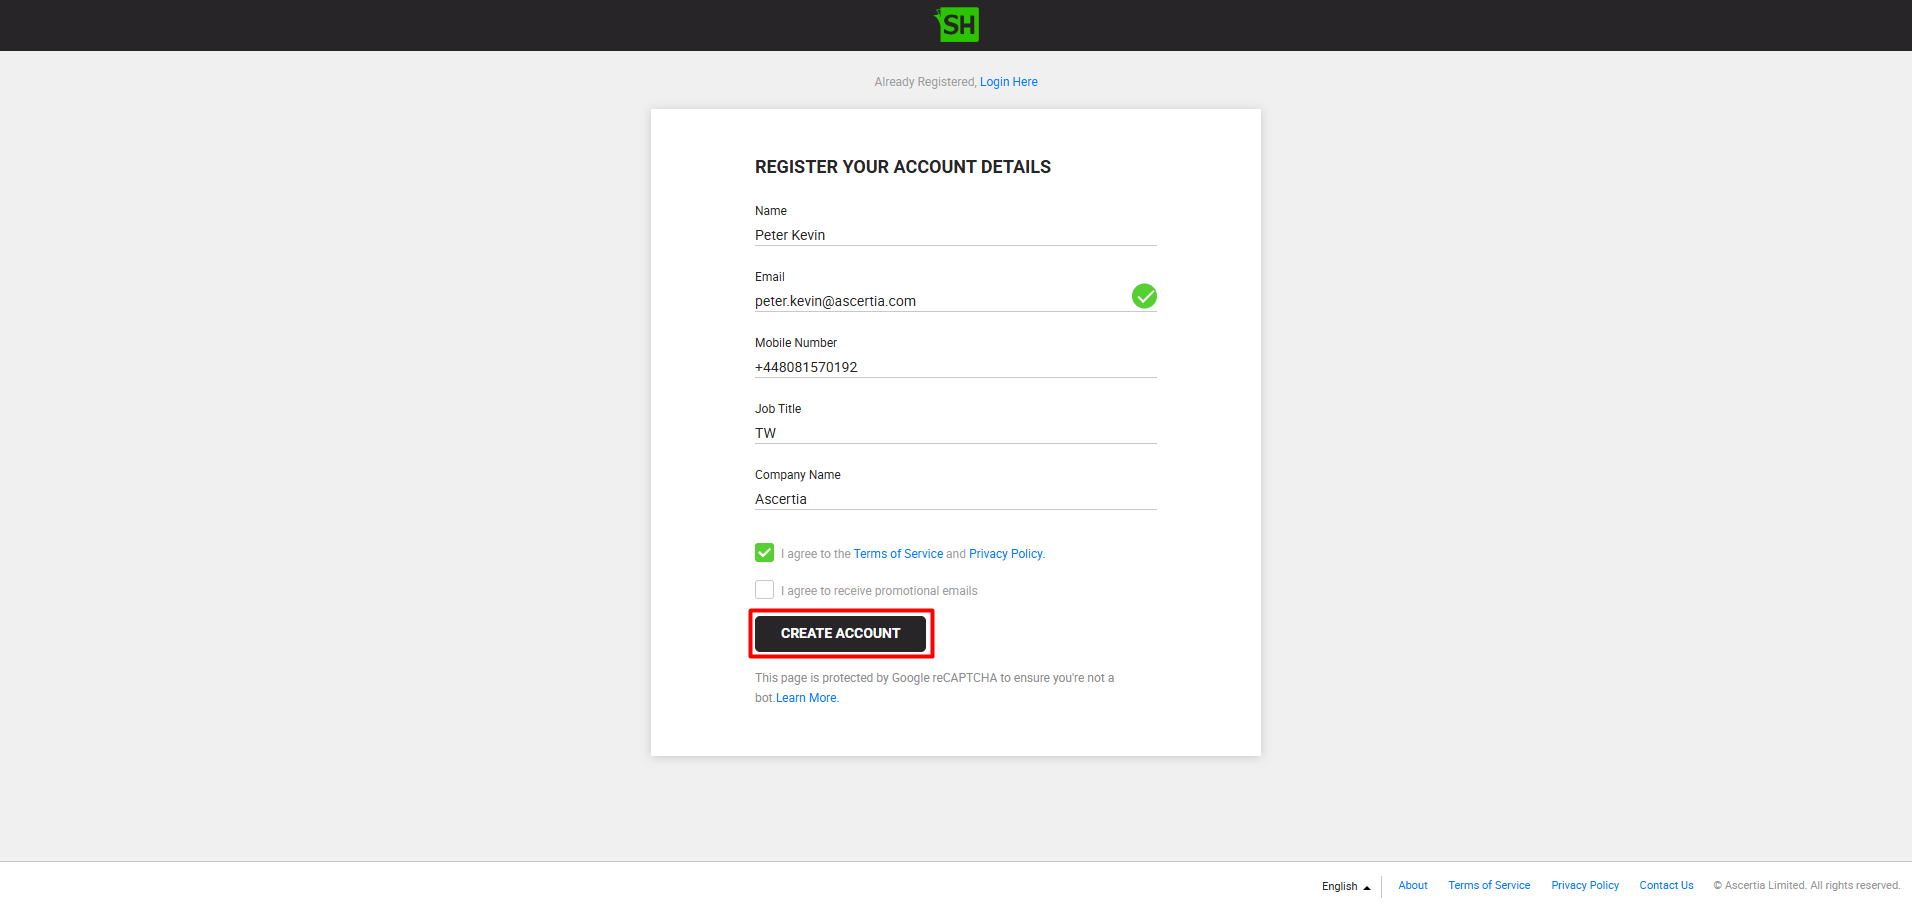
- After providing the necessary details, click on the 'Create Account' button.
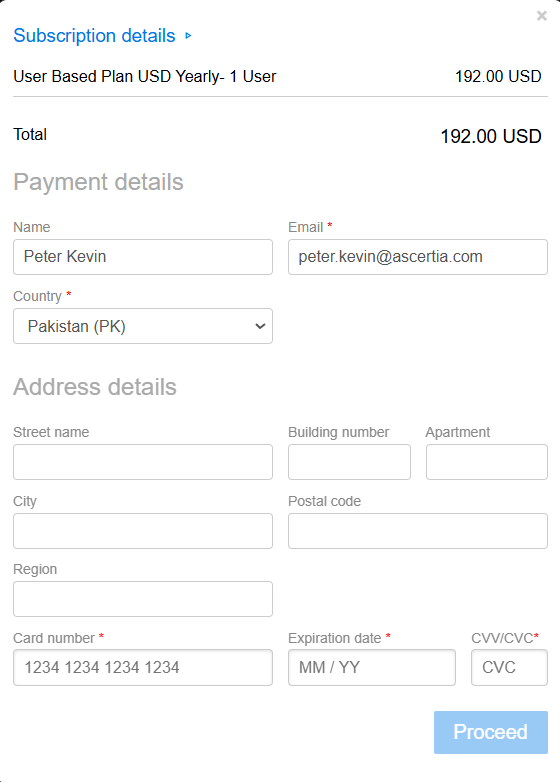
- The user will now be redirected to the stripe dialog to process the billing. The user can provide the payment details and click on the 'Proceed' button.
- After the payment has been processed, the billing process will complete. And the user will be redirected to the Login screen.
See Also
- How to Integrate Power BI
- How to Obtain Firebase Integration Key
- How to Obtain the Azure AD Integration Key
- How to Obtain the Office 365 Integration Key
- How to Obtain a Salesforce Consumer Key
- How to Obtain the Dropbox Integration Key
- How to Obtain the Google Drive Integration Key
- How to Obtain the OneDrive Integration Key
- How to Obtain the HubSpot Integration Key
- How to Integrate Static Pages with SigningHub Registration and Billing