Sign Your Documents
You can also quickly sign your documents from your SharePoint account, without going through the "Status" and "Recipients Adding" screens. This option is useful when you are the only document signer and no one else needs to sign it. SigningHub uses the "Only-me" variant of workflow to process such documents.
Sign a document
1. Browse the SharePoint site link (as provided by your SharePoint admin) and log into your SharePoint account.
2. Click the document library (i.e. default document library, or your custom document library, or a document set) whose document(s) are required to sign.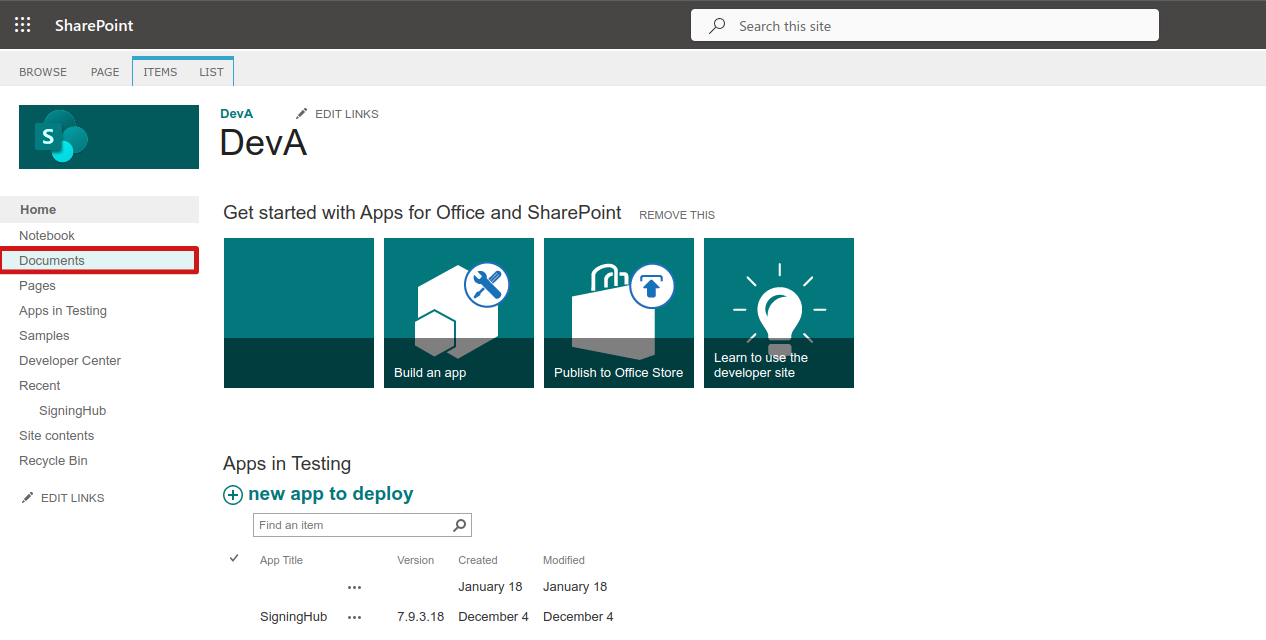
3. Right-click the document you want to sign and select "SignignHub - Sign" from the menu: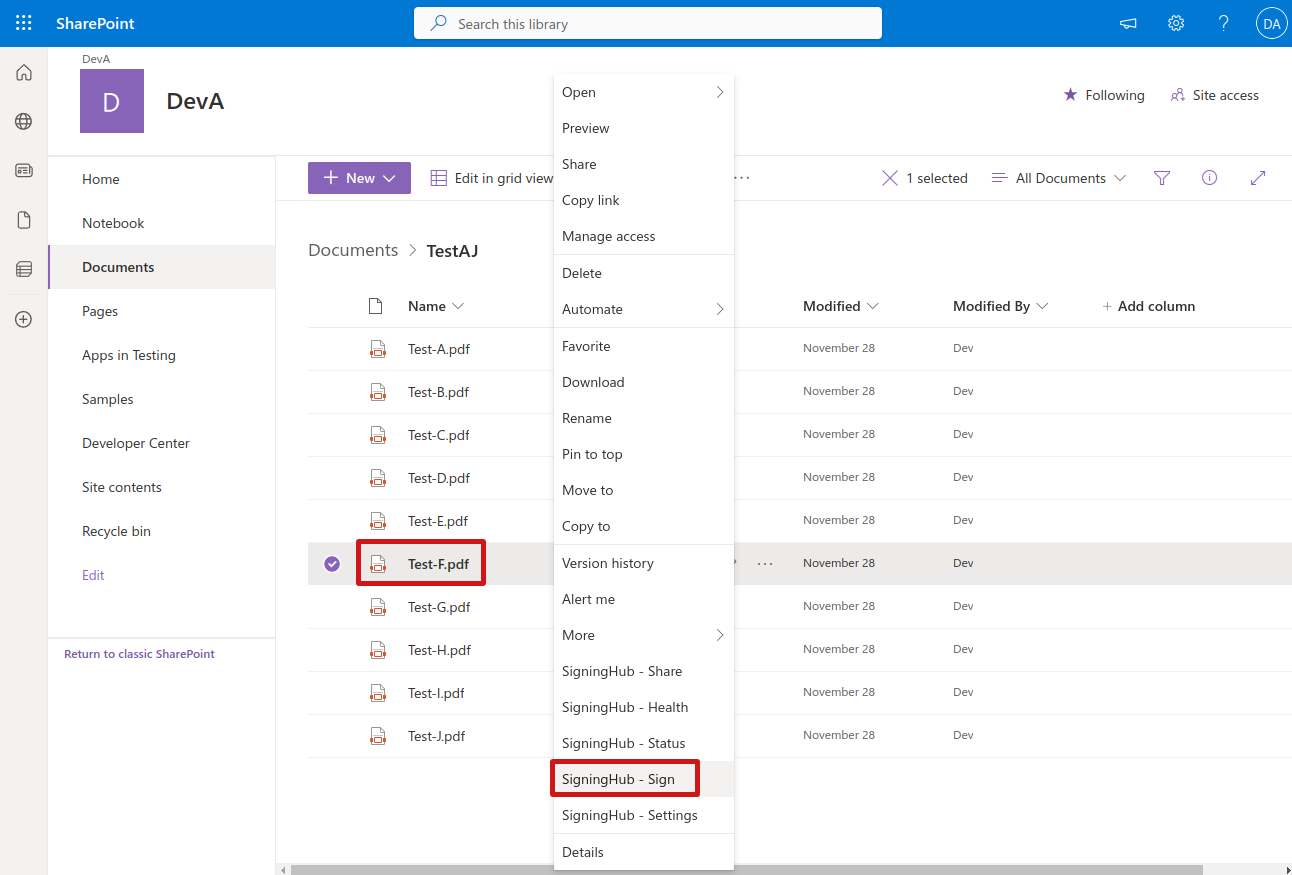
4. The selected document will be opened inside SigningHub in preparation mode. Add a Digital Signature or an Electronic Signature field as required. Then click the signature field to sign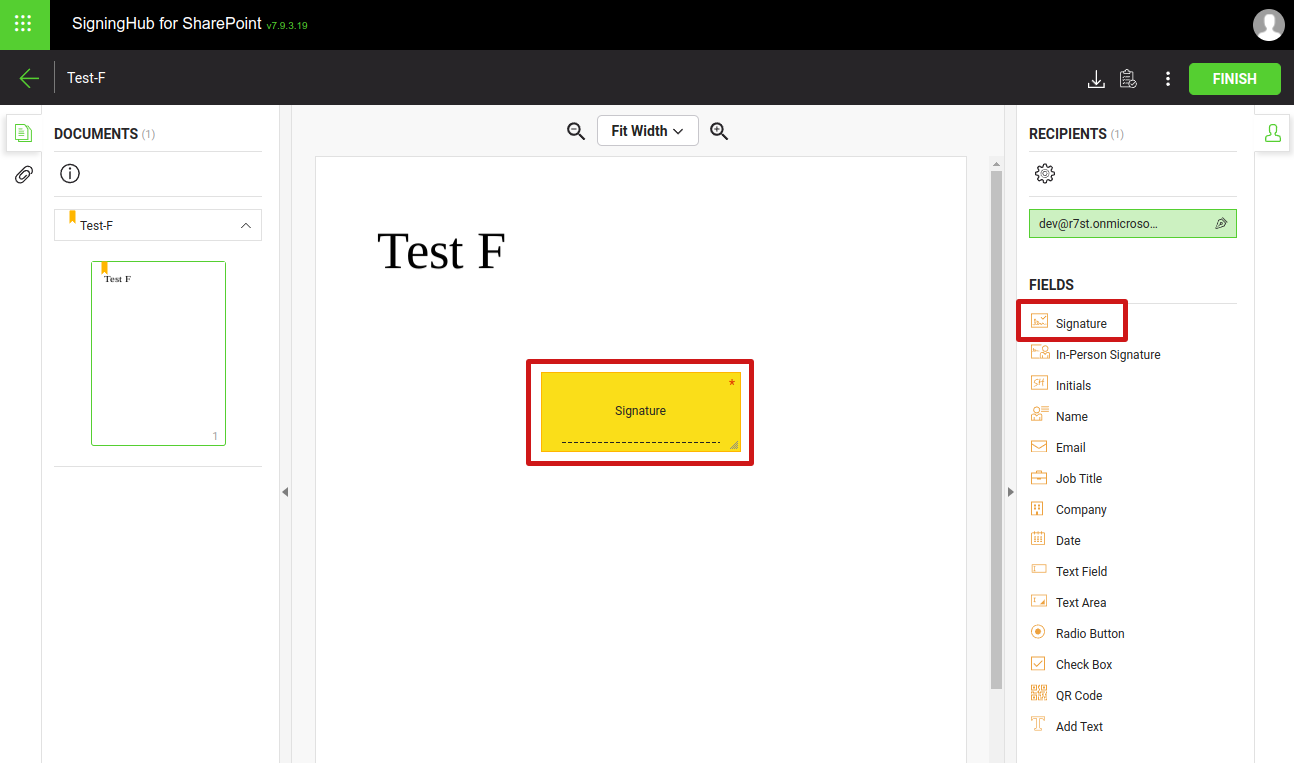
5. Select the signing profile you want to use (if more than one configured)
6. If desired and allowed according to SigningHub settings, customize the signature appearance and click "Sign Now":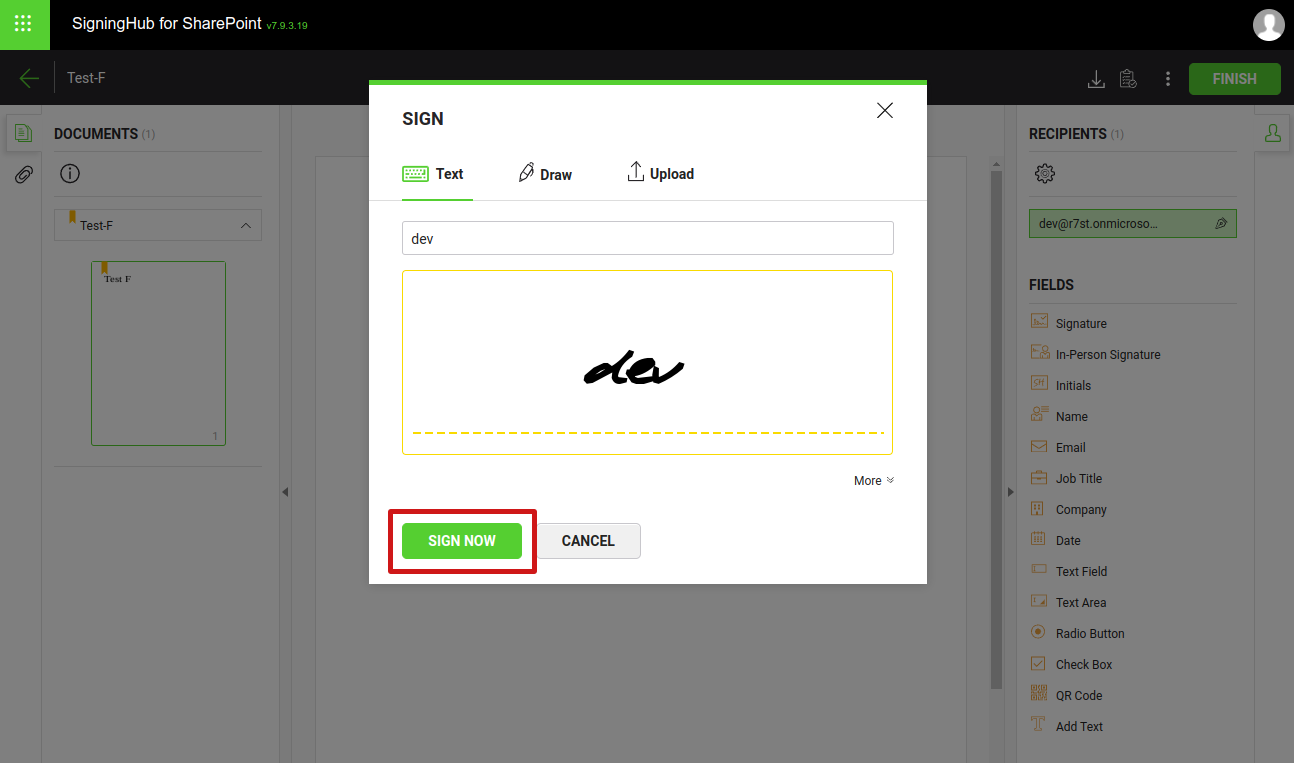
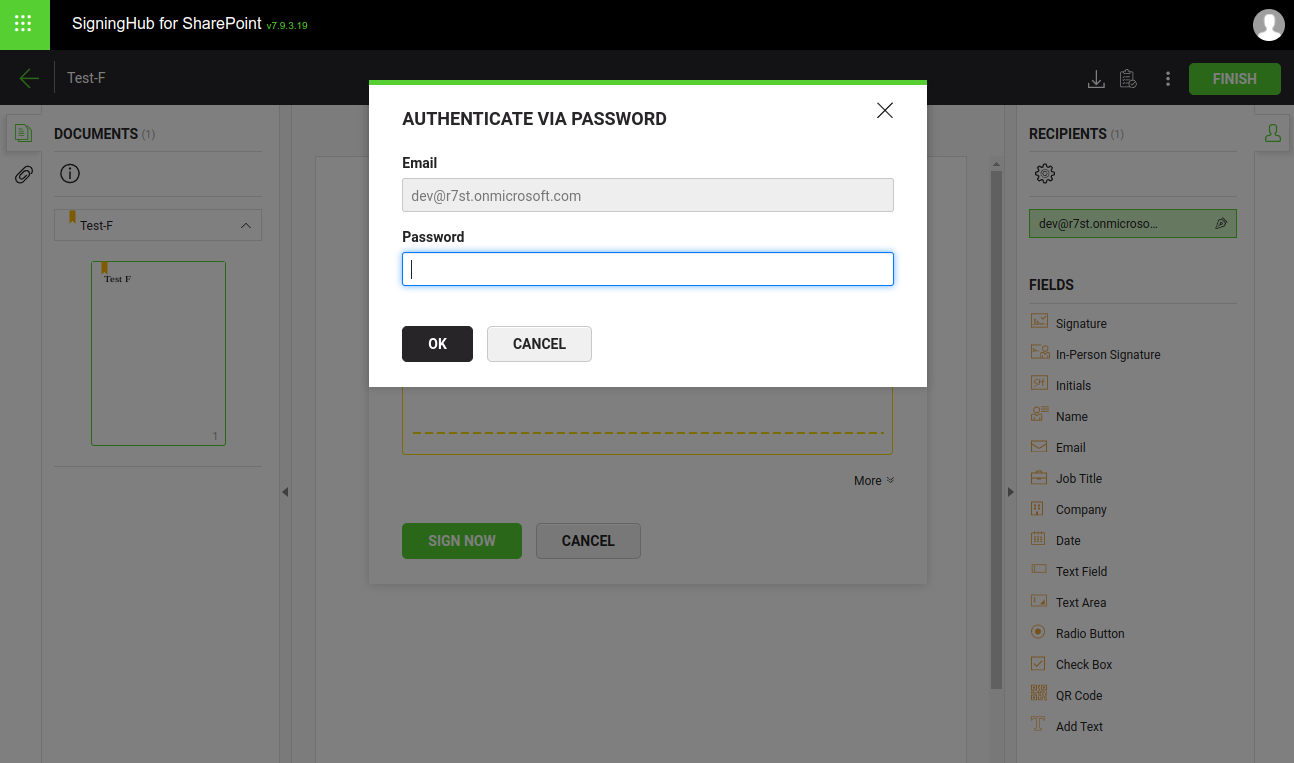
7. Complete authentication when requested:
8. Click the "Finish" button to conclude your signing activity.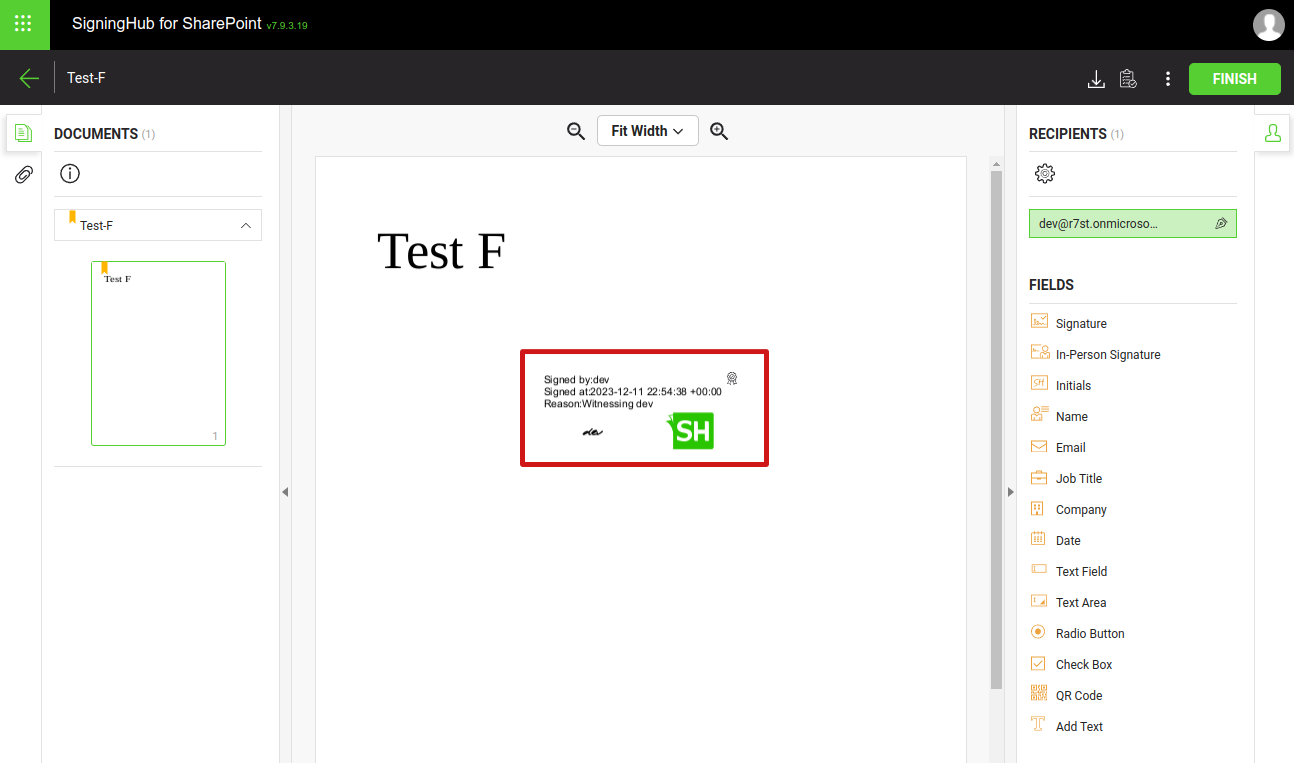
9. If auto-download of the the evidence report is configured, the sytem will download it and display a message when complete. Click "OK" to continue: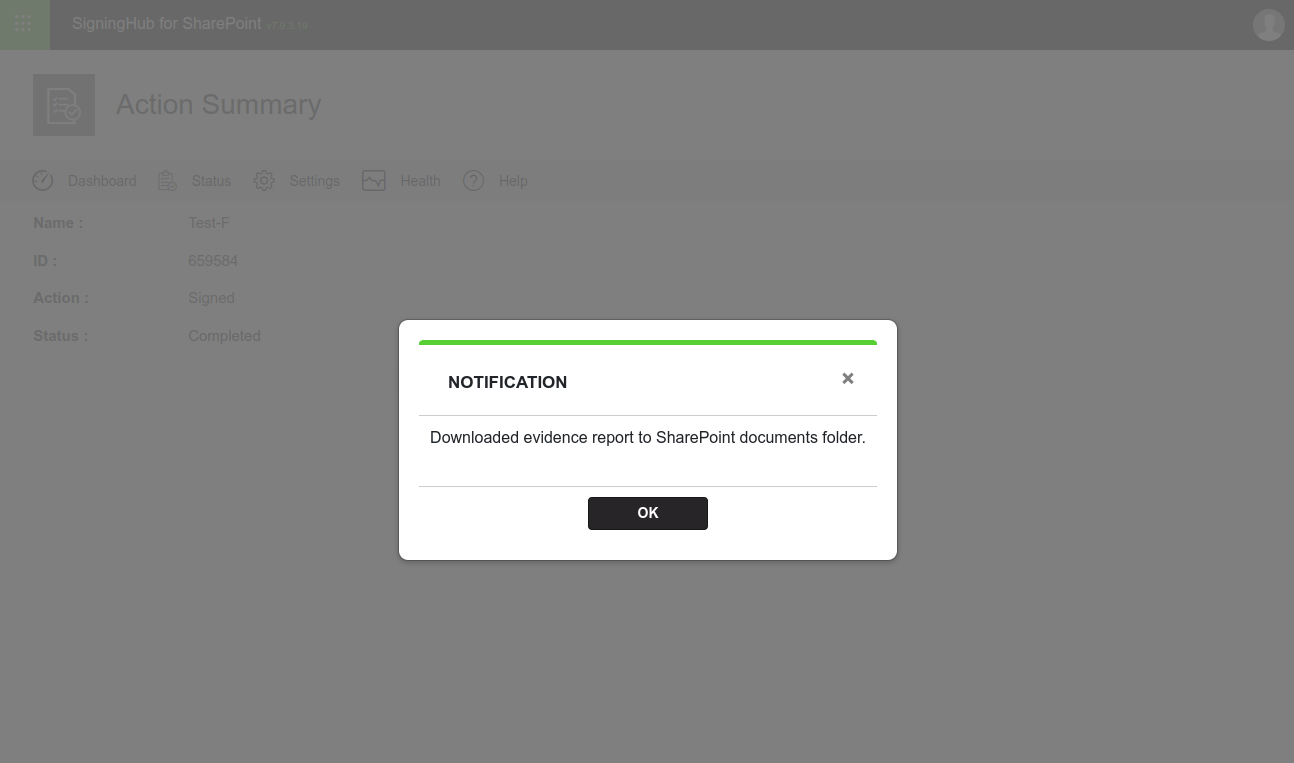
10. A confirmation screen will be displayed, showing the file(s) name(s), package ID, performed action, and document status.
From here you may:
+ Click the "Download" button to download this signed package at your configured location.
+ Click the "Home" button to move to your SharePoint Home screen.