Step 4 - Using the Service Manager
After making configuration changes within the ADSS Certification Service the service must be restarted for the changes to take effect. The certification service manager module allows operators to start, stop or restart the certification service and also make changes to service related configurations. Click on the "Service Manager" button and this screen is shown:
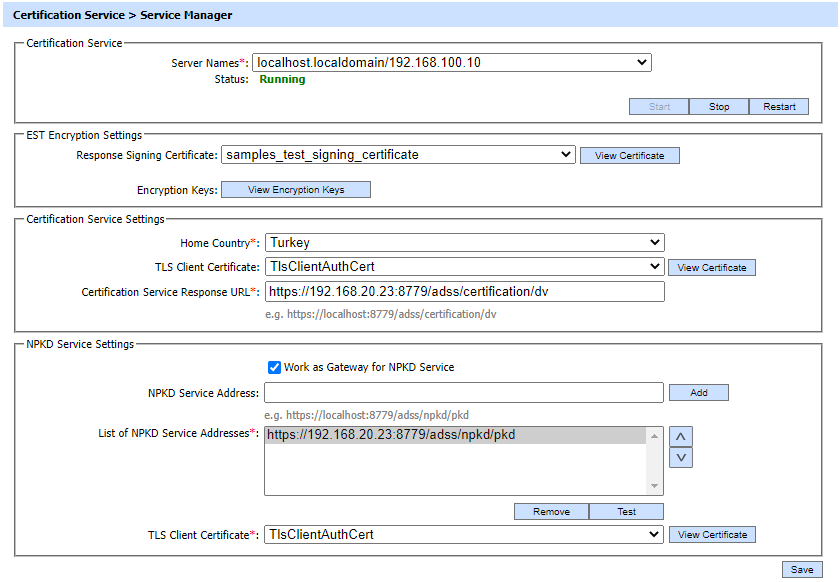
The configuration items are as follows:
|
Items |
Description |
|
Server Names |
The address of the Certification Service being controlled from this Service Manager. Ensure the address points to the correct service URL, i.e. if you are running the service on multiple machines in a load-balanced configuration then check that the name is correct for the particular instance that needs to be started/stopped/restarted. By default it will be that of the local machine. |
|
Start |
Start the service. Status will change to “Running” after a successful start. |
|
Stop |
Stop the service. Status will change to “Stopped” after the service is stopped. |
|
Restart |
Stop and then start the service in one go, Status will change to “Running” after a successful restart. |
|
EST Encryption Settings: |
These settings are enabled if the user wants to return our private key, encrypted in accordance with RFC 7030 mechanism, by using EST Server-Side Key Generation API. |
|
Signing Certificate |
A list of certificates created with 'Document Signing' purpose will appear in the drop-down. The selected signing certificate will be used to sign the server generated private key bytes. These signed private key bytes are also known as CMS signed data. Note: In EST, the CMS signed data are required to transport the server-side generated private key. |
|
Encryption Keys |
Clicking on the 'View Encryption Keys' button will show the list of all the encryption keys to be used for encryption purposes. These keys will be used to create digital enveloped data. Note: In EST, symmetric or asymmetric key required for encryption of server-side generated private key. |
|
Client request messages must be signed |
Select this check box to enforce the requirement that service request messages must be signed by the business application. |
|
E-Passport related settings: |
Below fields are used in the context of E-Passport when Certification Service acts as a CVCA or DVCA. |
|
Home Country |
This field defines the home country of a CVCA or DVCA. |
|
TLS Client Certificate |
This field shows the TLS client authentication certificate of Certification Service. The Certification Service use this certificate while communicating with SPOC. |
|
Certificate Service Response URL |
This field shows the certification service URL of a DVCA that will be sent to domestic SPOC in each request. If the domestic SPOC is operating in asynchronous mode where requests are approved after proper vetting, it would provide the requested certificate(s) on this URL after approval of the admin. |
|
Work as Gateway for NPKD Service |
Enable this option if you want the Certification Service to act as gateway for NPKD Service. This option is only available for a DVCA instance where inspection systems communicate with DVCA that forwards these requests to NPKD Service to fetch the Master Lists and CRLs. |
|
NPKD Service Address |
Use this field to add NPKD service address(es). |
|
List of NPKD Service Addresses |
This field shows the NPKD Service addresses where multiple service addresses can be added. The "Test" button is used to test the connection with the provided address. The "Remove" button deletes a configured NPKD Service address. |
|
TLS Client Authentication |
Certification Service of DVCA will communicate with NPKD Service using this TLS Client Authentication certificate. Select the TLS Client Certificate which pre-exists in the Key Manager. |
|
|
Ensure all the changes are saved by clicking the Save button and restart the service to take changes effect. |

EST Encryption Settings
Clicking on 'View Encryption Keys' button in EST Encryption Settings section displays the following screen:
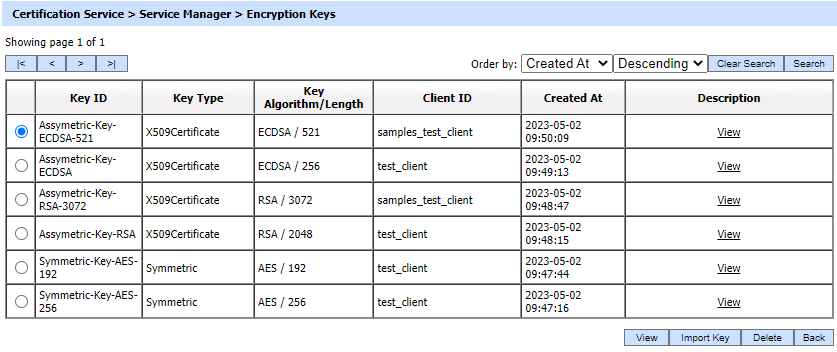
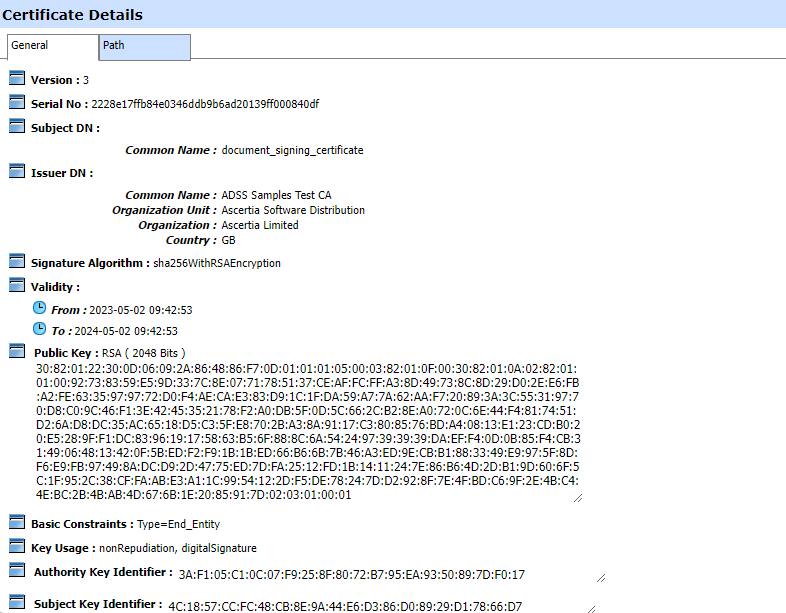
The above screen shows the list of all the encryption keys to be used for encryption purposes. Clicking the View button will display the content of the keys, however the button will be disabled in case of Symmetric keys. See the below screen:
Clicking on Import Key button will display the following screen:
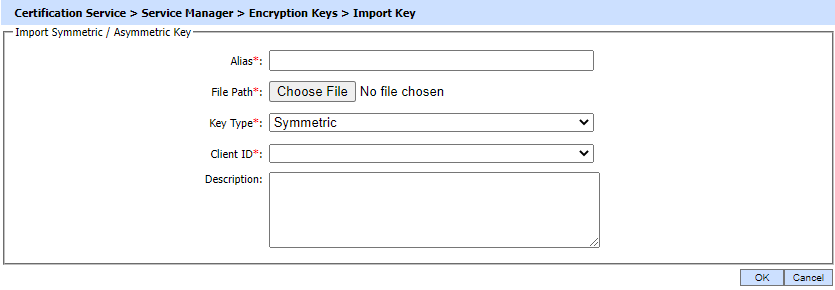
This is virtually the same form as when generating a new key pair, apart from the following differences:
- There is a browse option to import .aes and .cer extension files.
- A Key Type (Symmetric or X509Certificate) needs to be assigned along with the Client ID registered in Client Manager for the respective key.
Once the required fields are filled, click on the OK button to import the respective key.
Clicking on the Search button on the main Encryption Keys page will display the following screen:
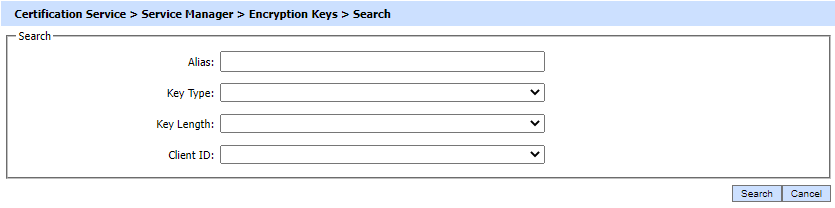
This helps to locate an encryption key that the Certification Service may have issued. Encryption Keys can be searched based on Alias, Key Type, Key Length and Client ID. If a search is based on multiple values, then these will be combined together using the “AND” operand, and thus only records that meet all the criteria will be presented.
|
|
If "_" character is used in the search then it will act as wildcard. |
See also
Step 1 - Configuring Certification Authorities
Step 2 - Creating a Profile
Step 3 - Registering Business Applications