SigningHub for SharePoint lets you share a wide range of custom documents from your SharePoint account with other users, to get them digitally signed. If a document being shared is other than PDF, then SigningHub will convert it into PDF file before sharing it with the configured recipient(s).
Supported documents
See details.
SigningHub allows documents sharing in the form of a documents package. A package may contain multiple files to facilitate sharing bundle of documents by consuming a single workflow from your available quota.
The recipient(s) are notified through email(s) by SigningHub (upon their turn) to sign the documents package. They can see the shared document in the same document library of their SharePoint account, and can sign it.
Before you proceed to share a package:
- You must have the SH-CHECKSTATUS and SH-SHARE permissions in the add-in, and
- Required SharePoint permissions.
Share your document for signing from SharePoint
- Browse the SharePoint site link (as provided by your SharePoint admin) and log into your SharePoint account.
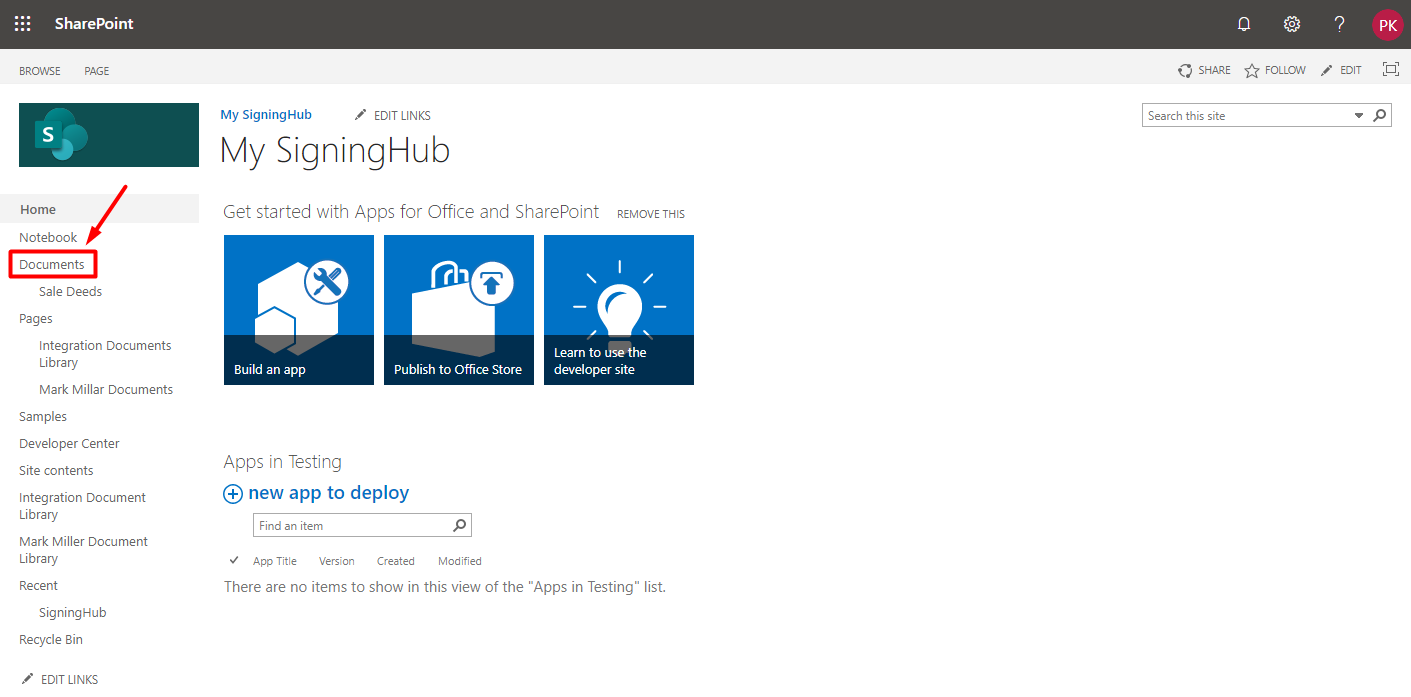
- Click the document library (i.e. default document library, or your custom document library, or a document set) whose document(s) are required to share.
- Click the "Upload" button to upload new document(s) (to share) and select them, or select the document(s) (to share) from your existing documents list. Click here for the supported document types.
- Based on your opted SharePoint View, click the "SigningHub" tab and select the "Share" option.

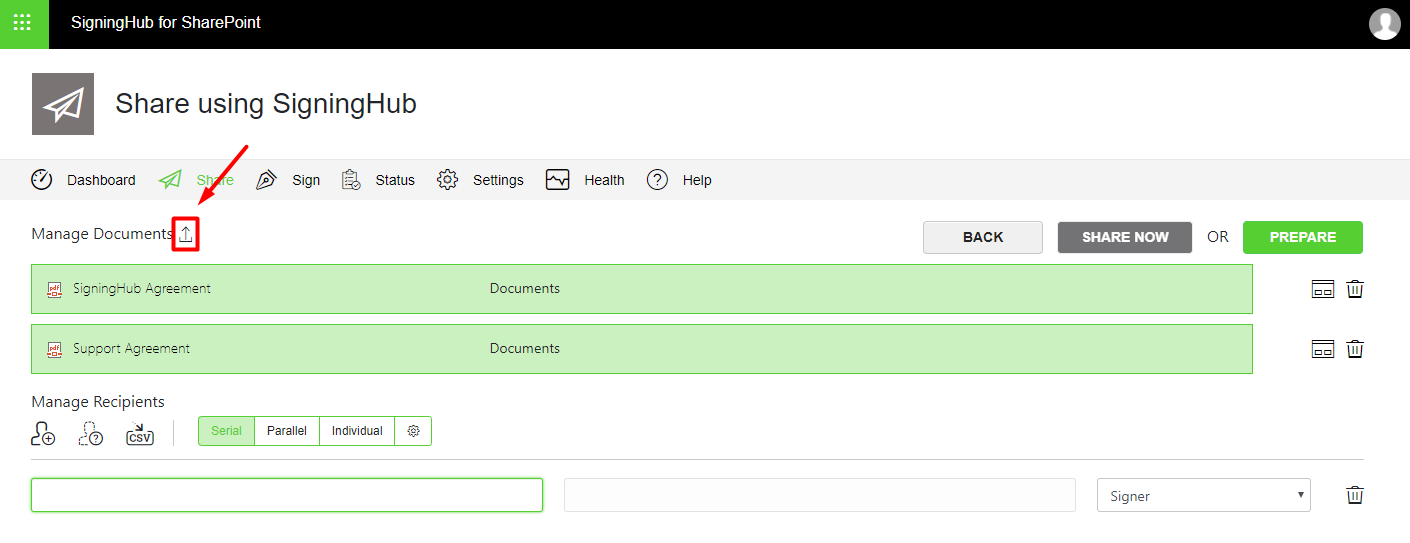
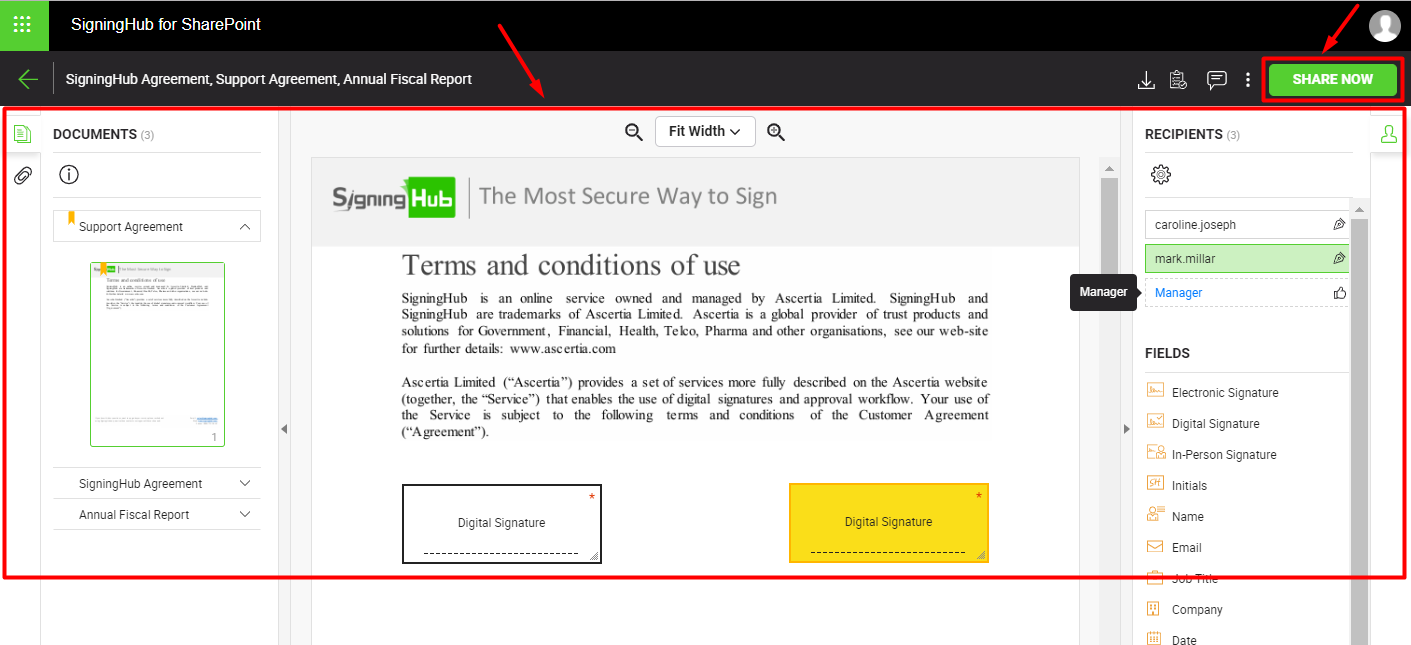
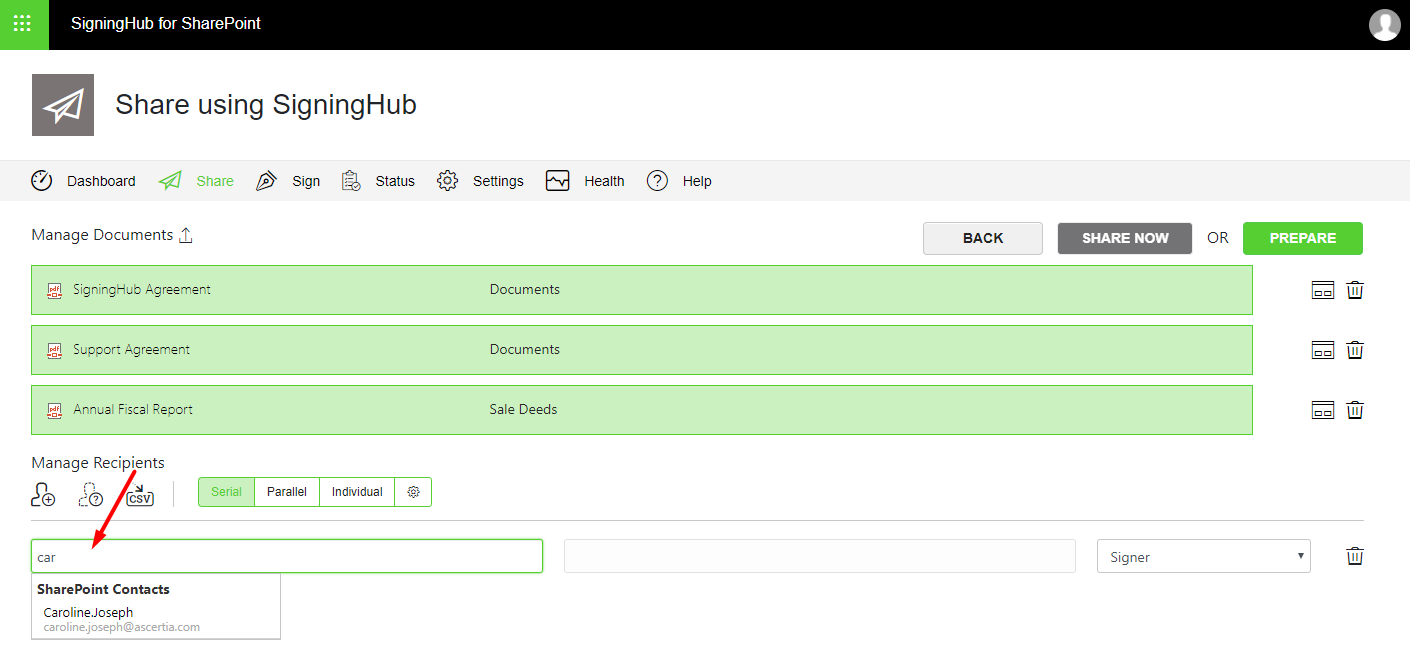
- In the next appearing screen, all the selected documents will be listed under the "Manage Documents" area for further processing.
- Under the "Document Library" column, the respective libraries are listed from where each document is shared.
- In case of selecting a wrong document, use
 adjacent to it to delete it from the documents package.
 - If you skipped any document previously, you can still add them in the same document package.
- Click
 to open a dialog from where you can select the remaining document(s). You can even add documents from different document libraries.
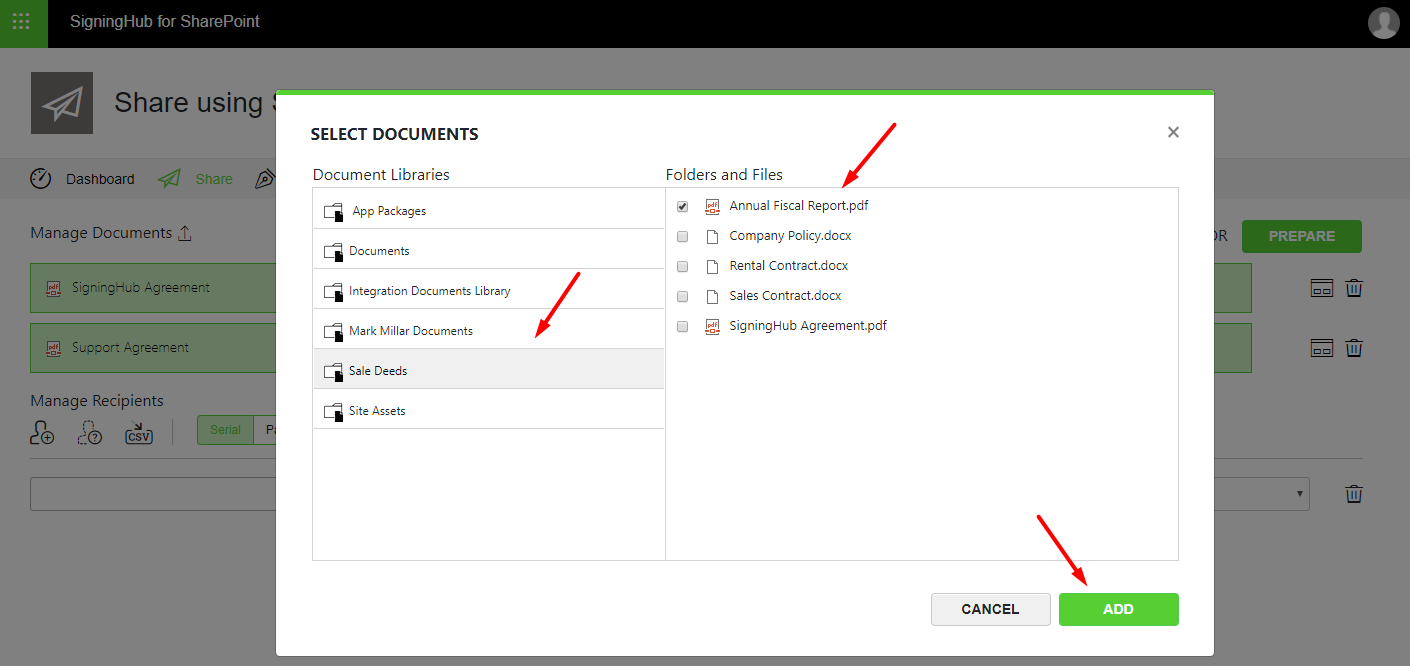
Select a document library from the left column to see its folders and files in the right column. Only the supported file types (see details) will be available for selection. Now select the required document(s) and click the "Add" button.
- You will be moved back to the "Manage Recipients" screen. Configure the workflow type (i.e. Serial, Parallel, or Individual), see details.
-
Specify the contacts, external users, and/ or placeholders with whom you want to share these documents, and configure their roles (i.e. Signer, Reviewer, Editor, Meeting Host, or Send a Copy) in the workflow accordingly. The specified contacts and placeholders are collectively termed as recipients in SigningHub.
- Your SharePoint and SigningHub contact(s) will be available for selection as you type in their name in the "Name" field.
- SigningHub contacts will be listed as per your configurations in the Advanced Settings, i.e. Personal or Enterprise.
- The selected SharePoint contacts will also be added in your SigningHub contacts list for future use, if they don't exist in your contacts list previously.
- You can also use a CSV file to add recipients, see details.
- SigningHub for SharePoint supports group signing as well, so you can add group email IDs as required, see details.
- In case of specifying a wrong contact, use adjacent to the recipient to delete them from the "Manage Recipients" list. Once a contact is specified, a blank field will be displayed below to add another contact and so on.
- After finalising the documents and recipients, click the "Prepare" button to proceed further.

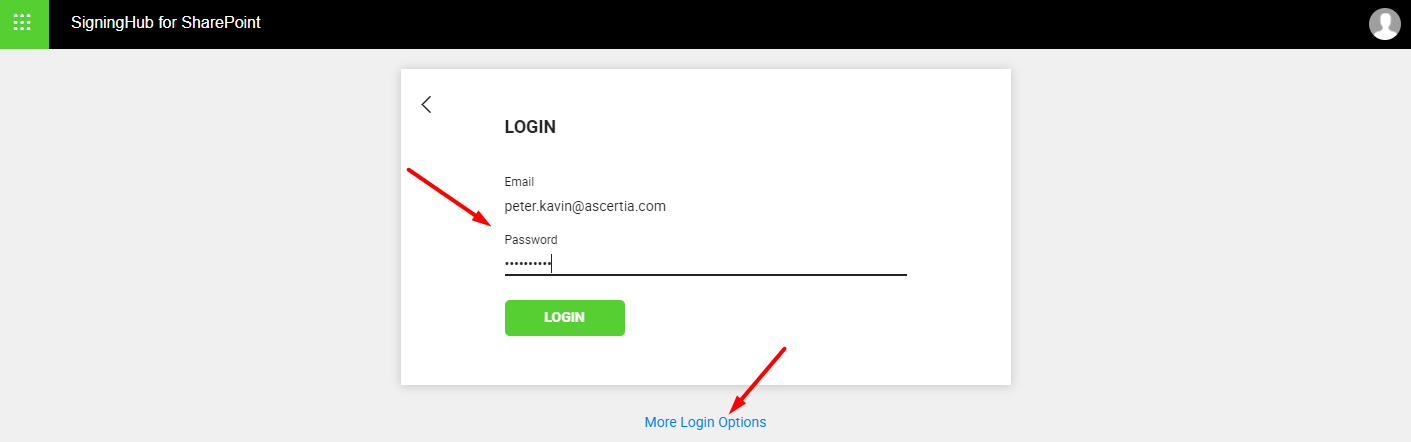
- The authentication screen of SigningHub will appear within SharePoint, specify your credentials to authenticate yourself. There are multiple authentication ways in SigningHub, click the "More Login Options" link to use the advanced login options, see details.
SigningHub for SharePoint also supports multi-factor authentication (i.e. login credentials and OTP), if it is configured in the roles settings of your SigningHub enterprise account, see details.
You can also skip the SigningHub authentication screen by turning on the "Allow recipients to access the documents without login when using email link or integrated application" checkbox from your SigningHub Enterprise account, see details.
- After successful authentication, the document(s) will be opened inside SigningHub in preparation mode, see details. Configure all the workflow related details as required and click the "Share Now" button.
- A confirmation screen will be displayed, showing the file(s) name(s), package ID, performed action and document status.

Please wait for a while for the "OK" button to enable. Now you may:
- Click the "OK" button to move to the originating screen (i.e. the screen from where you started the document sharing activity)
- Click the "Download" button to download the document in your SharePoint account, see details.
- Click the "Home" button to move to your SharePoint Home screen.
1. SigningHub supports sharing a document from a Default/ custom Document Library and Document Set within your SharePoint account. Go to the related Document Library or Document Set and share their documents as required. You can even add documents from different document libraries in a single documents package.
2. The name of your custom document library or document set should contain only those special characters that are supported by SharePoint, i.e. !@$^. SigningHub will not allow sharing documents from a document library or document set that may contain any special character other than the supported ones.
3. You must have the SH-CHECKSTATUS and SH-SHARE permissions in the add-in and required SharePoint permissions to share a documents package.
4. SigningHub for SharePoint also supports multi-factor authentication (i.e. login credentials and SMS OTP), if it is configured in the user role of your SigningHub enterprise account, see details.
5. For a recipient (contact) to view their pending documents within SharePoint, they should have SH-CHECKSTATUS and SH-SIGN permissions in the add-in and required SharePoint permissions to view and sign a document.
6. The CSV file used to add recipients must have the valid email addresses of the recipients. SigningHub supports three different types of email headers in a CSV file, i.e. Primary Email, E-mail Address, and Email Address. You can export your contacts (in CSV) from Outlook, Thunderbird, or any other email service provider that supports these email headers.
7. If you do not want to view the SigningHub login screen for each document transaction, you may turn it off from your SigningHub Enterprise Settings/ Accessibility Preferences, see details.
8. Whenever a documents package is shared, the workflow quota of respective document owner's account is consumed, and hence the available count is decreased by one.