After successful installation, SigningHub account settings are configured to integrate the SigningHub for SharePoint add-in with your Microsoft SharePoint account. For this you need to have an active enterprise account in SigningHub. Before you proceed to browse this section, you must have the "SH-SETTINGS" permission.
When installing the SigningHub add-in on multiple site collections, you may either use a single SigningHub integration for all your site collections or a separate SigningHub integration for each site collection. You can even install the add-in on a catalog site and share the deployment with other site collections.
These settings are done at SigningHub enterprise account level. Which implies that once an enterprise account is integrated by their enterprise admin, the same settings can be applicable to all their enterprise users.
Configure your SigningHub account settings
- Register an Enterprise account in SigningHub.
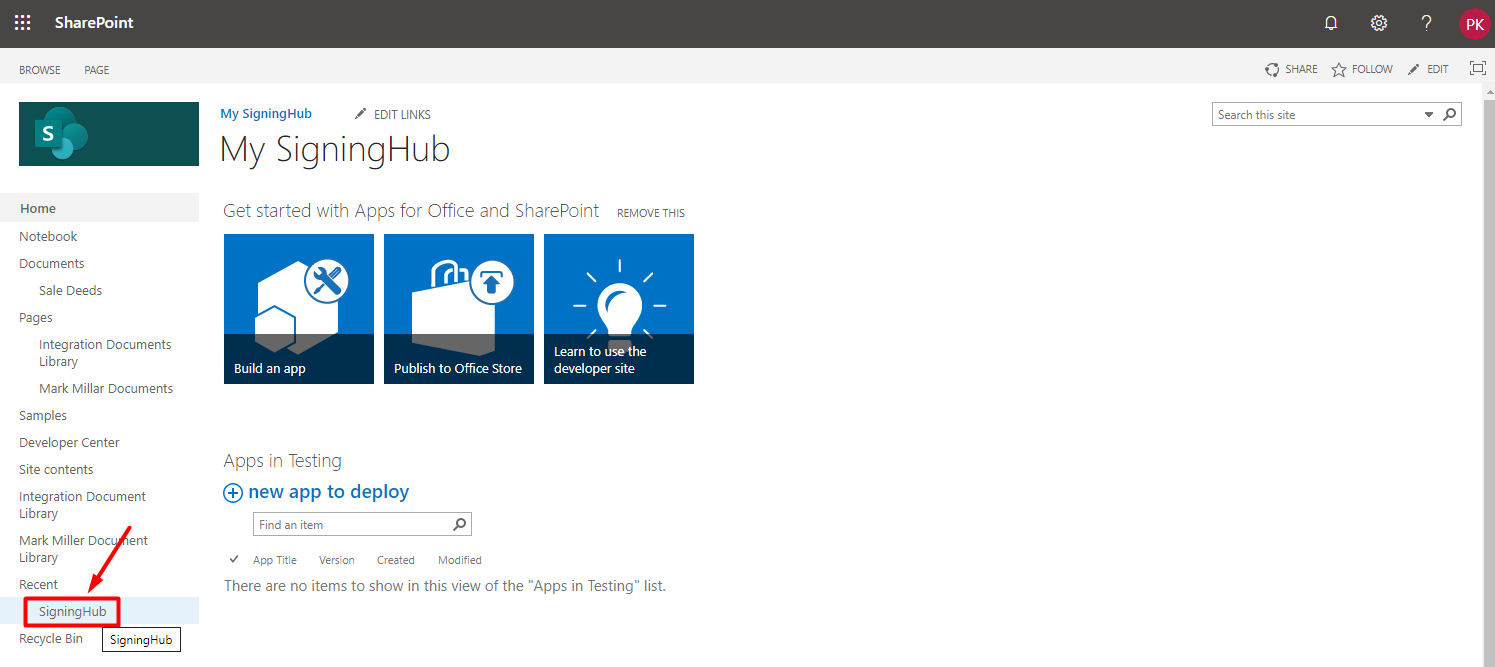
- Browse the SharePoint site link (as provided by your SharePoint admin) and log into your SharePoint account.
- Click the "SigningHub" option from the left panel.
- Click the "SigningHub Account Settings" option from the next appearing screen.

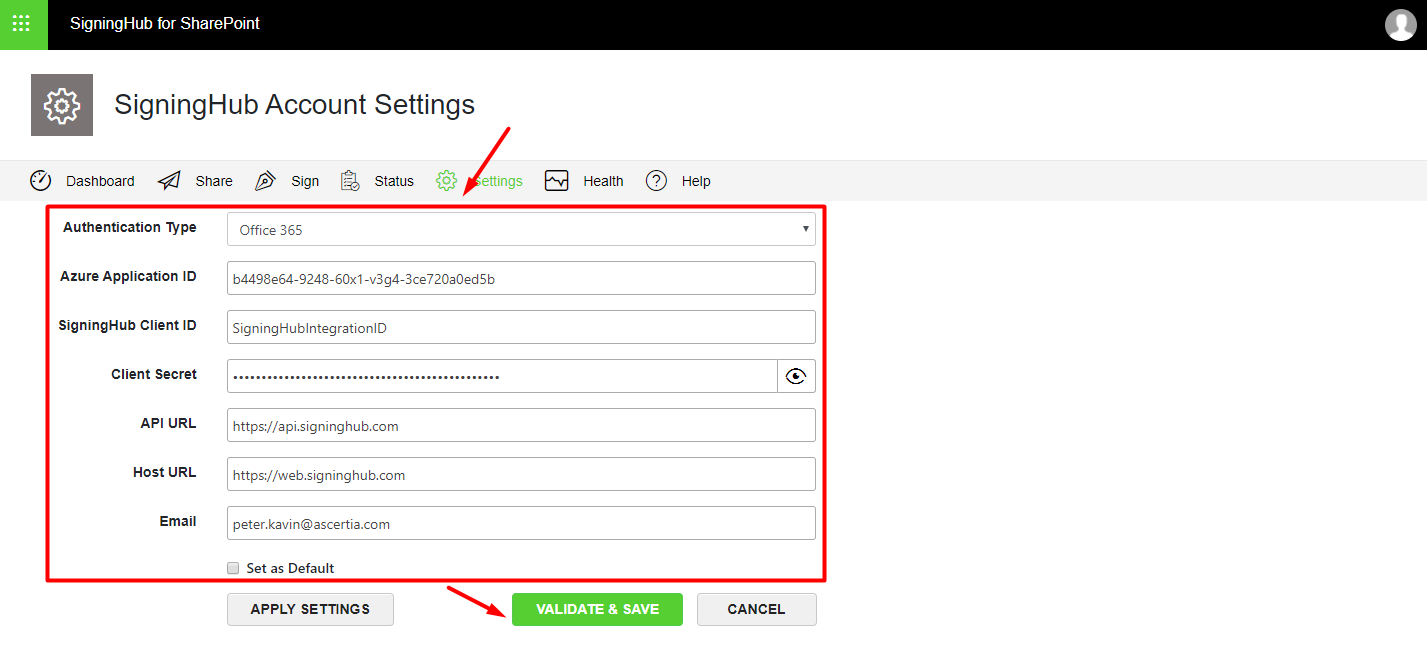
- Account settings will appear from where you can configure and authenticate the account details. You can authenticate yourself in two ways, i.e. SigningHub or Office 365. See the below table and images for their respective description.
SigningHub Account Settings Fields Description Authentication Type When you select the Authentication Type as "SigningHub", you will be authenticated via your SigningHub credentials (i.e. ID and password). System will need the Client ID and Client Secret that have been specified in your SigningHub Enterprise Settings (SigningHub>Enterprise Settings>Integrations>Application Integration>Step 6) to validate the integration settings.
Conversely, if you select the Authentication Type as "Office 365", you will be authenticated via your Office 365 credentials (i.e. ID and password). System will need the Azure Application ID in addition to the Client ID and Client Secret that have been specified in your SigningHub Enterprise Settings to validate the integration settings.
Azure Application ID This field will only appear when the Authentication Type is "Office 365".
Specify the Application ID that is generated in Azure Active Directory, when you register your app in Azure Active Directory. See details how to get this ID.
Client ID Specify the client ID as specified in
SigningHub>Enterprise Settings>Integrations>Application Integration>Step 6.
Client Secret Specify the client secret as generated in
SigningHub>Enterprise Settings>Integrations>Application Integration>Step 6.
Clickto view it.
API URL
Specify the URL of SigningHub API, i.e. "https://api.signinghub.com".
In case if your SigningHub deployment is on a server other than Signinghub.com, then you will have to specify this URL accordingly.
SigningHub Host URL Specify the URL of SigningHub Host, i.e. "https://web.signinghub.com".
In case if your SigningHub deployment is on a server other than Signinghub.com, then you will have to specify this URL accordingly.
Specify the email of SigningHub Enterprise Admin account that needs to integrate with your SharePoint account.
Password
Specify the password of Enterprise Admin account.
Set as Default SigningHub for SharePoint allows multiple enterprises to integrate their SigningHub accounts over a single SharePoint Site Collection. This implies that more than one enterprise can use a single instance of SigningHub for SharePoint installed on a SharePoint Site Collection and can specify their unique integration settings.
Select this checkbox to save the specified settings as default account settings for other Enterprise users. This is useful in the cases where different Enterprises save their own account settings to integrate with SigningHub. When a new SharePoint user attempts to integrate with SigningHub, this settings will be shown to them as a default account settings in the available settings list. In this way, they will have the option whether to use any of the available settings or provide their own to integrate their SharePoint and SigningHub accounts.
In case, if no Enterprise user marks their account settings as default, SigningHub itself picks those settings that are available on the top of the list for a new SharePoint user. However, the user will still have the option to either go with the system's suggested settings or provide their own, see details.
Validate & Save
After specifying your account details click the "Validate & Save" button to validate them.
Authentication Type = SigningHub
If all the information is correctly supplied, a success message is displayed in green color and the account information is saved. It will also open the Health screen. See the "SigningHub Authentication" image below for the reference.
Authentication Type = Office 365
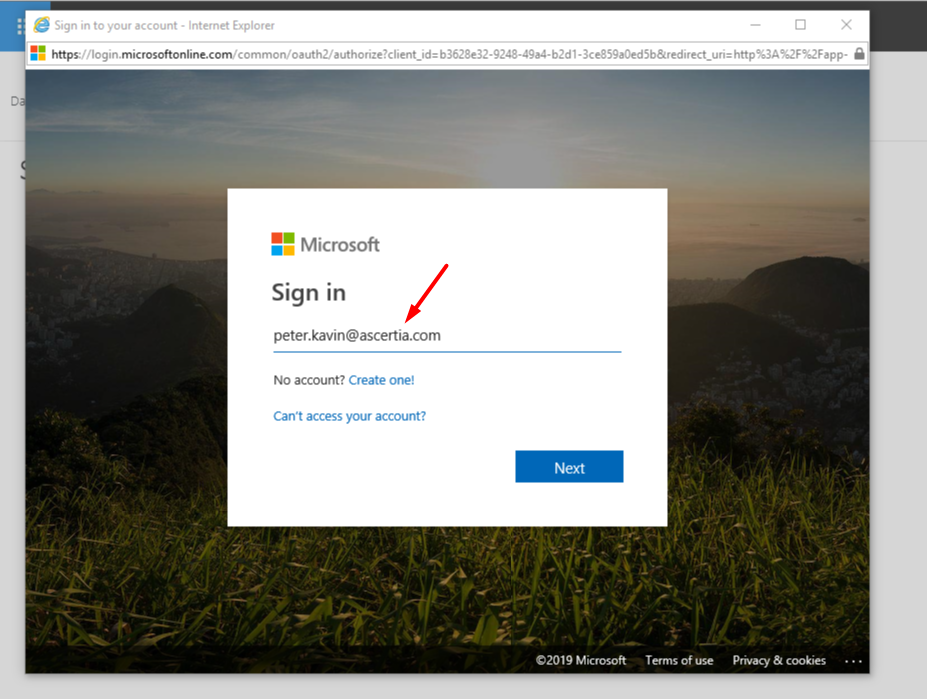
If all the information is correctly supplied, the Microsoft Office 365 app will appear in a popup. Specify your Microsoft Office 365 ID and password in the app and click Login. After successful authentication, the Health screen will appear. See the "Office 365 Authentication" images below for the reference.
If SMS OTP authentication is enabled in your SigningHub user role, an OTP will be sent to your mobile device when you click the "Validate & Save" button. System will prompt for the OTP before validation. The specified account details can be validated only after providing the correct OTP.
Apply Settings This button is used to update the settings of all your enterprise users within the same enterprise. Click this button when there is any change in your existing accounts settings and you are looking to reflect these changes in the account settings of all your enterprise users.
Make sure the account details are validated and saved before the changes are applied on your enterprise users.
SigningHub Authentication

Office 365 Authentication
1. The user configuring SigningHub account settings within SharePoint must have the "SH-SETTINGS" permission. This is an administrative permission, so should be allowed only to tenant application administrators.
2. When installing the SigningHub add-in on multiple site collections, you may either use a single SigningHub integration for all your site collections or a separate SigningHub integration for each site collection.
3. SigningHub for SharePoint also supports multi-factor authentication (i.e. login credentials and SMS OTP), if it is configured in the user role of your SigningHub enterprise account, see details.