Configuring the Go>Sign Service
Smart cards store digital certificates that can be used to validate (authenticate) a user’s identity to the network. Digital certificates are used in X.509 systems, and are part of an organization’s public key infrastructure (PKI). Smart card support is available only on Windows platforms.
The smart card/ USB token can be used on any device and it is completely secure.
ADSS Web RA Server supports two types of key stores for smart card token:
- MSCAPI (Microsoft Crypto API)
- Smart card / USB Token
To create a certificate request with MSCAPI follow the instructions below:
- Login to the ADSS Web RA web portal, expand Certificate Center > Create Requests.
- To create a certificate request, using
 icon on top right.
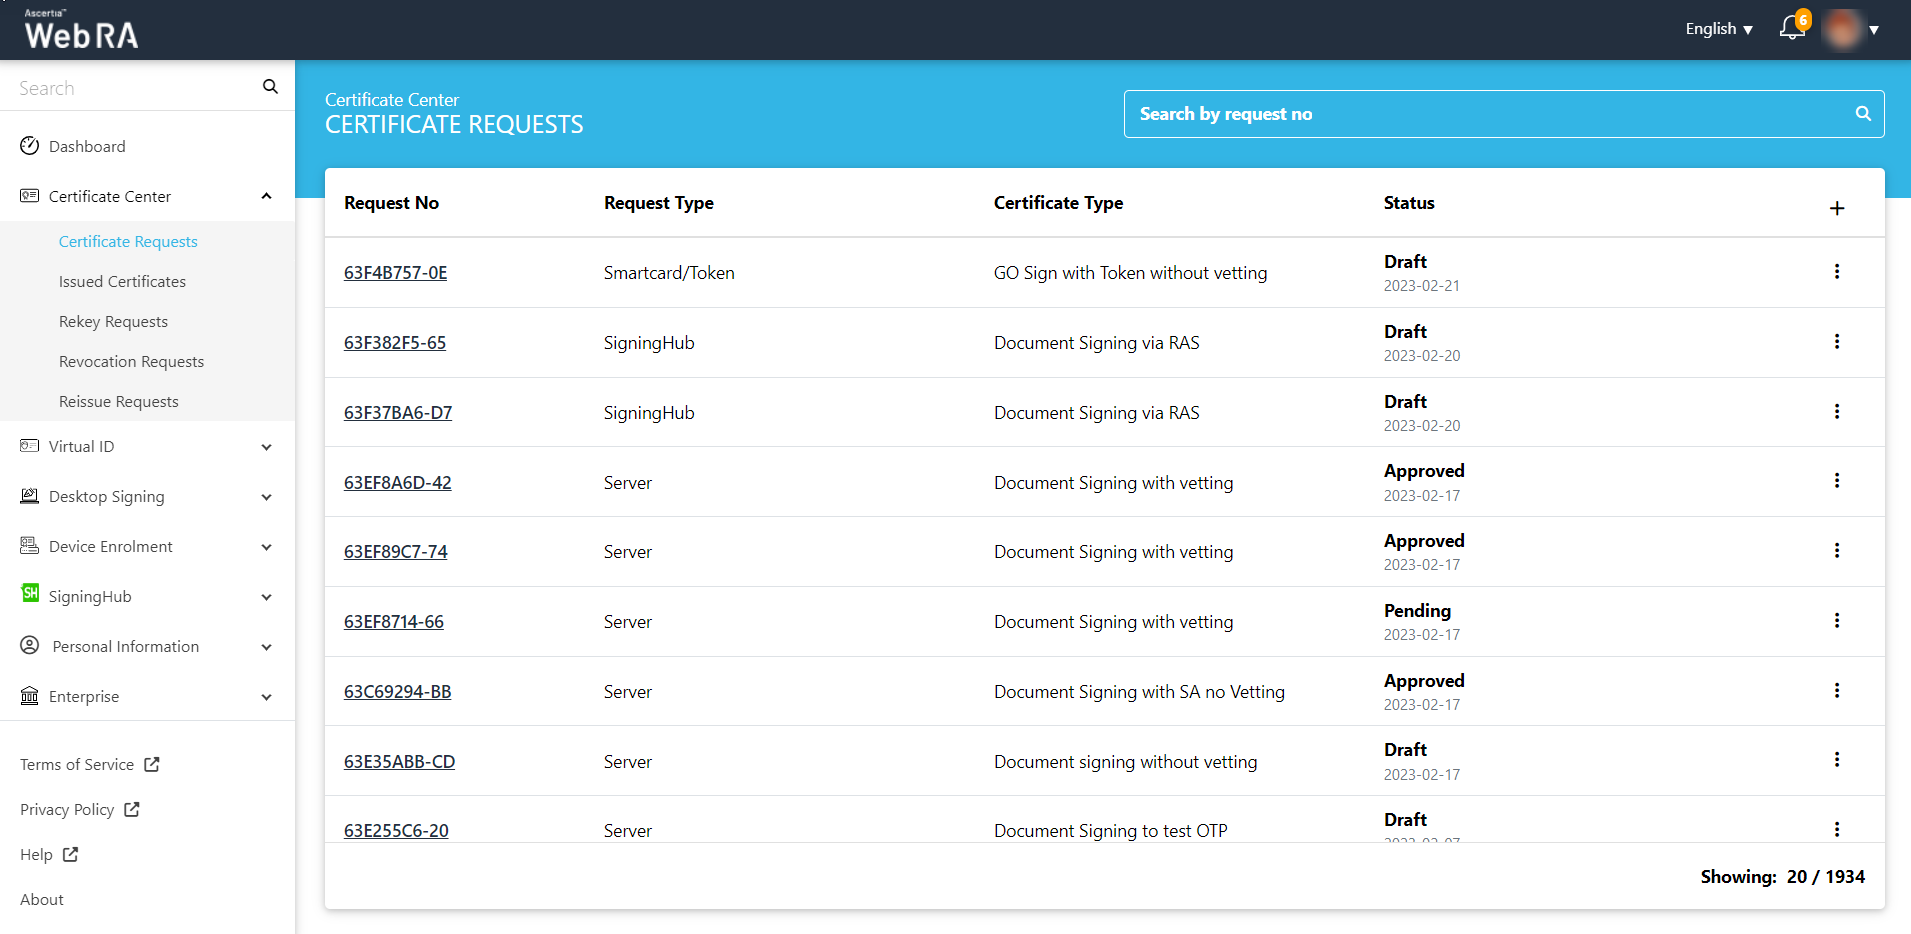
- Select the certificate type from the drop down, fill in the details. Then click Create. Here, the validity period will appear as per the configurations in the certification profile.

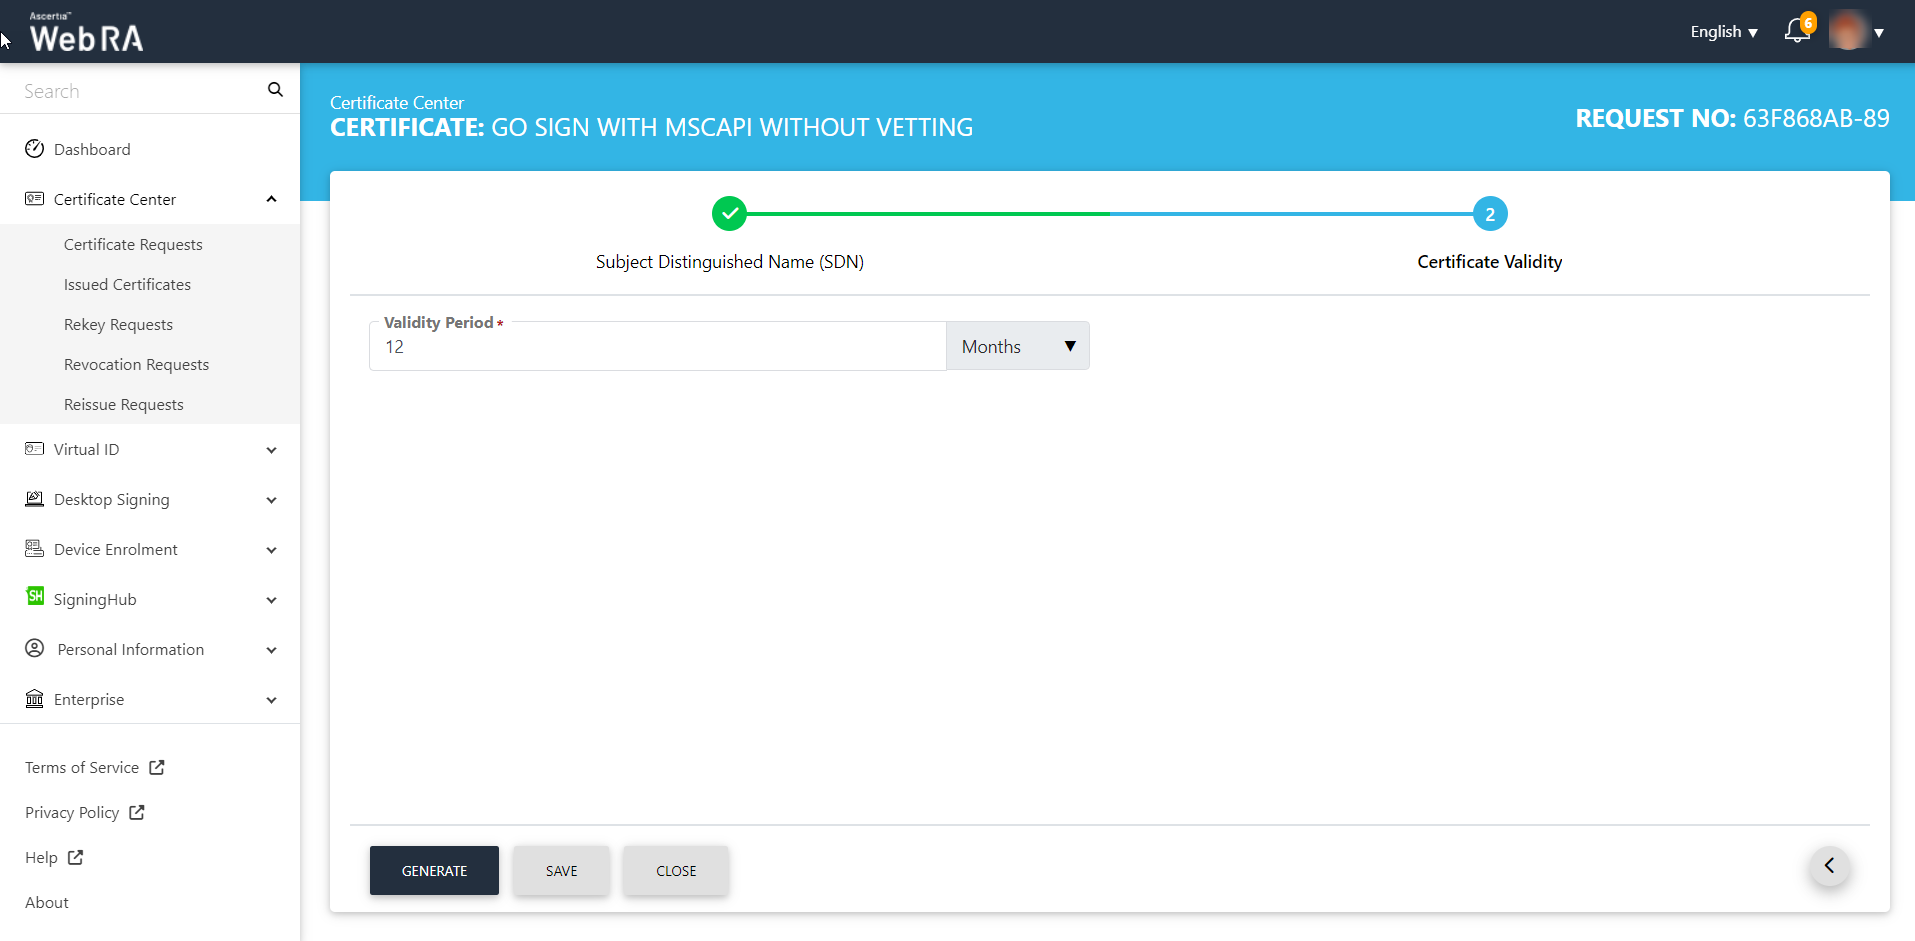
- Enter your email address and click >.

- The certificate validity period will be auto-filled and in a disabled form. Then click Generate.
- Once the certificate request is generated, it displays the following:
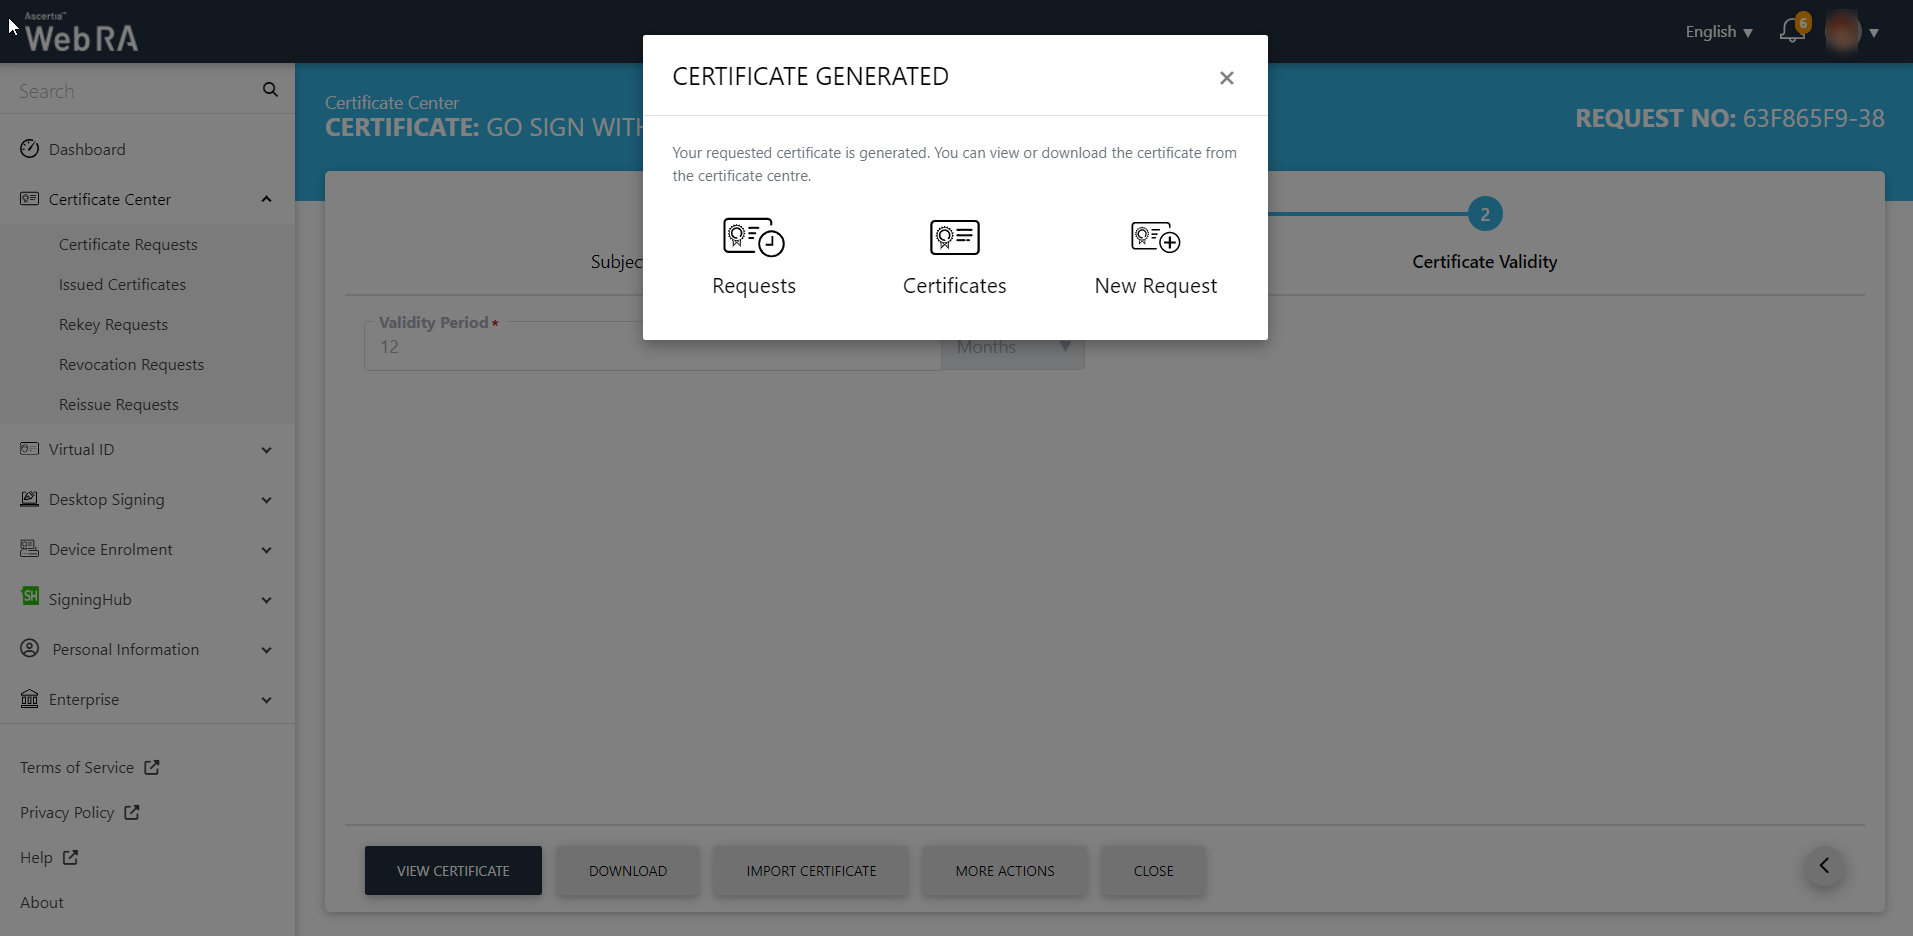
In the MSCAPI, a certificate request is generated without requiring a smart card/USB token.
You can also import a certificate by clicking on the Import Certificate button on the screen.
Pre-Requisites for Go-Sign Service
Following are pre-requisites for using the Go-Sign service:
- Install safe net authentication client on your machine.
- Install Go-Sign Desktop on your machine.
- Make sure you have created a Go-Sign certification profile.
- Make sure you have connected the smart card/USB token to your machine.
Create a Request with Go-Sign Service
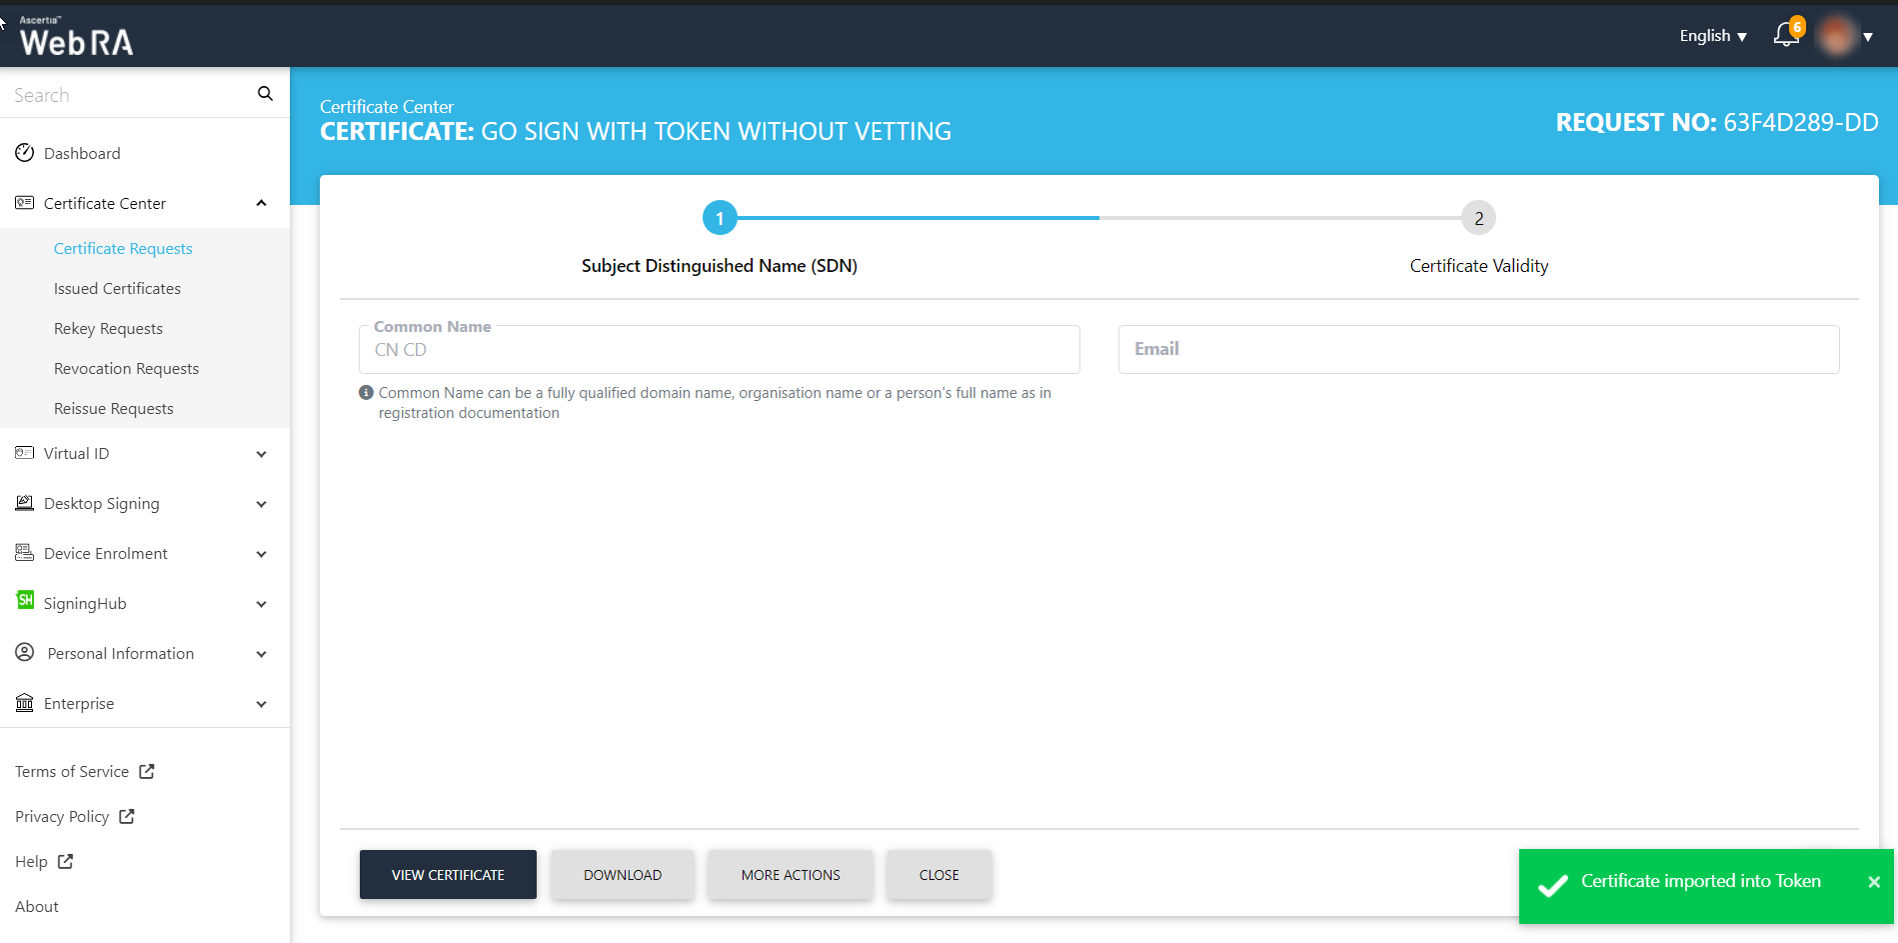
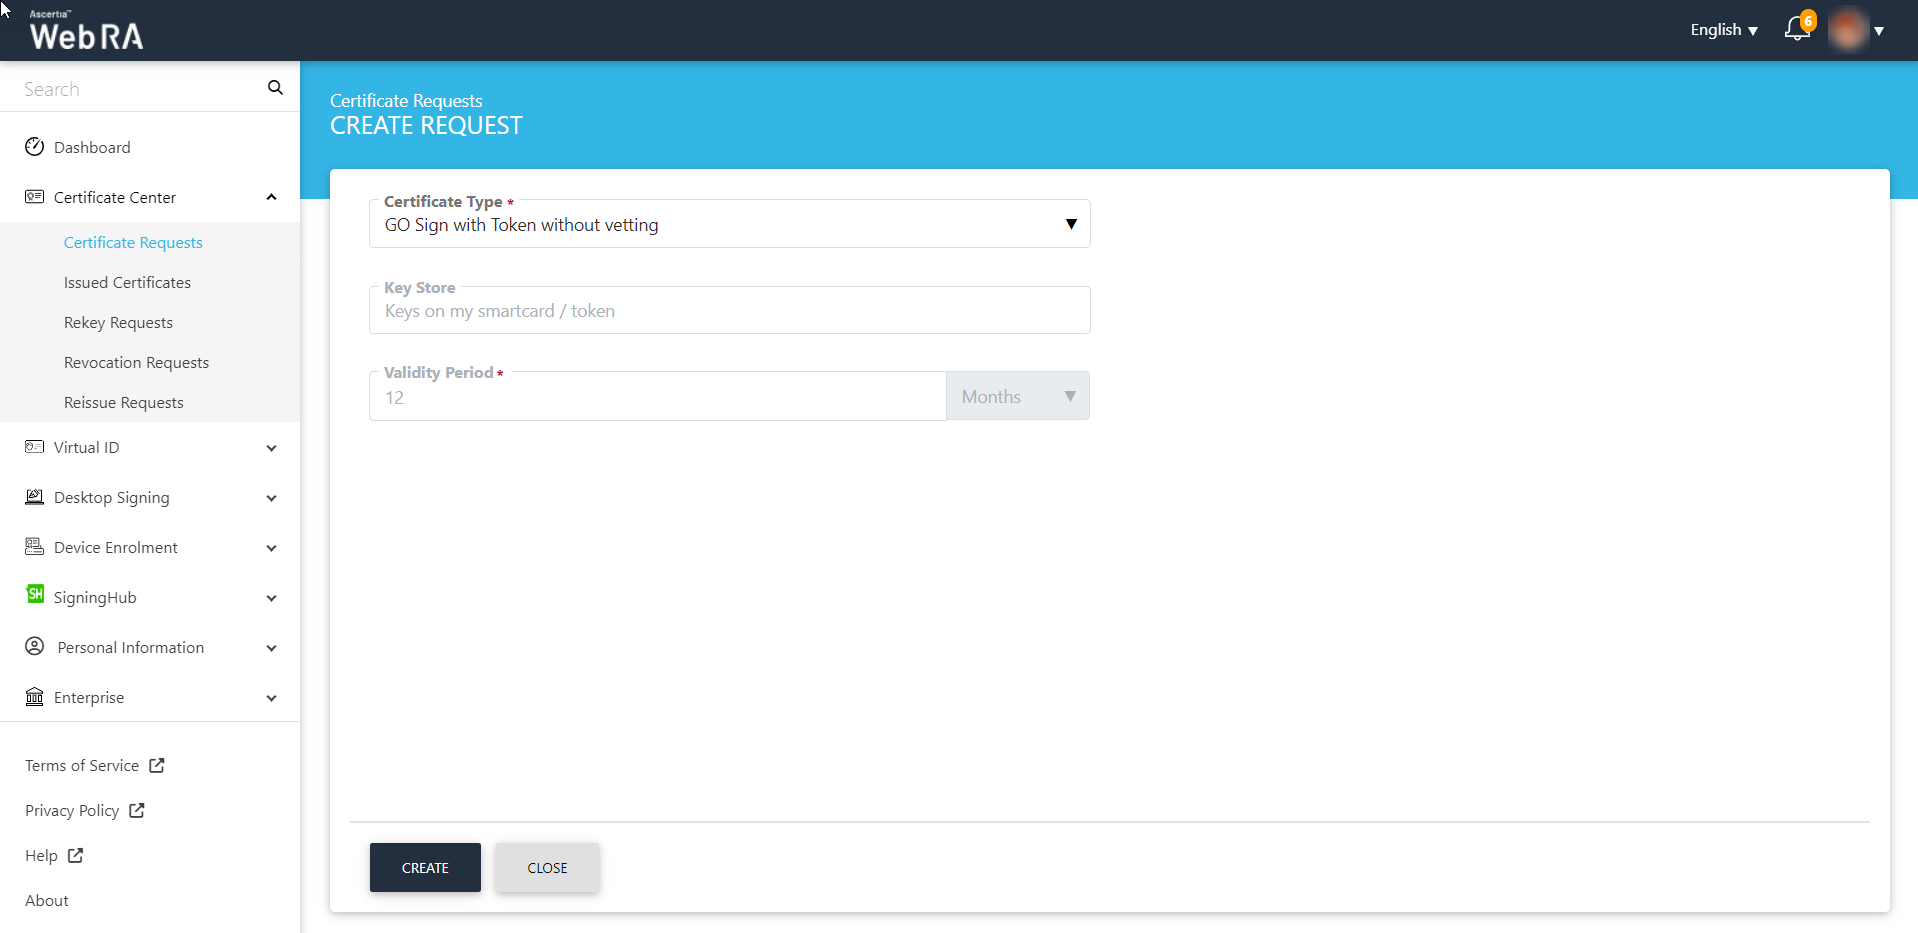
To create a certificate request with a smart card / USB token follow the instructions below:
- Ensure that you have connected the smart card / USB token with your machine.
- Login to the ADSS Web RA web portal, expand Certificate Center > Create Requests.
- To create a certificate request, using icon on top right.
- Select the certificate type from the drop down, fill in the details. Then click Create. Here, the validity period will appear as per the configurations in the certification profile.
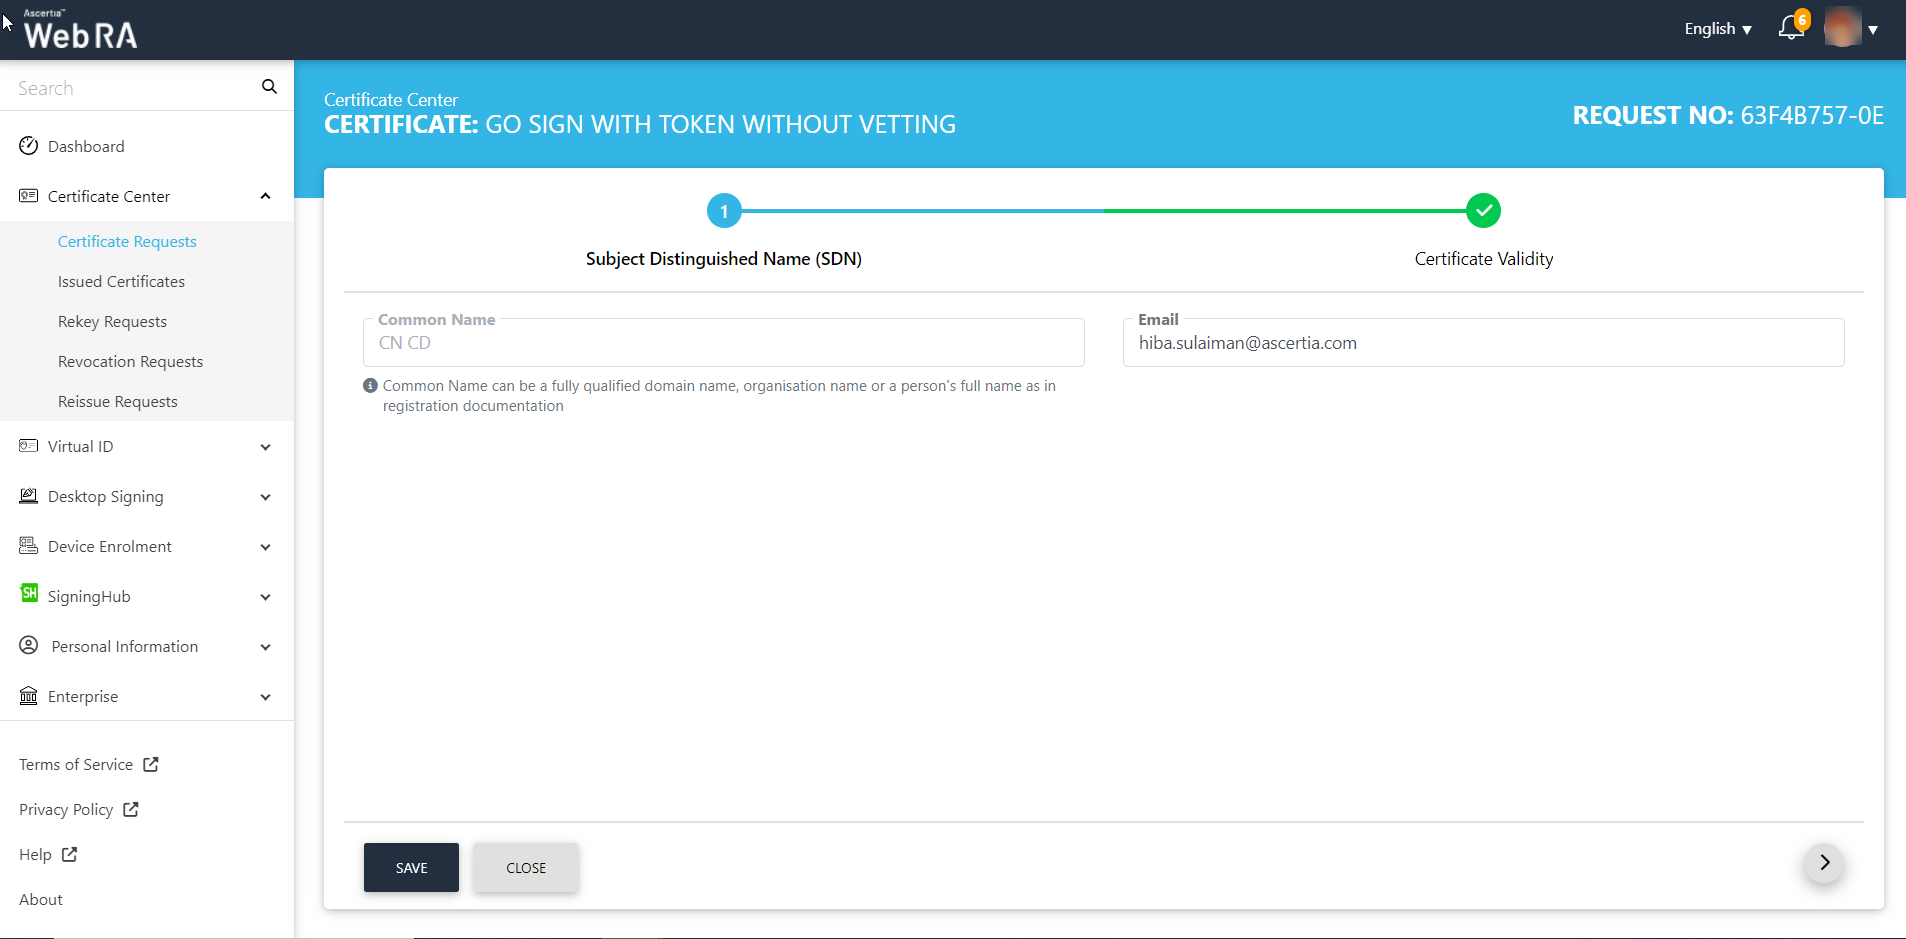
- Enter your email address and click next.
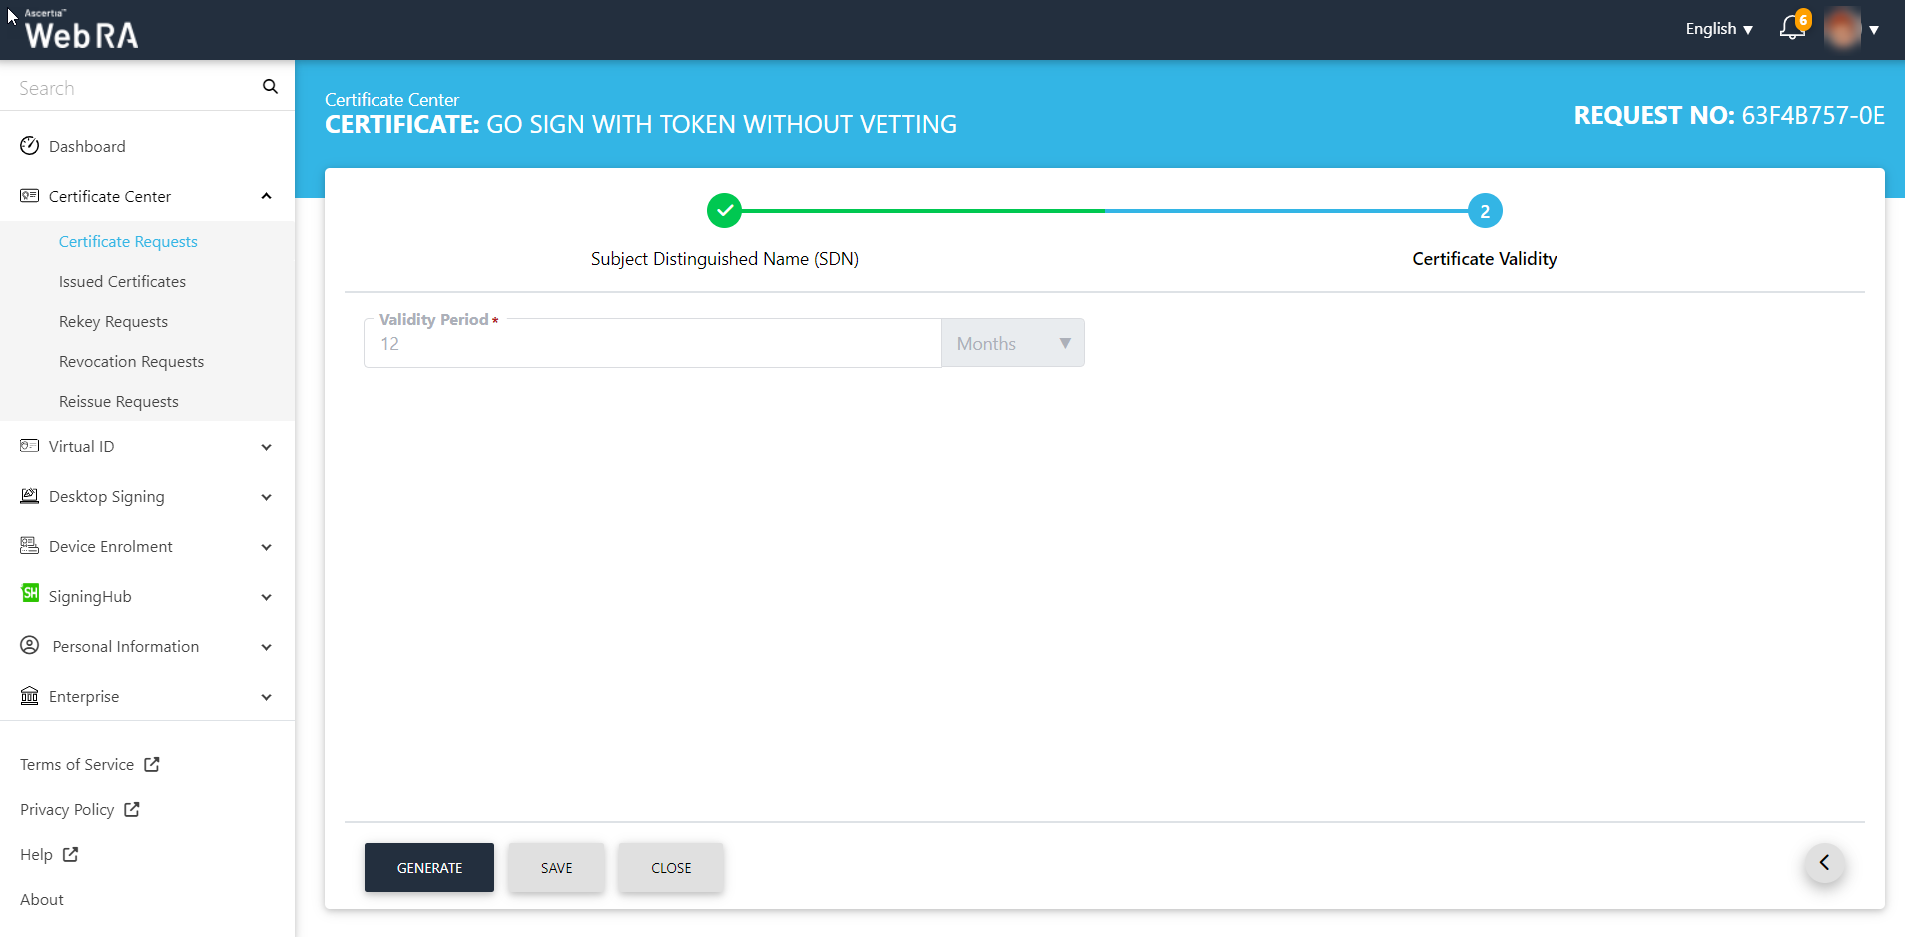
- The certificate validity period will be auto-filled and in a disabled form. Then click Generate.
Once the application detects the token and Go-Sign is also running successfully, the following screen is displayed. And once the certificate request is generated, it redirects you to the Certificate Requests listing.

Following roaster message will be displayed once a certificate is imported into the token: