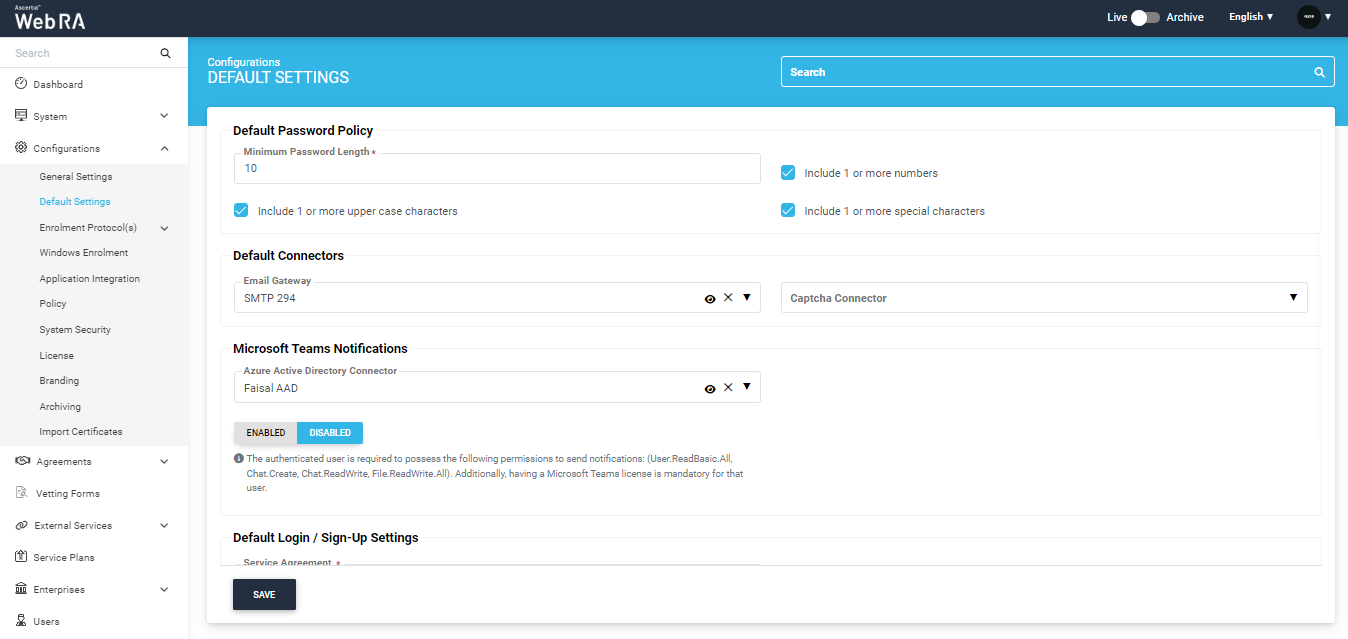
Default Settings
There are some default settings that will automatically apply for new users and enterprises. The users and enterprises will be able to change these settings by themselves if allowed by the ADSS Web RA administrator.
To set the default values follow the instructions given below:
Expand Configurations > Default Settings from the left menu.
This section allows an administrator to configure settings for the following:
- Default Locale
- Default Password Policy
- Default Connectors
- Default Login / Sign-Up Settings
The following tables describe each field:
Default Locale
|
Field |
Description |
|
Allowed Language |
An operator can select allowed language (s) for ADSS Web RA users. ADSS Web RA supports English, French and Arabic languages. |
|
Default Language |
This drop down will only enlist those languages that are configured in the Allowed Languages drop down. When a language is deselected from Allowed Languages, the Default Language drop down will also be updated based on the current configurations. |
|
Allow users to change Language |
If this check box is selected, users will be able to change the language on their profile settings. |
|
Country |
Select a default country (e.g. United Kingdom) for your ADSS Web RA application. When a user does not specify their country in their registration form, ADSS Web RA will save the default country in their profile. |
|
Allow users to change the Country |
If this check box is selected, end users will be able to change the country on their profile settings |
|
Select a default time zone (e.g. UTC Dublin, Edinburgh, Lisbon, London) for your ADSS Web RA Server application. The timing information (available throughout the system) and the time will be displayed as per the default time zone. This applies to all lists appearing in the application. |
|
|
Allow users to change the Time Zone |
If this check box is selected, end users will be able to change the time zone on their profile settings |
|
|
The time zone selected here, appears the same on the activity logs from both, ADSS Web RA admin and web portals. |

Default Password Policy
|
Field |
Description |
|
Minimum Password Length |
This allows an operator to set a minimum password length required for the application (e.g. 1,2, etc.). It allows an operator to tick the following checkboxes:
|

Default Connectors
|
Field |
Description |
|
Email Gateway |
This is a default connector that will be used if a user has not configured any connector in the application |
|
Captcha Connector |
When a new user registers, this Captcha appears to complete the registration process |
An operator can configure registration/sign-up settings in this section. The registration process in ADSS Web RA Server is based on two identifiers:
- Enterprise registration - An operator will enable enterprise registration on sign-up. This means that an enterprise will be registered to ADSS Web RA Server using an email address.
- User registration - An operator will enable user registration on sign-up. In this case, a user will be registered to ADSS Web RA Server using either his citizen ID or email address as the login identifier.
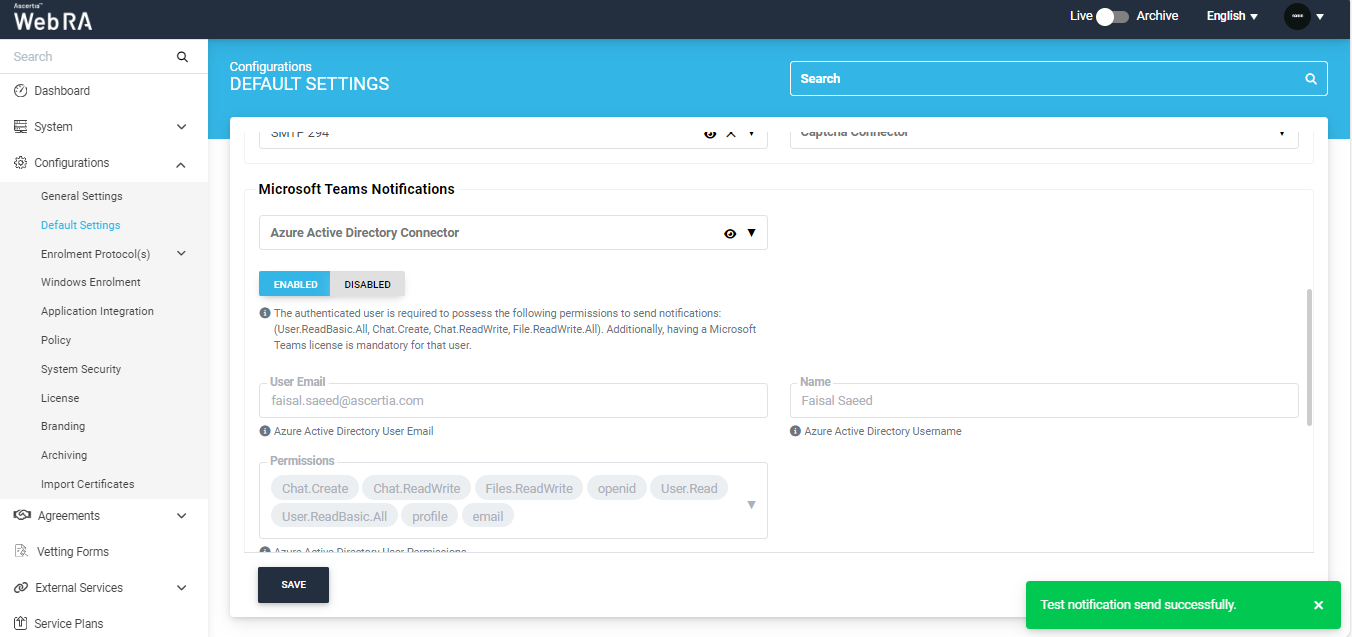
Microsoft Teams Notifications
This section enables the configuration of ‘Azure Active Directory Connector’ that allows an operator to receive system notifications directly in their Microsoft Teams application.
To do that, the operator needs to first attach the required connector in this section.
|
Field |
Description |
|
Azure Active Directory Connector |
From this dropdown, select the required 'Azure Active Directory Connector' that contains the data of the operator to whom Microsoft Teams notifications will be sent. |
|
|
Having a Microsoft Teams license is mandatory for the user to receive system notifications. Furthermore, the following permissions must be allowed in the Microsoft Teams app:
|
After selecting the connector, click on the 'Enabled' tab to activate the configuration. (By default, the 'Disabled' option is selected).
Once the setting is enabled, the system will display a ‘Microsoft: Sign in to your account’ popup, where the operator will be required to ‘Accept’ the requested permissions.
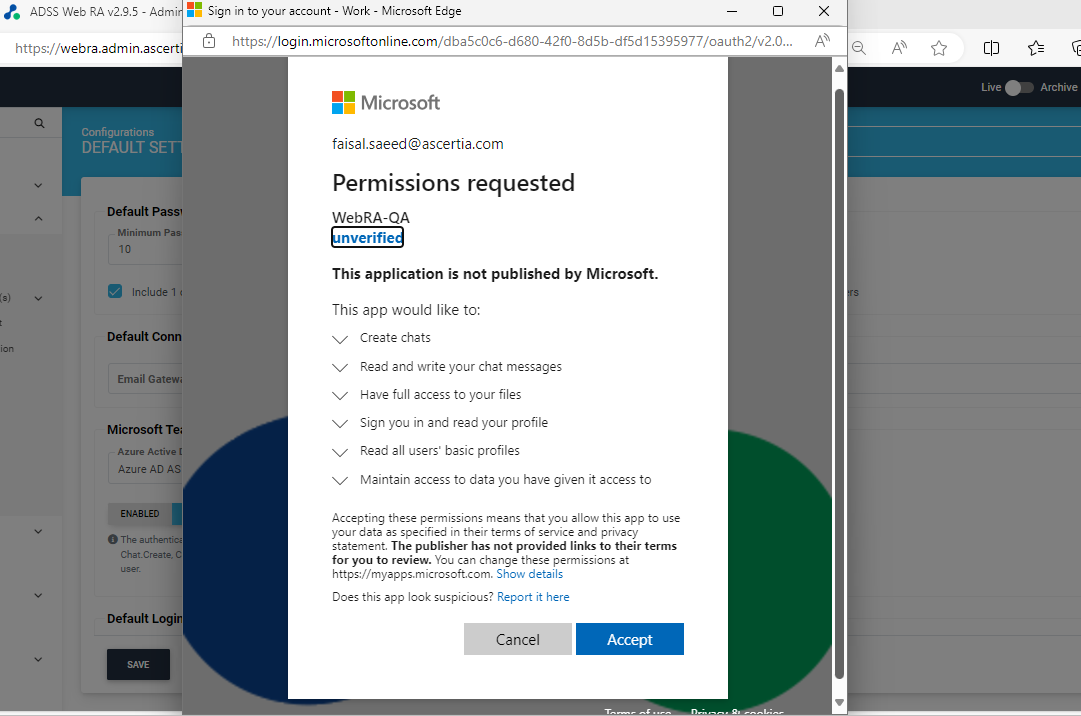
After reading about the requested permissions, click on the ‘Accept’ tab to proceed.
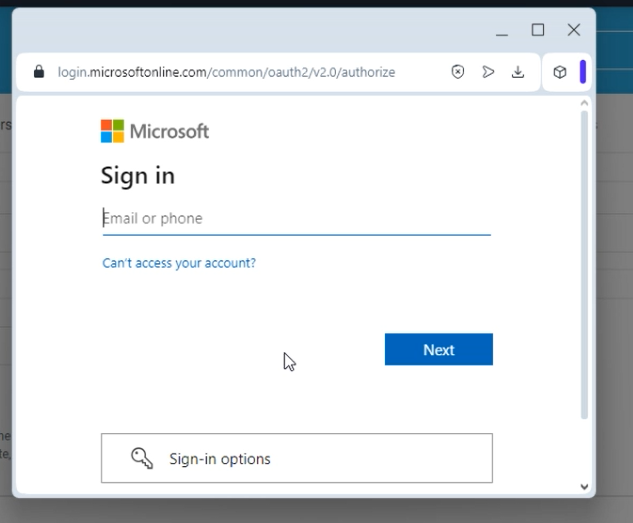
The system will display a Microsoft login window. Here, the operator is required to add the credentials of the Microsoft user for whom the required permissions have been enabled. This particular user will be receiving system notifications in Microsoft Teams.
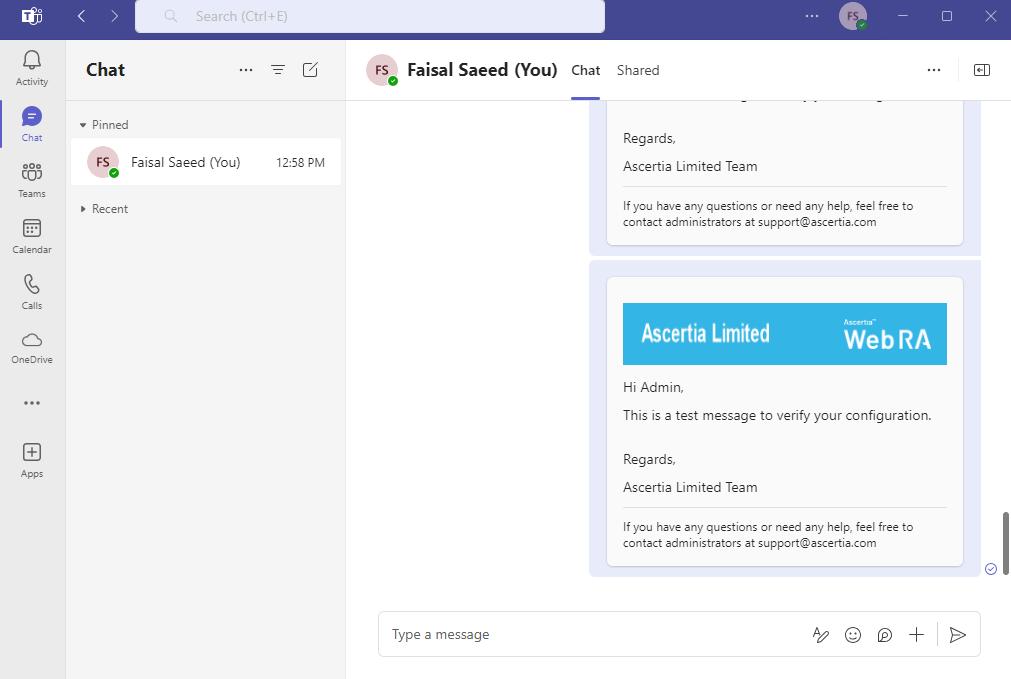
Once the ‘Sign-In’ process is complete, the system will display a ‘Team Test Connection’ popup. This popup allows the operator to send test notification to verify the configuration.
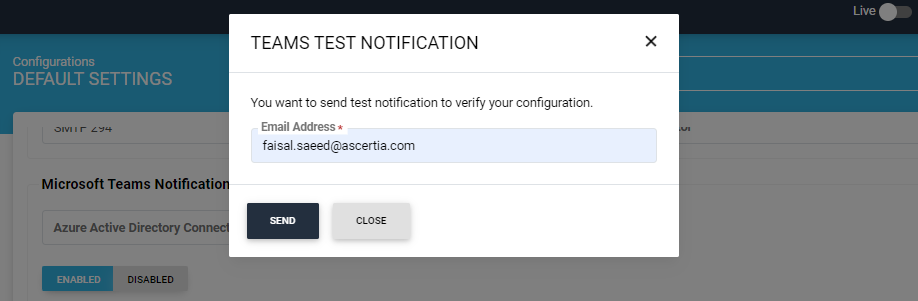
To test the connection, provide the email of the user and click ‘Send’.
If the configurations are implemented, the system will display a ‘Test connection send successfully’ text at the bottom right of the screen.
Moreover, the user will receive a message in the Microsoft Teams application regarding the verification of the configuration.
Once the ‘Microsoft Teams Notification’ setting is enabled, the operator can view the following details of the user in disabled form:
- Azure Active Directory User Email
- Azure Active Directory Name
- Azure Active Directory User Permissions
Click ‘Save’ to apply the new settings.
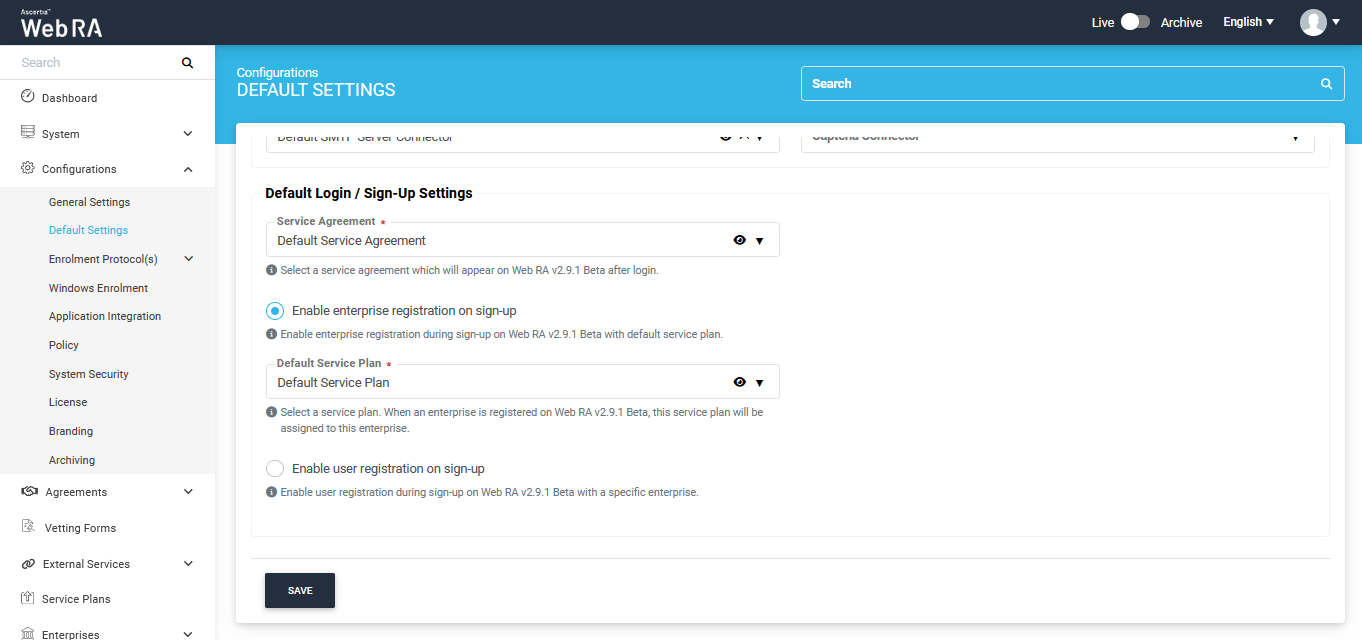
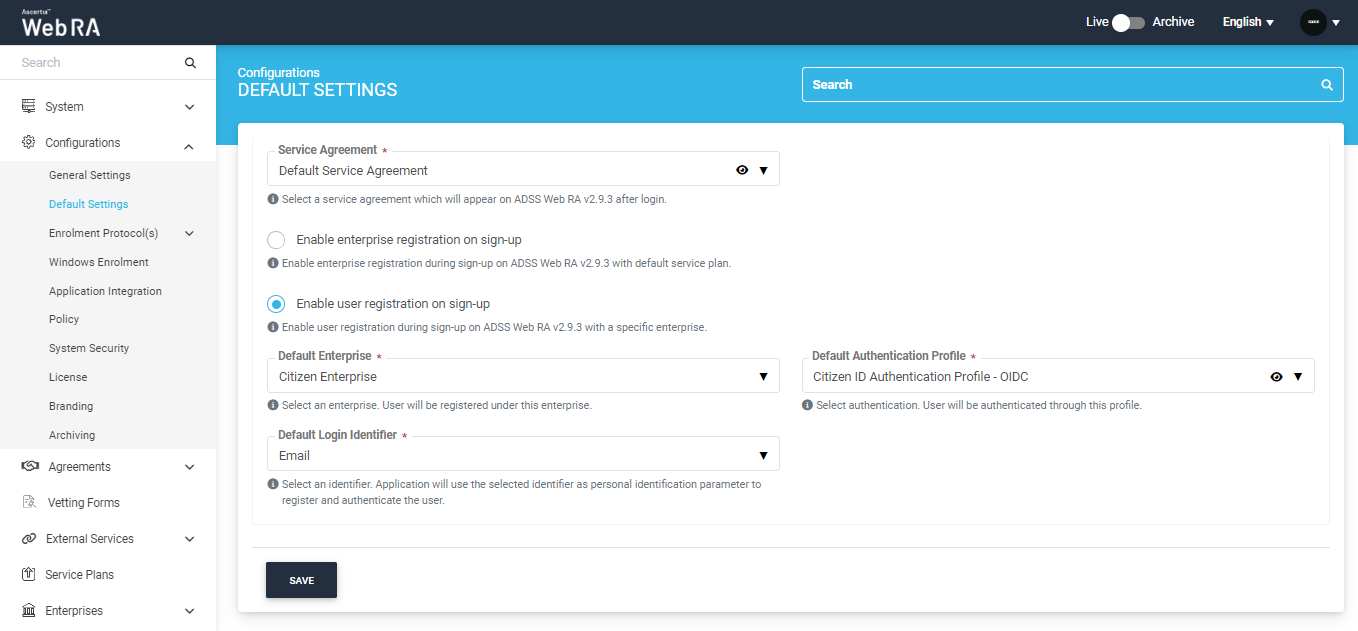
Default Login / Sign-Up Settings
|
Field |
Description |
|
Service Agreement |
The available service agreements will be displayed here, and the operator can select the required service agreement. Each service agreement contains the terms of service and privacy policy details. It will appear to the user during login, and the user must agree to it. |
|
Field |
Description |
|
Enable enterprise registration on sign-up |
Select this radio button if you want to enable enterprise registration during sign-up on Web RA with default service plan. A user can sign-up through his email ID. In this an enterprise will be registered and a default service plan will be assigned to it. |
|
Enable user registration on sign-up |
Select this radio button if you want to enable user registration during sign-up on Web RA with a specific enterprise. A user can sign-up through his citizen ID or email. |
Default Login / Sign-Up Settings
If you select Enable enterprise registration on sign-up the following screen will appear:
|
Field |
Description |
|
Default Service Plan |
Select a service plan. This service plan will be assigned to this enterprise upon registration. An administrator can either select a service plan or select none from this drop down. In case of None, the Sign up option doesn't appear when a user logs in from the web portal. |
If you select Enable user registration on sign-up the following screen will appear:
|
Field |
Description |
|
Default Enterprise |
A user will be registered under this enterprise. So when a user will sign-up/login from ADSS Web RA web portal, he will be registered under this enterprise. |
|
Default Authentication Profile |
A user will be authenticated through this profile. |
|
Default Login Identifier |
This identifier will be used to register and authenticate the user. Administrator can set one of the following identifiers. According to selected authentication profile:
|
Click Save to save your configurations.