
Profile
The Profile screen allows users to change their profile picture and update their personal information, such as their name, email address, citizen ID, mobile number, job title, location, enterprise name, and role name.
To access the Profile screen, expand Profile Information > Profile from the left-tree menu in the Web Portal.
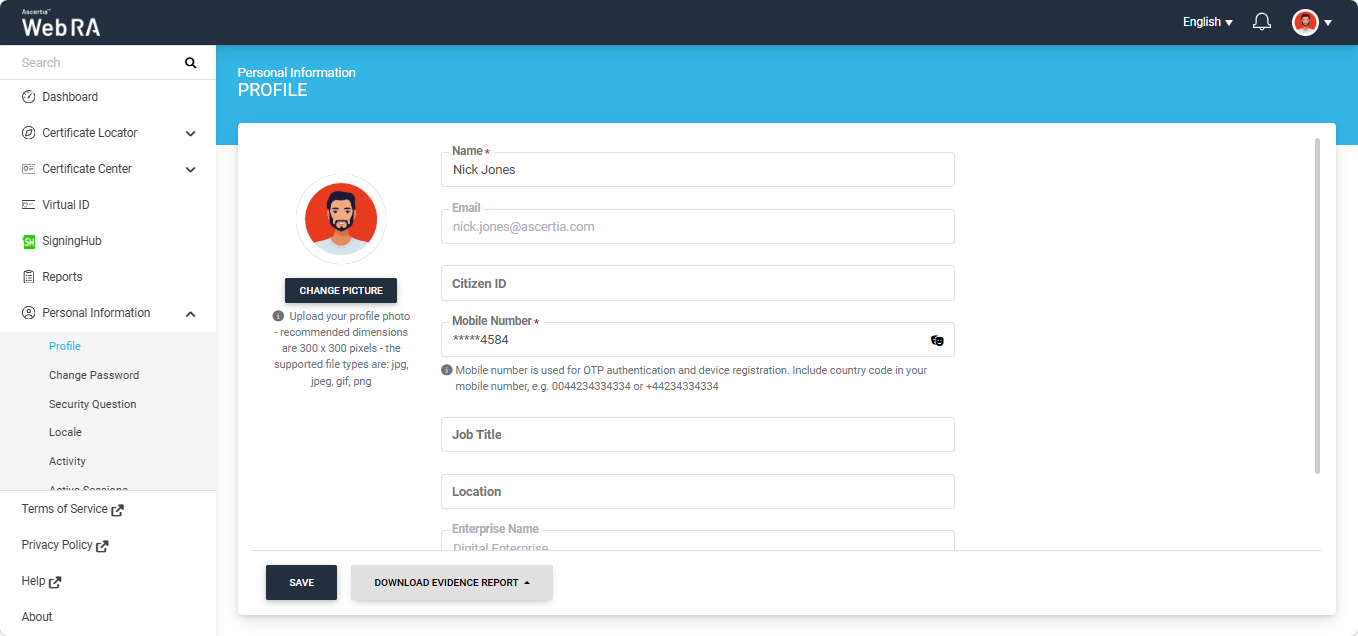
See the following table for the column headers description:
|
Field |
Description |
|
Change Picture |
This field allows users to browse and select a display picture. The selected picture is displayed as an avatar in the top-right corner of the screen and in email notifications sent to the user. |
|
Name |
This field allows users to specify their name. The specified name is used to identify the user in ADSS Web RA Server. |
|
|
This is a read-only field that displays the email address registered as the user's ADSS Web RA Server account ID. |
|
Mobile Number |
This field allows users to specify their mobile number, including the country and area code. Note: If OTP authentication is enabled in the service plan, click the verification icon By default, the mobile number is partially masked to comply with the GDPR policy. Click the view |
|
Job Title |
This field allows users to specify their job title. The specified job title is used to automatically populate relevant form fields during signing operations. |
|
Location |
This field allows users to add their specific location. |
|
Enterprise Name |
This is a read-only field that displays the name of the enterprise in which the user is registered. |
|
Role Name |
This is a read-only field that displays the role name assigned to the user's profile. |


After updating the information in the given fields, click the 'Save' button.
Download Evidence Report
The 'Download Evidence Report' button appears on the Profile screen when a user is registered in the Web RA system through the Digital Onboarding process. The evidence report contains the information captured during the onboarding process.
When you click the 'Download Evidence Report' button, the system displays the available formats in which the report can be downloaded. The supported formats include PDF, XML, and JSON.
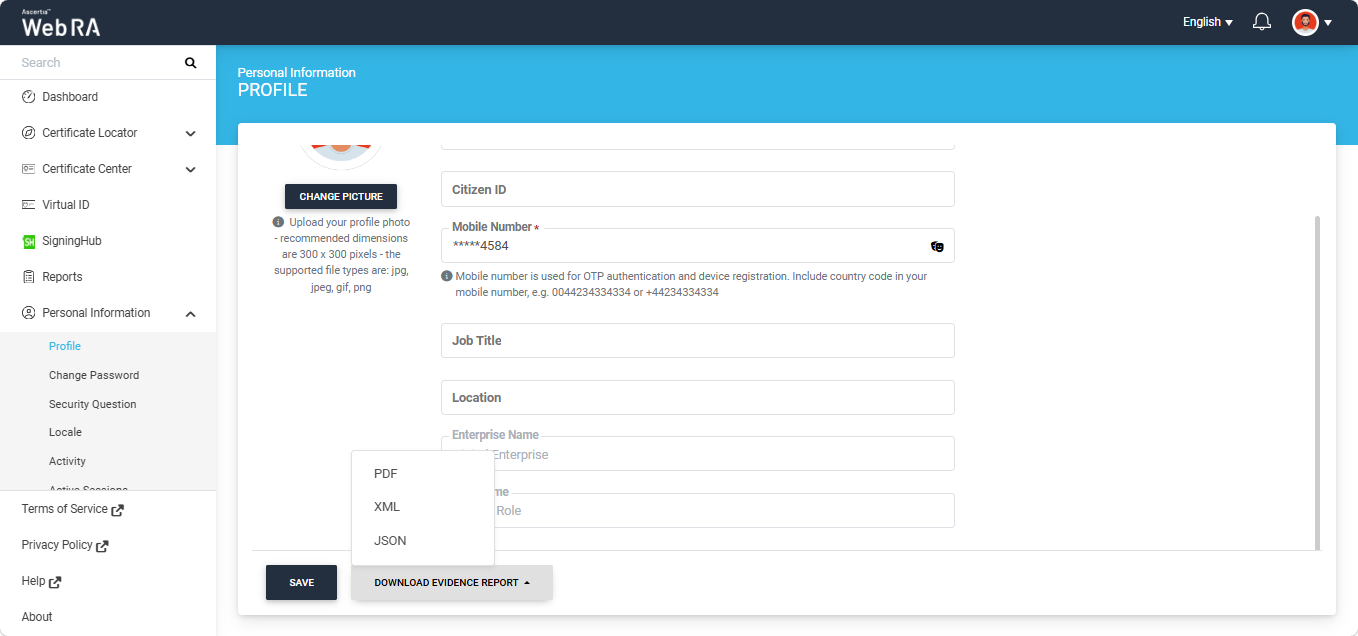
Select the required format from the available options. The report is then downloaded to your system.