
Vetting Forms
Vetting is the process of thoroughly investigating an individual or organisation to determine whether they meet the requirements for a particular purpose, especially where secrecy, loyalty, or trustworthiness is essential.
Digital certificates serve as digital identities for individuals and businesses. Certificate Authorities (CAs) are responsible for issuing certificates to valid entities. To ensure that a requesting entity, whether an individual or a business, is authorised to obtain a certificate, CAs and Registration Authorities (RAs) implement a vetting process. This process validates the information provided by the requester, either automatically or manually.
The vetting checks performed by an RA or Registration Authority Officer (RAO) vary depending on the certificate type. These checks may include:
- Validity of the email address
- Proof of employment
- Proof of organisation
- Proof of domain ownership
- Verification of operational existence
- Verification of the physical address
- Final verification call
ADSS Web RA provides the option to configure dynamic vetting forms for each certification profile, allowing additional information to be collected with a certificate request. You can design these vetting forms within ADSS Web RA and associate them with Service Profiles, such as Certification Service Profiles or CSP Service Profiles. These forms are presented to the end user when they request a certificate associated with these profiles. For example, a user requesting an SSL certificate using an SSL certificate profile or a signing certificate using a signing certificate profile may be required to complete a vetting form.
Vetting can be performed either by ADSS Web RA Administrators (Admin RAOs) or Enterprise Administrators (Local/Enterprise RAOs), depending on the criticality of the certificates. The time required to issue a certificate can range from hours to days, depending on the complexity of the vetting process.
In a typical use case, the following certificate types are generally vetted by the Admin RAO because they require more critical validation and carry greater responsibility:
- TLS Server Authentication certificates
- Code Signing certificates
- eSeal, Legal Person, and Organisational certificates
In contrast, the following certificate types can be vetted by the Enterprise RAO and are typically issued within minutes to hours, depending on the vetting process:
- Document Signing certificates
- Email Signing certificates
- TLS Client Authentication certificates
|
|
An operator can choose whether a certificate will be vetted by the Administrator RAO or the Enterprise RAO from the Certification Profiles. |

How to Add a New Vetting Form
Expand Vetting Forms module from the left-tree menu in the Admin portal. The Vetting Forms listing screen appears.
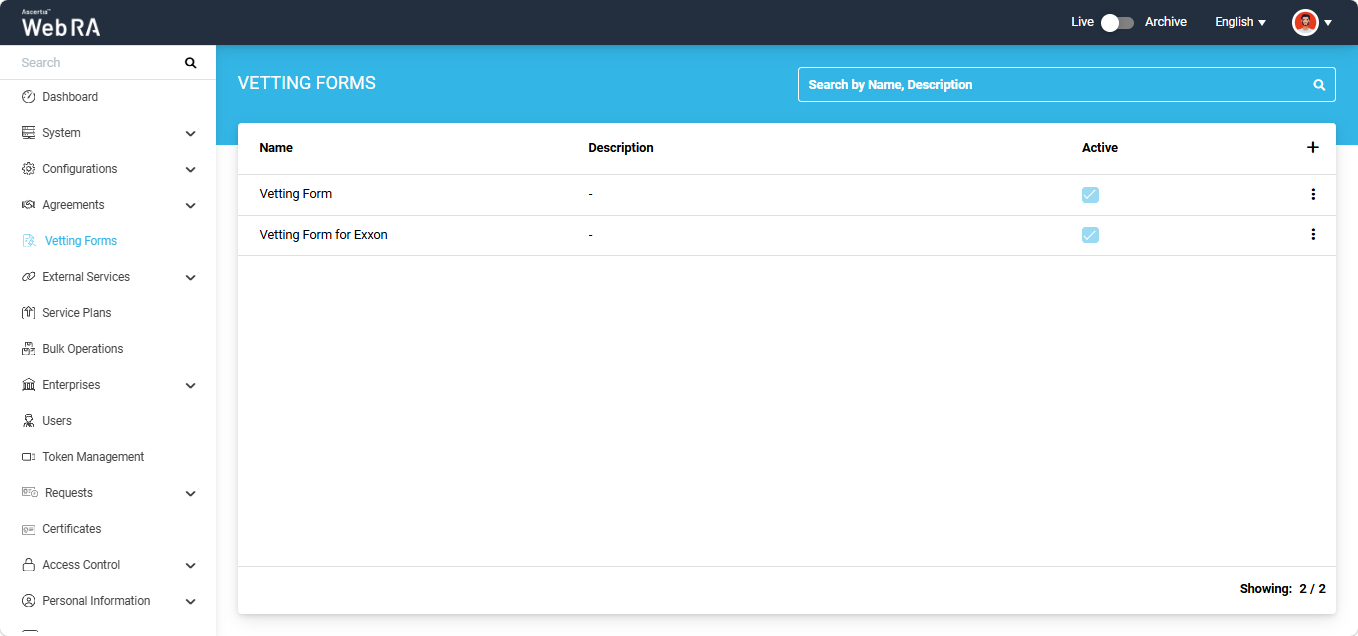
The system displays the ‘Add Vetting Form’ dialog on the screen.
Name & Description
Enter a unique name for the vetting form and add an optional description as per your requirement.
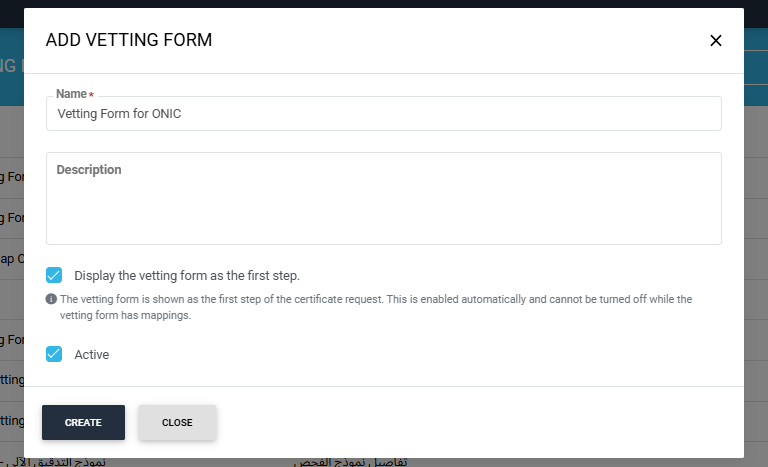
Display the vetting form as the first step
If you want this vetting form to appear at the start of the certificate request, enable the ‘Display the vetting form as the first step’ checkbox. When this checkbox is enabled, anyone generating a certificate request using a certification profile that has this vetting form configured must enter the required details in the vetting form first.
This checkbox is enabled automatically if any vetting form fields are mapped to SDN/SAN fields.
Active
Enable the ‘Active’ checkbox to make the vetting form available for selection when configuring a certification profile. Inactive vetting forms are not displayed for selection.
After making all the required selections, click ‘Create’. The system will open the Vetting Form in edit mode.
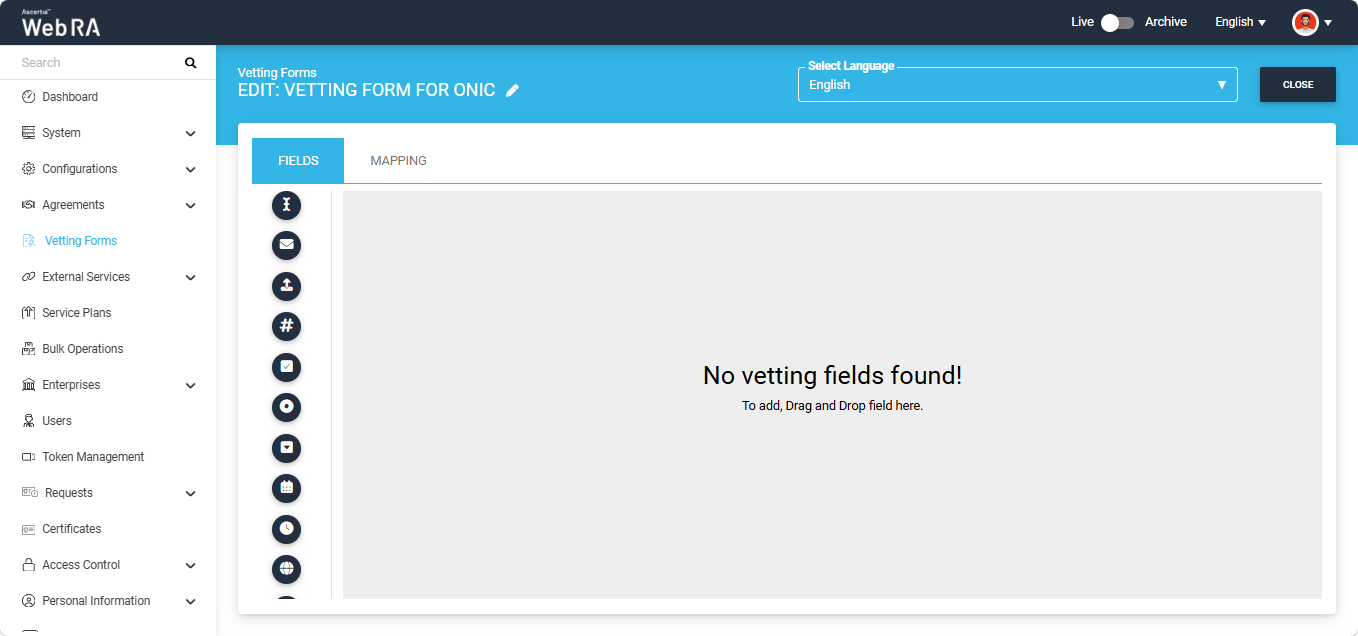
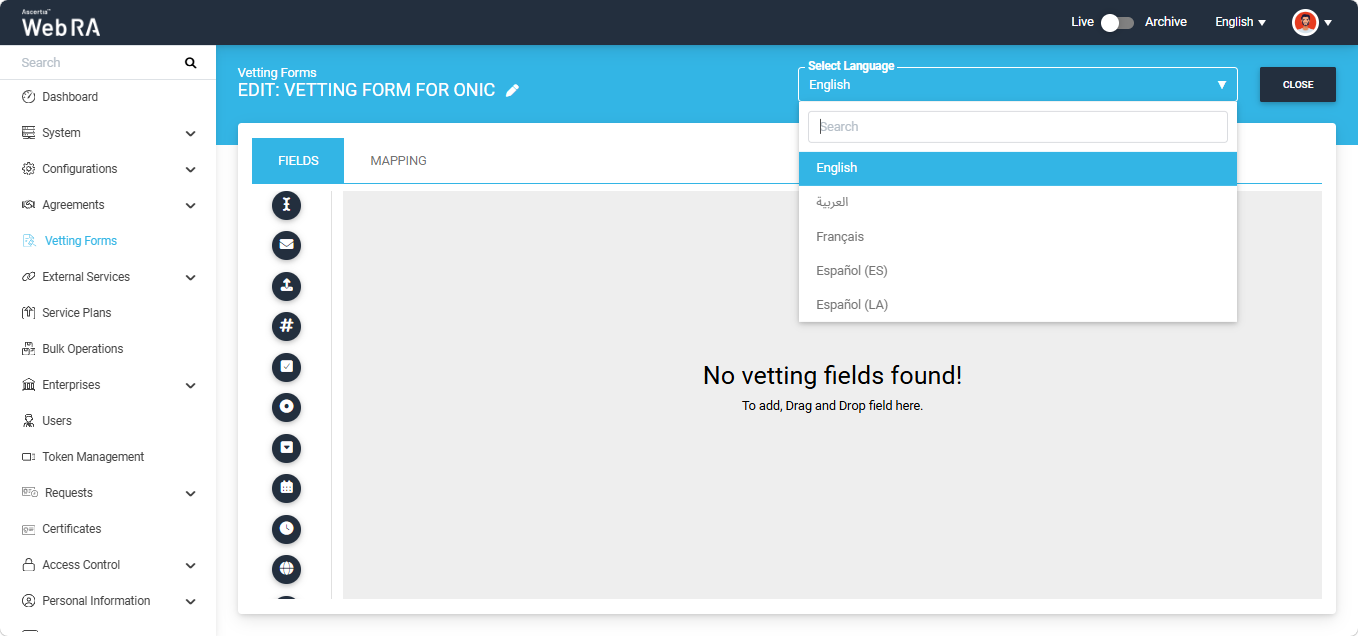
You can select the required language from the Select Language dropdown at the top-left corner of the screen. By default, English is selected in the dropdown.
You can drag and drop the required vetting fields from the list on the left side of the window to the right side. When you drag and drop a field, it appears as shown in the image below.
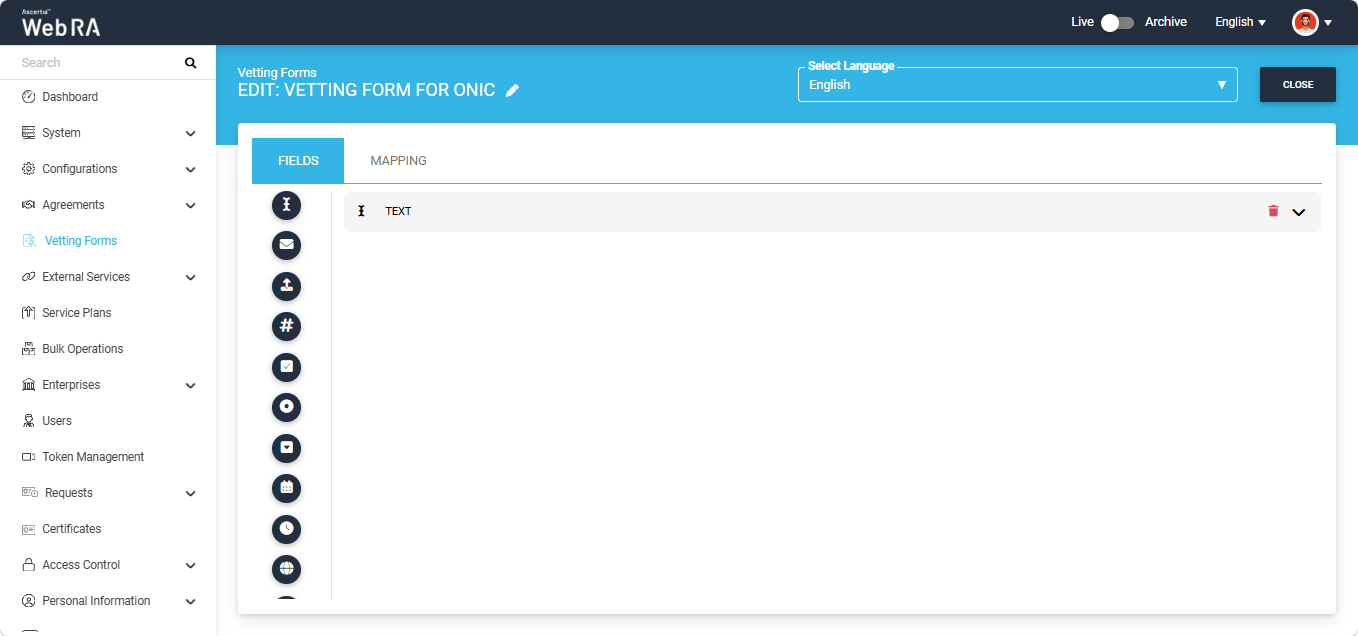
Click the dropdown arrow on the added field to edit its details.
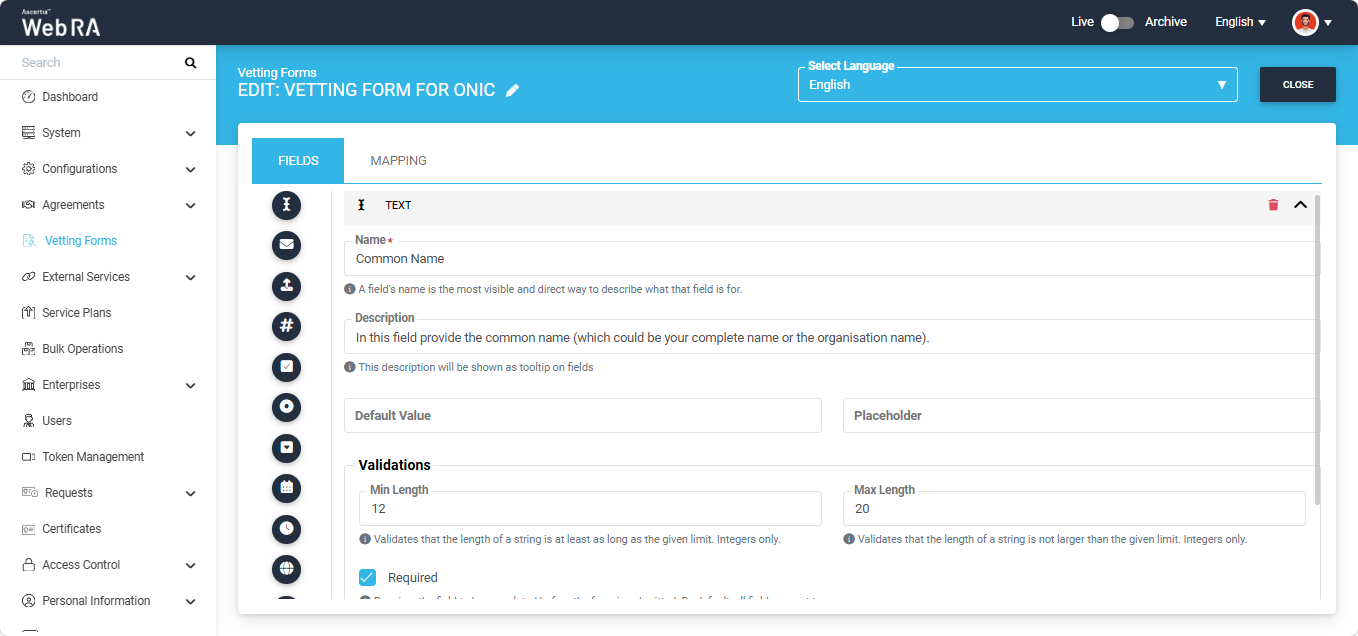
Country and Contact Fields
The following fields related to country and contact details have been added to the field list on the left side of the vetting form screen. To add one, drag and drop it to the right side. Then click its dropdown arrow to see its settings.
|
Field |
Description |
|
Country |
Adds a country list to the vetting form. Its settings are:
|
|
State |
Adds a province/state list to the vetting form. Its settings are Name, Description, Placeholder and Required. |
|
City |
Adds a city list to the vetting form. Its settings are Name, Description, Placeholder and Required. |
|
Postal Code |
Adds a postal code field to the vetting form. Its settings are Name, Description, Placeholder and Required. |
|
Mobile Number |
Adds a mobile number field to the vetting form. Its settings are Name, Description, Placeholder and Required. |
|
Multi-Text |
Adds a field that accepts more than one text value. Its settings are:
|
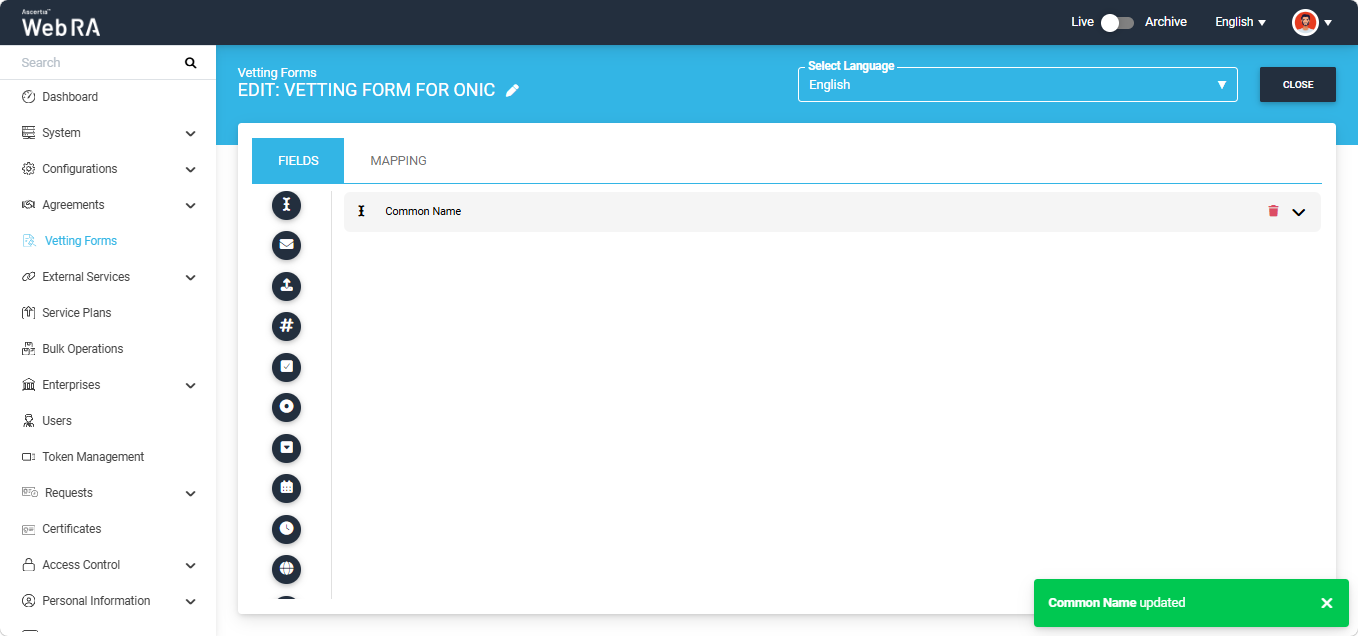
After editing the field details, click Save to save the changes. A success alert appears on the screen to confirm that the changes have been saved.
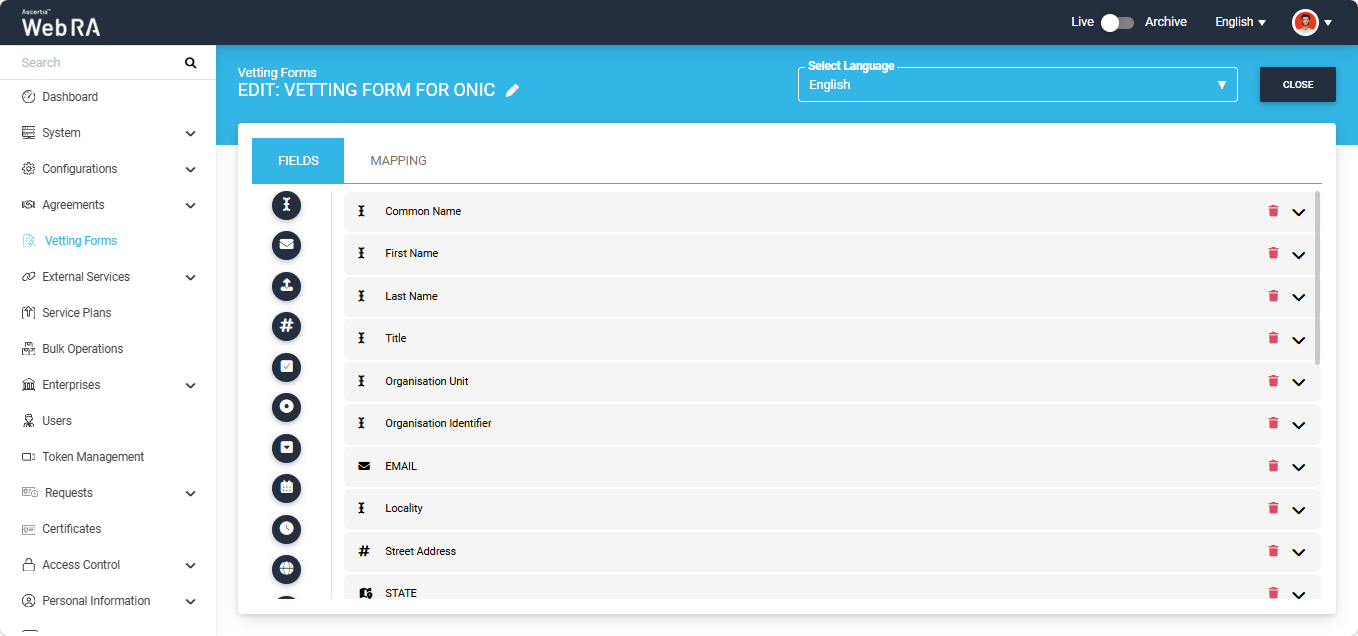
You can multiple fields in the Vetting Form as shown in the image below.
To map vetting form fields to Subject Distinguished Name (SDN) or Subject Alternative Name (SAN) fields, click Mapping to open the Mapping section.
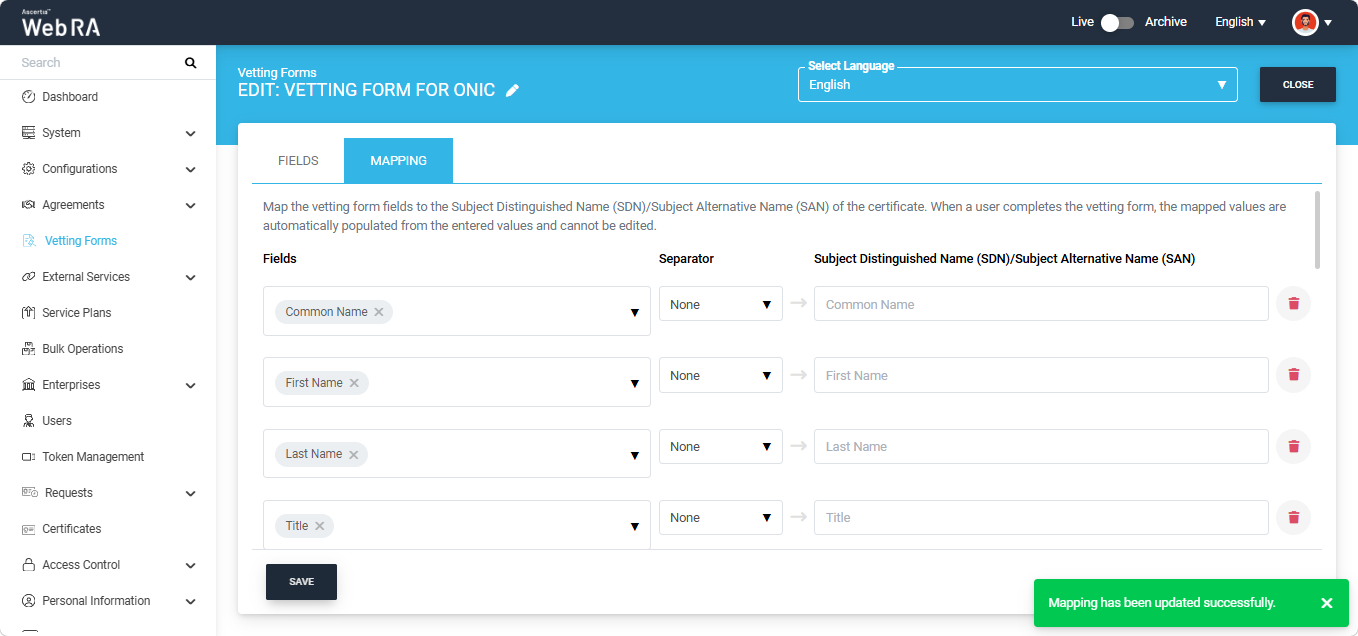
Here, you can map the vetting form fields to the Subject Distinguished Name (SDN)/Subject Alternative Name (SAN) fields of the certificate. When the user completes the vetting form while creating the certificate request, the mapped values are automatically populated from the entered values and cannot be edited.
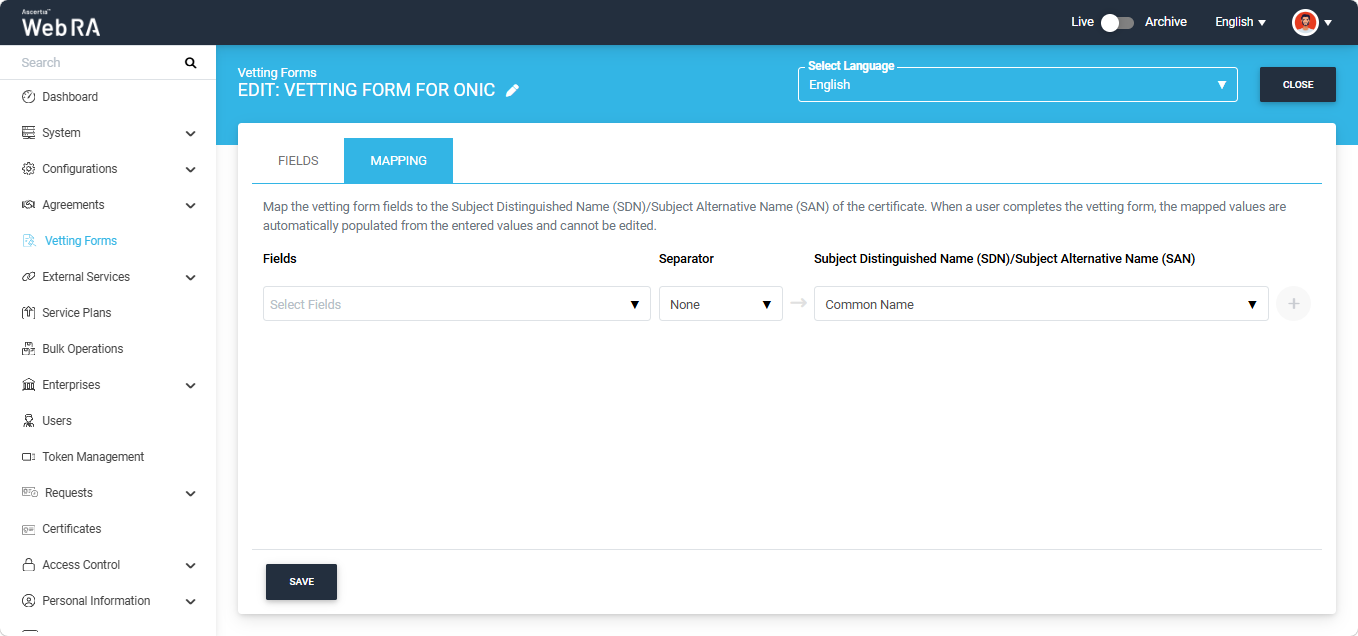
The Fields dropdown displays all the fields added to the Vetting Form in the first step, while the SDN/SAN dropdown displays all supported SDN/SAN fields.
Select the required options from both dropdowns, then click the + icon to create the mapping.
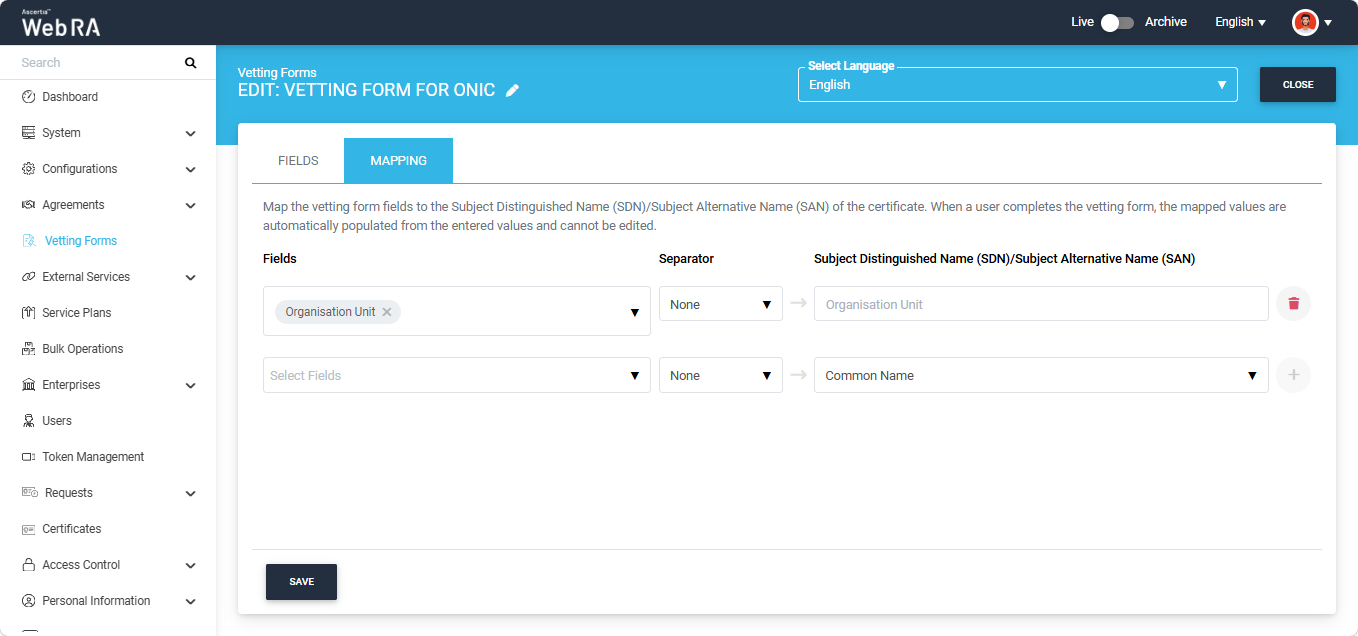
A mapped field can be removed from the Vetting Form by clicking the ‘Delete’ icon.
|
|
Note: When a Vetting Form field is mapped to any SDN or SAN, the system automatically enables the ‘Display the vetting form as the first step’ checkbox. The checkbox remains enabled and disabled (read-only) as long as any mappings exist in the Vetting Form. To uncheck this checkbox, you must first remove all mappings from the Vetting Form. |
You can map one or more Vetting Form fields to a particular Subject Distinguished Name (SDN) or Subject Alternative Name (SAN) field. If multiple Vetting Form fields are mapped to the same SDN/SAN field, you can use a separator to define how their entered values are combined and displayed in that field when creating a certificate request.
For example, if you map the Title, First Name, and Last Name fields to the Common Name SDN field, you can specify a separator to define how these values are combined in the Common Name field.
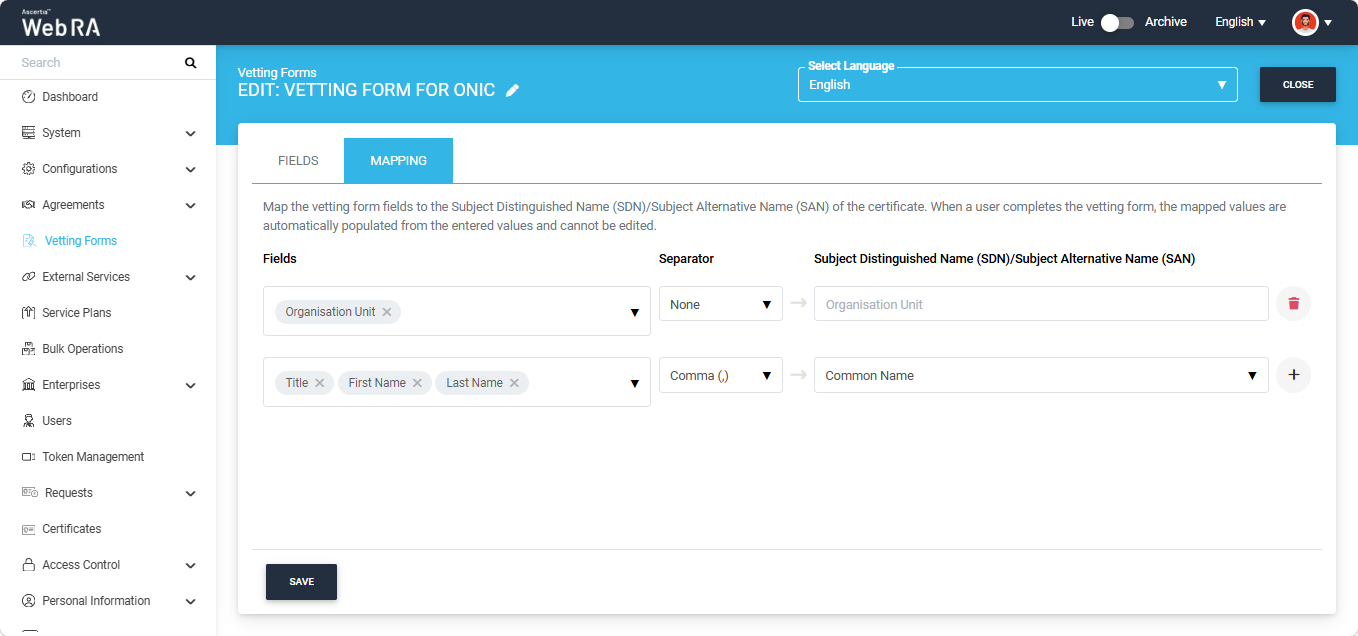
You can map multiple fields in the Vetting Form with SDN/SAN as per your requirement.
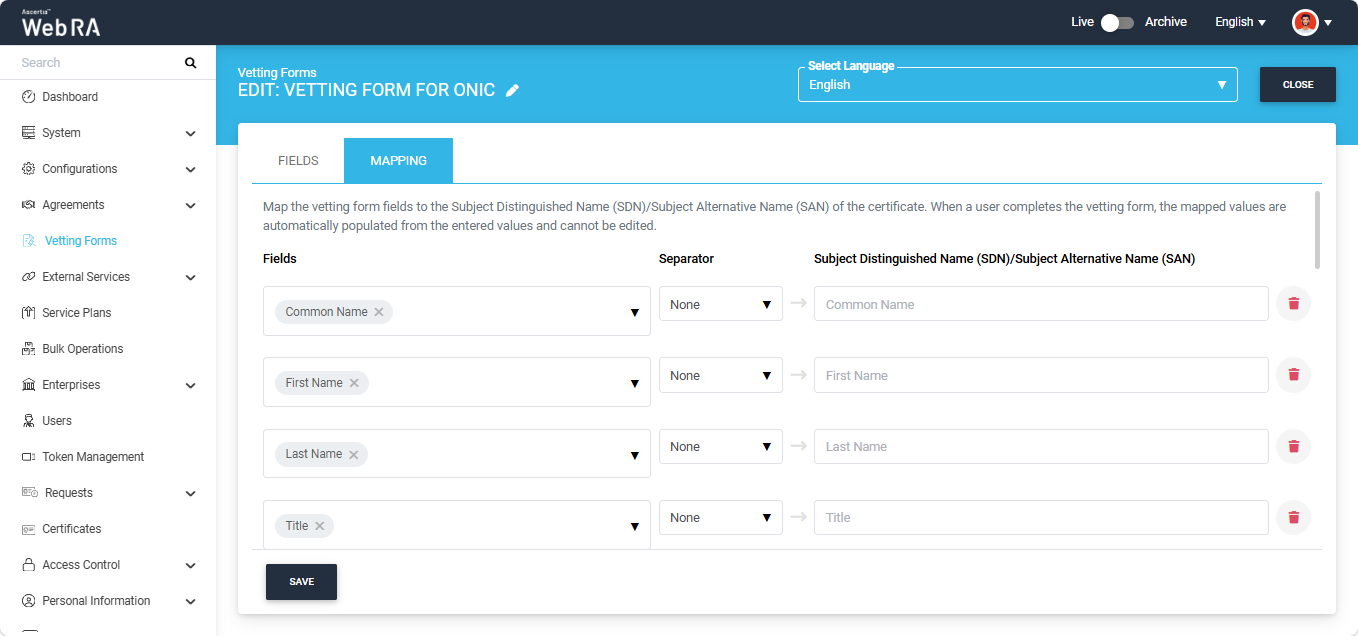
|
|
Note: If a single Vetting Form field is mapped to an SDN/SAN field, the value entered in the Vetting Form field is copied directly to the mapped SDN/SAN field. If multiple Vetting Form fields are mapped to the same SDN/SAN field, a configured rule uses the values entered in those fields to construct a single SDN/SAN value. |
During certificate request creation, any SDN/SAN field mapped to a Vetting Form field appears disabled in the corresponding SDN/SAN section once the user has entered the value in the Vetting Form.
Click ‘Save’ under the Mapping section to save the field mappings in the Vetting Form. You must click ‘Save’ every time you make changes to the Vetting Form mappings. If you close the screen without saving, your changes will not be saved.
When you click ‘Save’, the system displays a success alert on the screen.
|
|
Note: Web RA does not validate the compatibility of Vetting Form field types with the mapped SDN/SAN fields. The operator is responsible for selecting appropriate Vetting Form fields and ensuring that they can capture values in the required format for the corresponding SDN/SAN fields. |