User Invitations
How to Invite a User into an Enterprise
Expand Enterprises > Registered Enterprise > Users > Users Invitations from the left-tree menu.
The system displays the ‘User Invitations’ listing screen, which contains all pending user invitations sent by the Enterprise. If there are no pending invitations, the list will be empty.
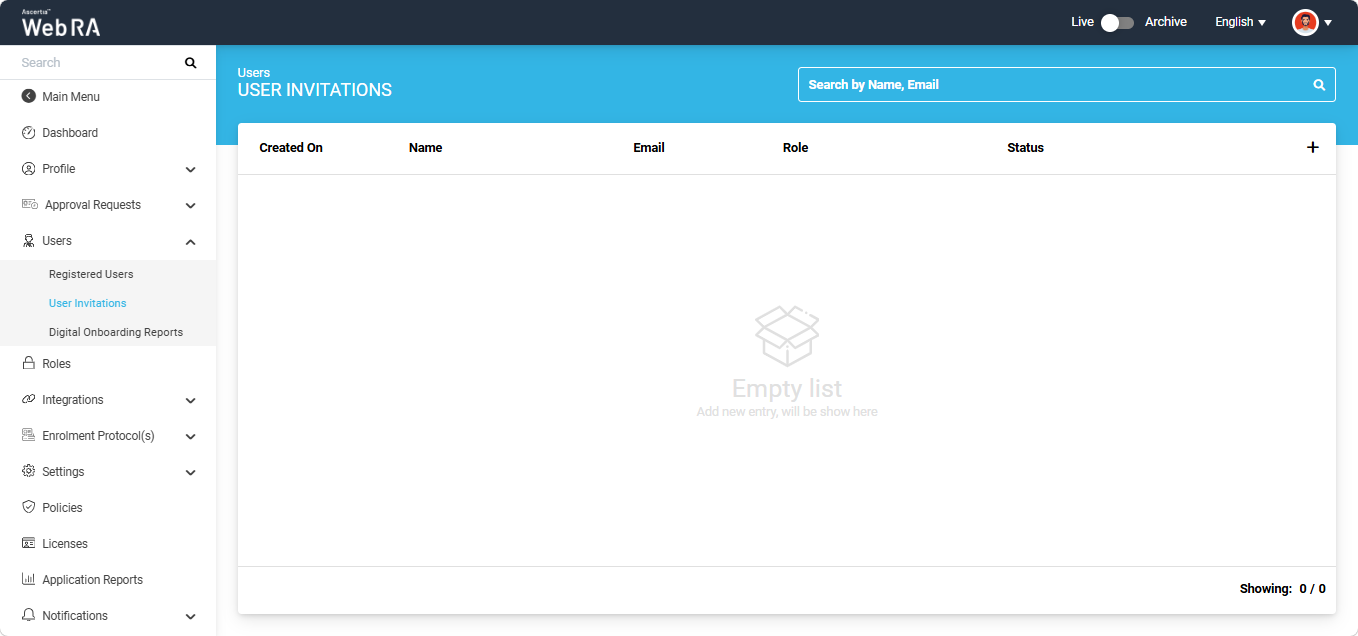
Click the Add User (+) icon to invite a new user. The system opens the Invite User screen.
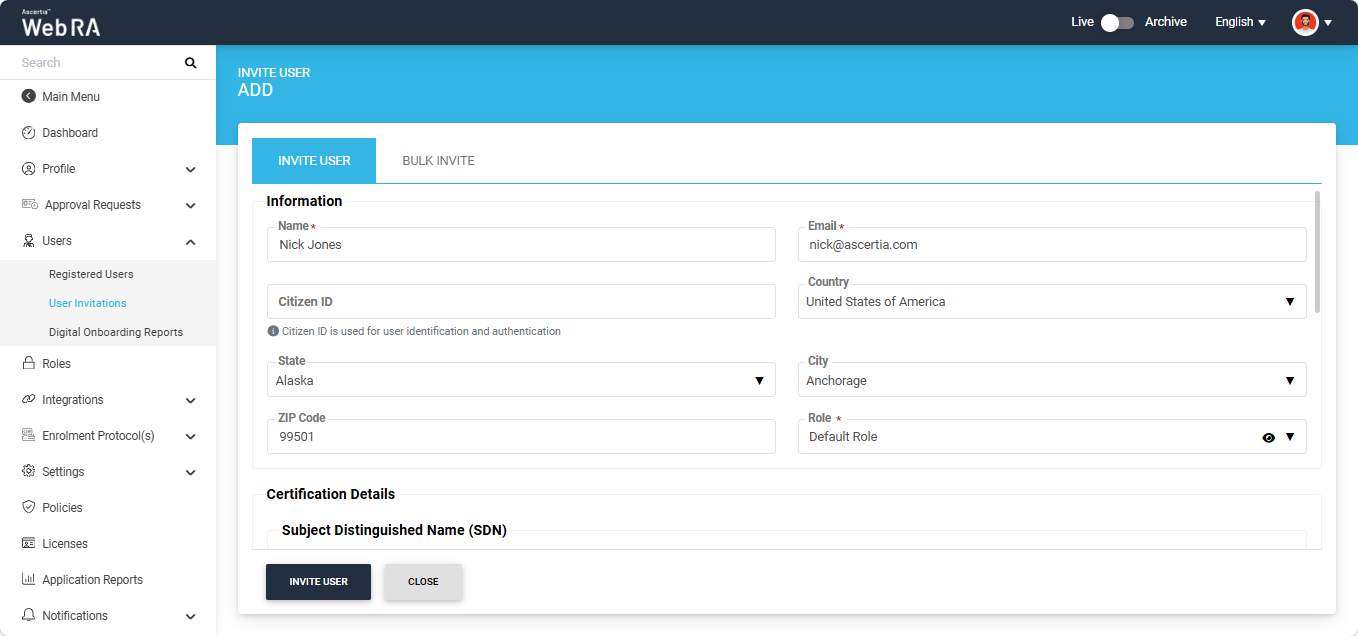
Information
Under the Information section, enter the name and email address of the user being invited, and select a role for the user from the Role dropdown. All three fields are mandatory to send an invitation.
You can also enter the user's Citizen ID (optional) for identification and authentication, and select their Country, State, and City.
The available options in the State dropdown depend on the selected country, while the options in the City dropdown depend on the selected state. The City dropdown is disabled by default and becomes available only after you select a state.
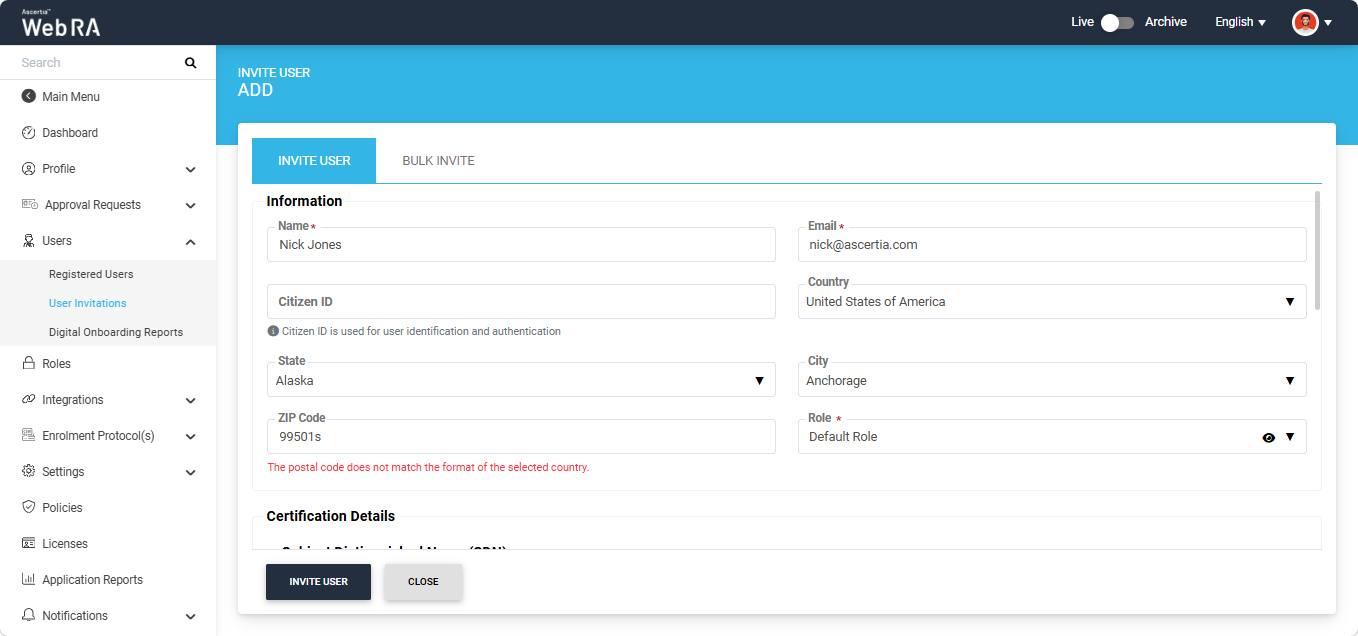
You can also enter the Zip Code for the selected city. If the entered zip code does not match the format required for the selected country, the system displays an error message indicating that the code format is invalid for that country.
Certification Details
The options displayed under the Certification Details section depend on the configuration specified under Roles > Login Authentications > Certificate Details.
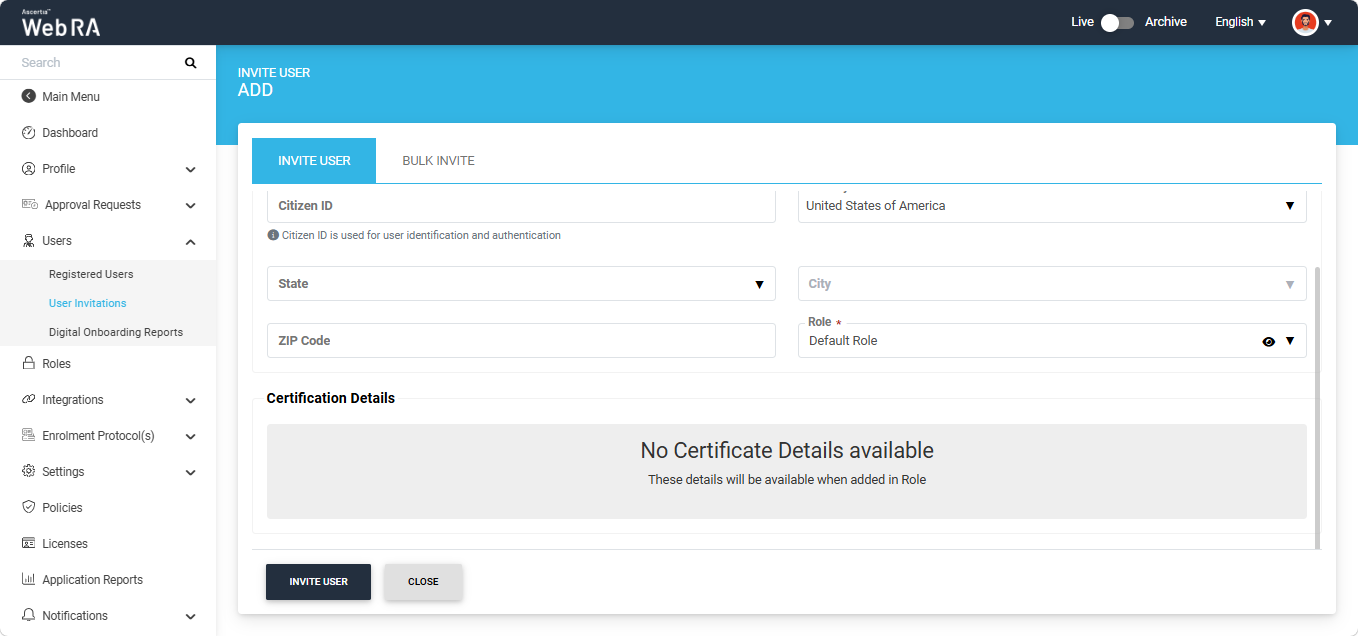
None
If ‘None’ is selected under the Roles configuration, the system displays the message ‘No Certificate Details available’ in this section. No further input is required.
Operator
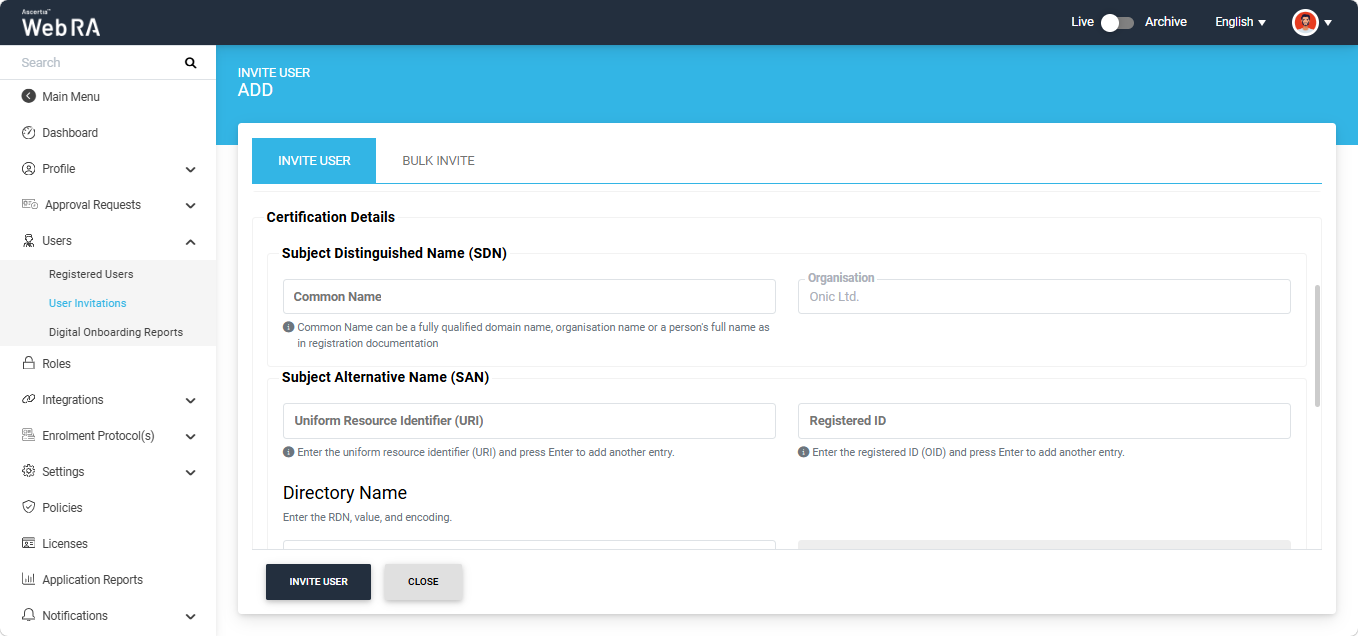
If ‘Operator’ is selected under Roles > Certificate Details, along with the required Subject Distinguished Names (SDNs) and Subject Alternative Names (SANs), the configured SDN and SAN fields are displayed under the Certification Details section.
All SDN and SAN fields are optional. You can enter values in these fields, which will be used when creating certificate requests in the User Portal.
|
|
Note: ADSS Web RA now supports the following additional Subject Alternative Name (SAN) fields:
When these SAN fields are configured in the ADSS Certification Profile, the corresponding fields are also supported in ADSS Web RA. |

Authentication
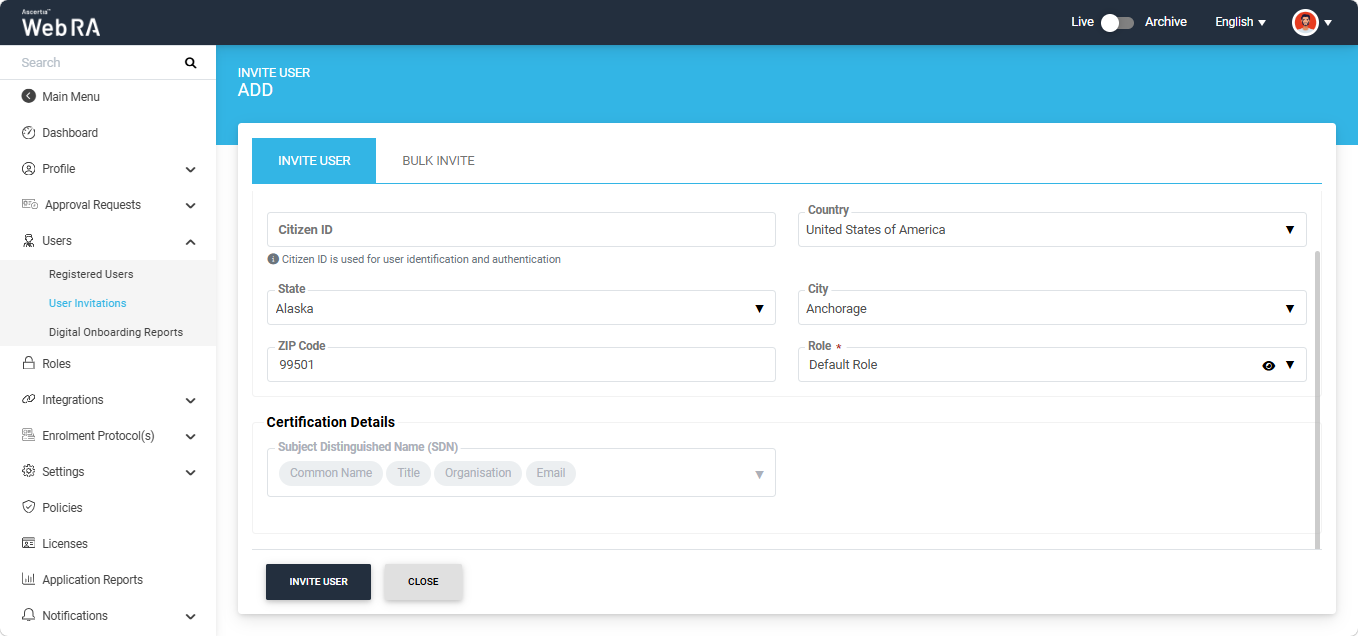
If ‘Authentication’ is selected under Roles > Certificate Details, the SDN fields mapped to the claims configured under Roles > Certificate Details are displayed in this section.
These SDN fields are read-only. Their values will be used when creating certificate requests in the User Portal.
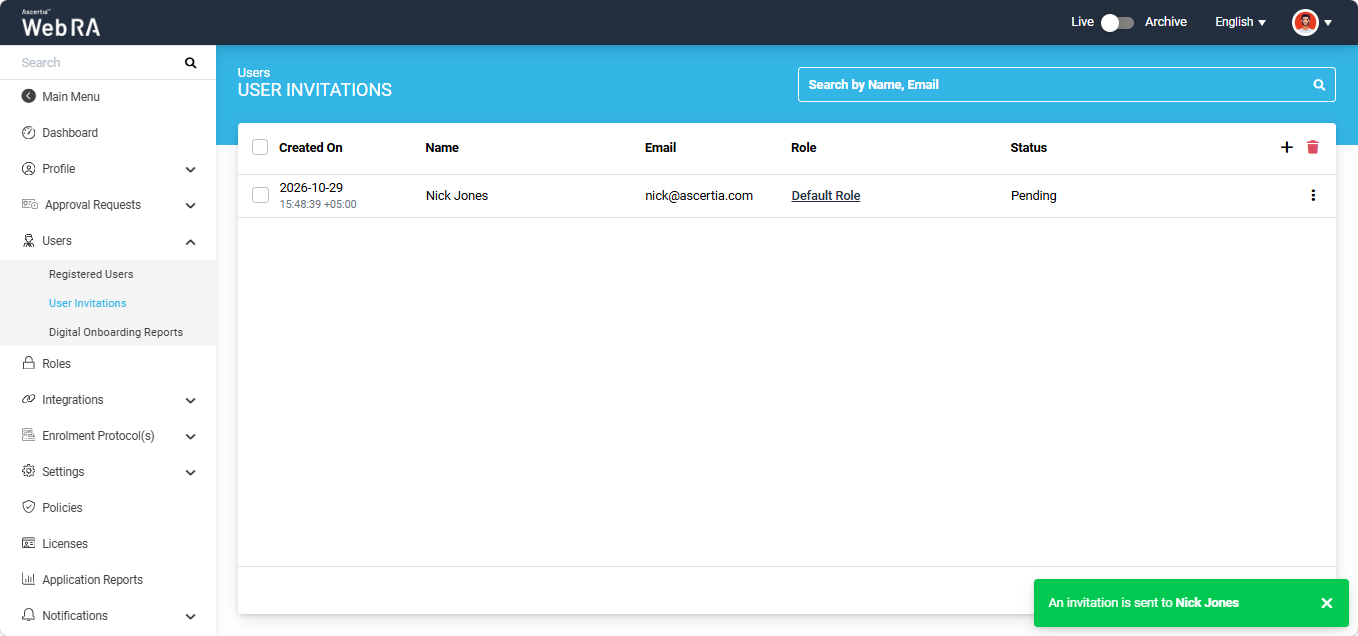
After entering the required details, click Invite User to send the invitation.
Once the invitation is sent, the system displays a success alert, and the pending invitation appears in the User Invitations listing.
The user receives an invitation email at the configured email address, containing a Join Now button.

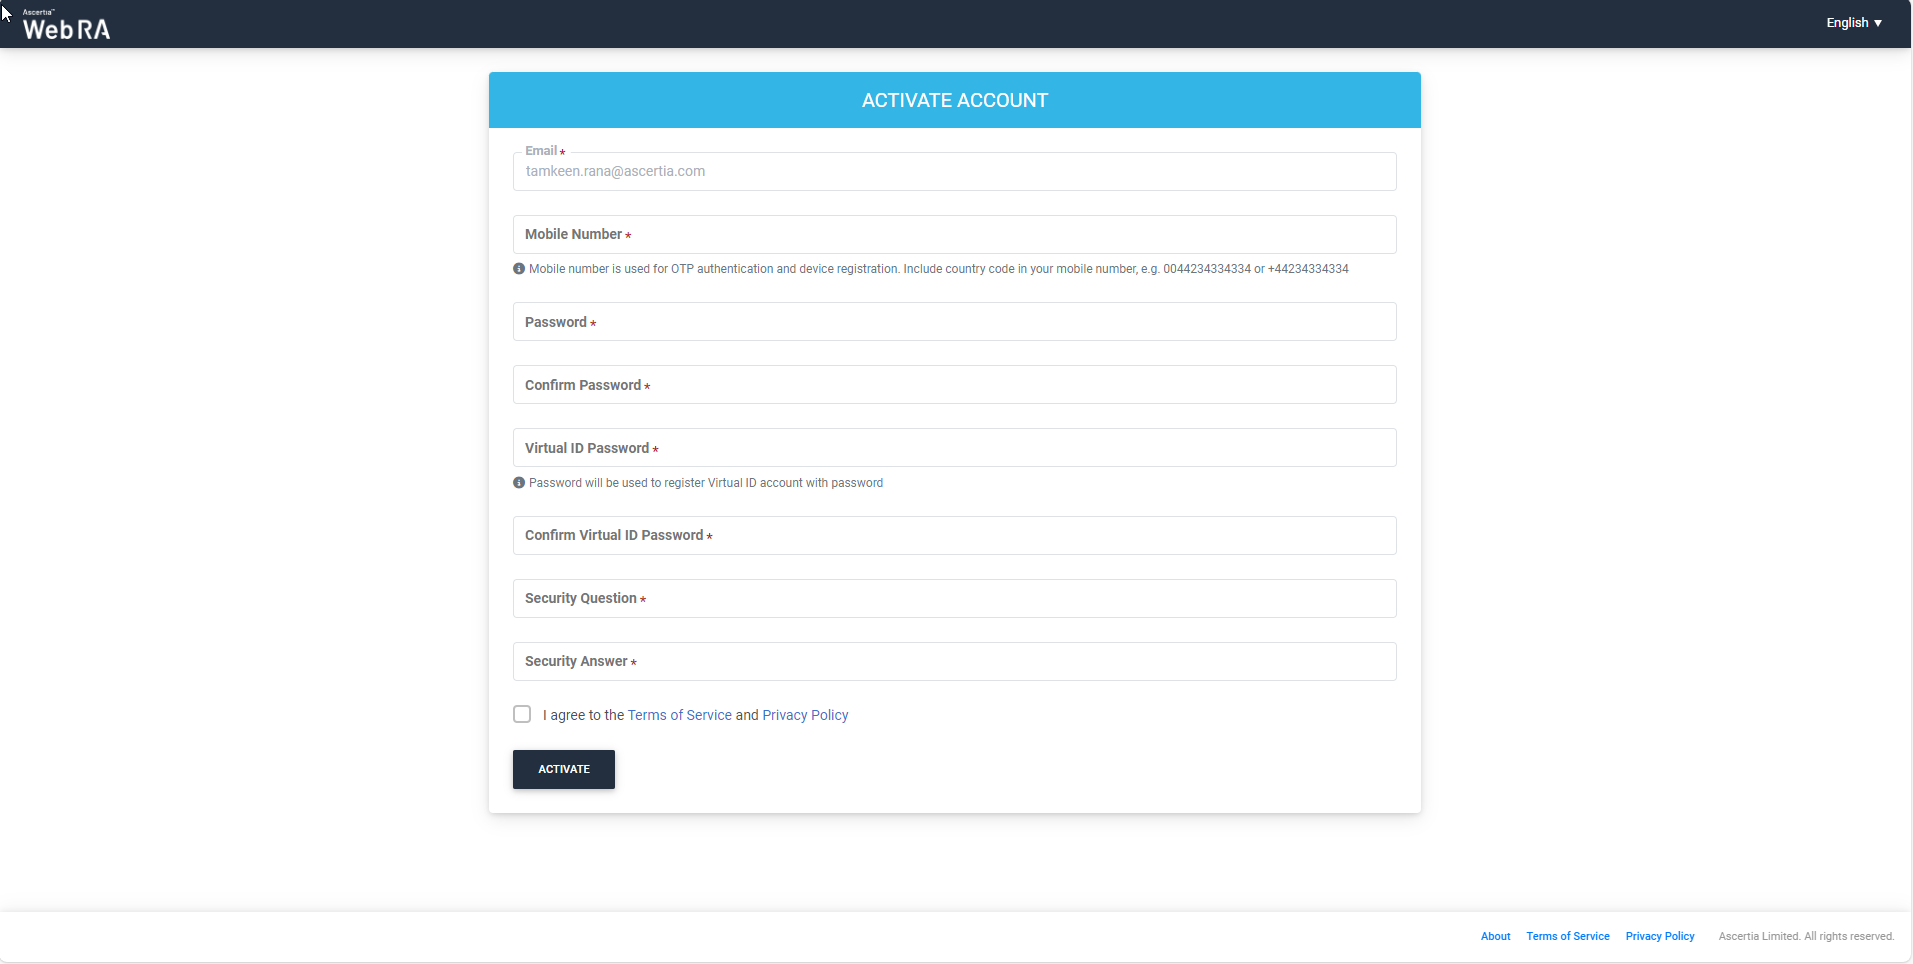
Clicking the ‘Join Now’ button takes the user to the ‘Activate Account’ form.
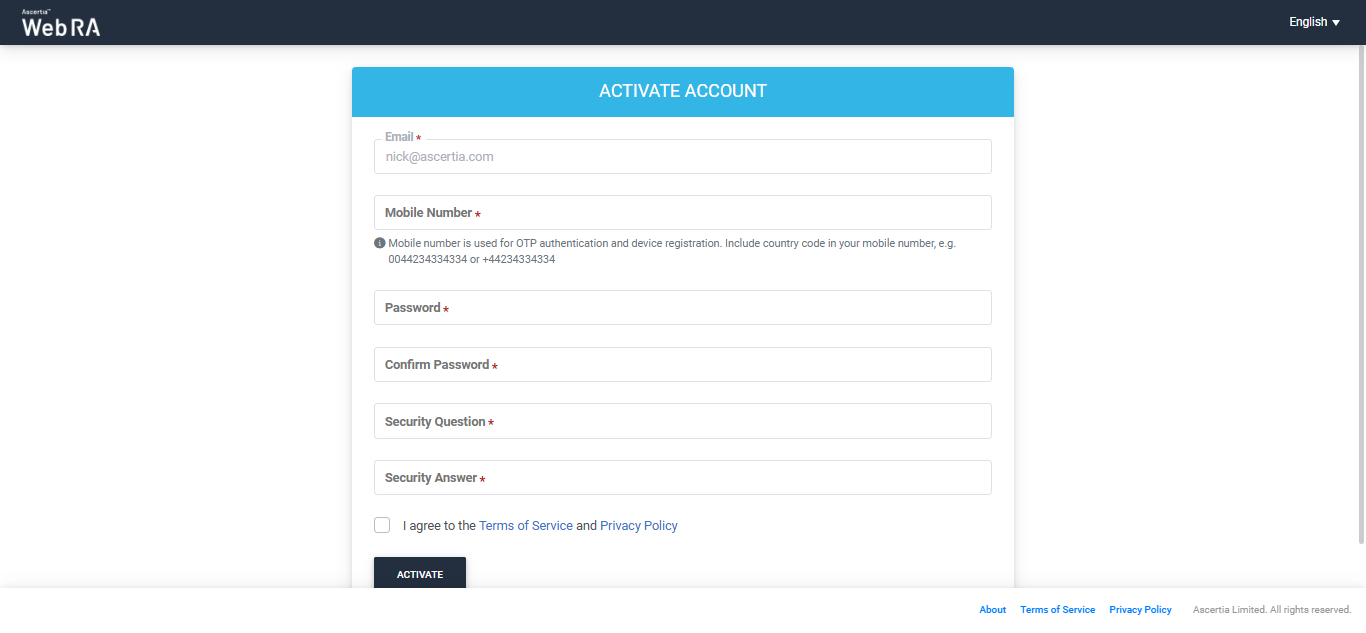
After entering the required details, the user clicks Activate. The system then creates the user's account in ADSS Web RA under the Enterprise from which the invitation was sent.
Bulk Invite
To send invitations to multiple users at once, navigate to the Bulk Invite section in the Web RA application.
Select the Role to assign to the users and upload a CSV file containing the details of the users you want to invite.
The CSV file must include the following mandatory details for each user:
- First Name
- Last Name
- Primary Email Address
You can also include other relevant user details in the CSV file, as required.
If any of the mandatory details are missing from the CSV file, the system displays an error.
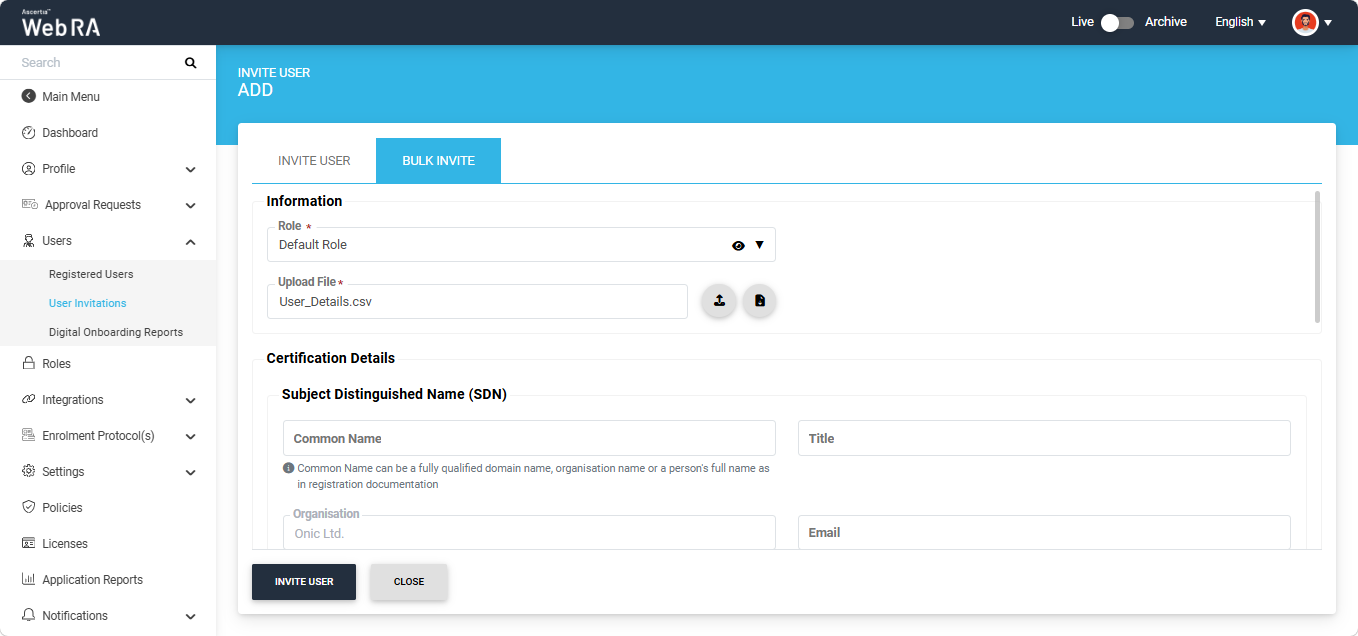
The options displayed under the Certification Details section depend on the configuration specified under Roles > Login Authentications > Certificate Details.
|
|
Note: ADSS Web RA now supports the following additional Subject Alternative Name (SAN) fields:
When these SAN fields are configured in the ADSS Certification Profile, the corresponding fields are also supported in ADSS Web RA. |
If you want to learn more about the options appearing under the Certification Details section, read the details mentioned above under the ‘Invite User’ section.
Virtual ID Registration with Email/Password Authentication
If the ‘Enable Virtual ID Registration with Password’ option is enabled in the RAS certification profile, then the system will display the following two fields on the screen while activating an account:
- Virtual ID Password
- Confirm Virtual ID Password