
Requests
This section lists down all the enterprise requests that are created in ADSS Web RA application. This list contains all the pending or approved enterprise requests.
Register an Enterprise:
Expand Enterprises > Requests from the left-tree menu in the Admin portal. Click the add button  from the table header to register a new enterprise in the system.
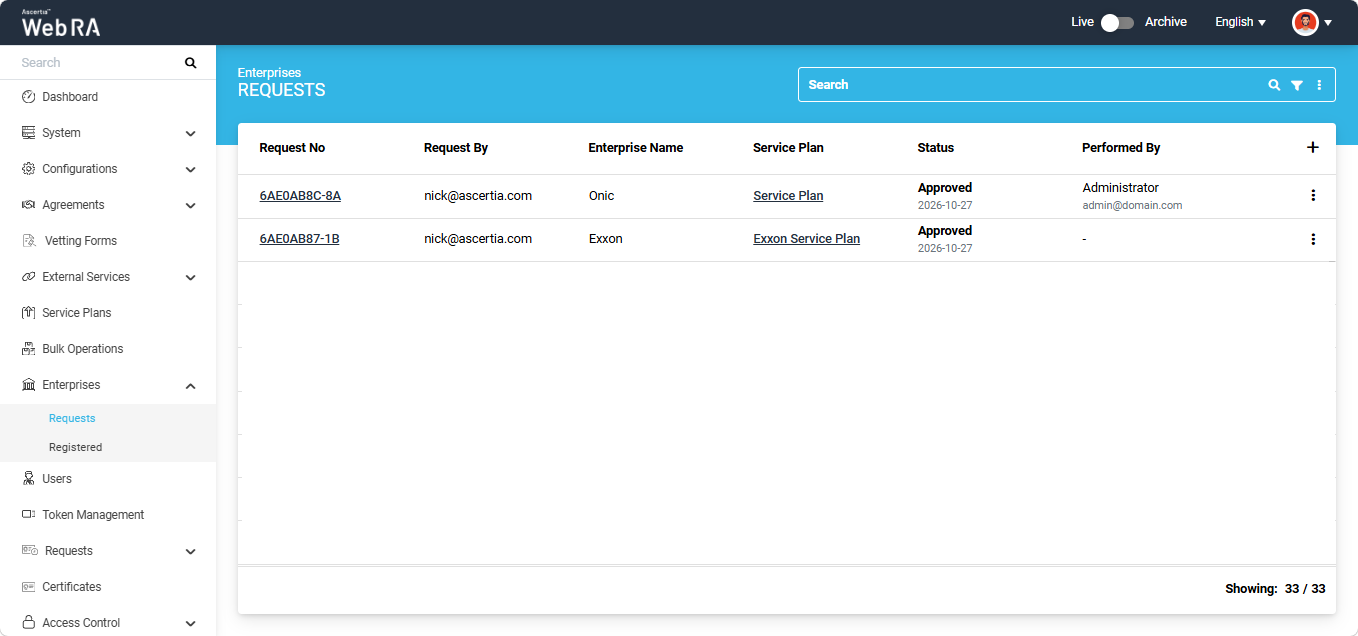
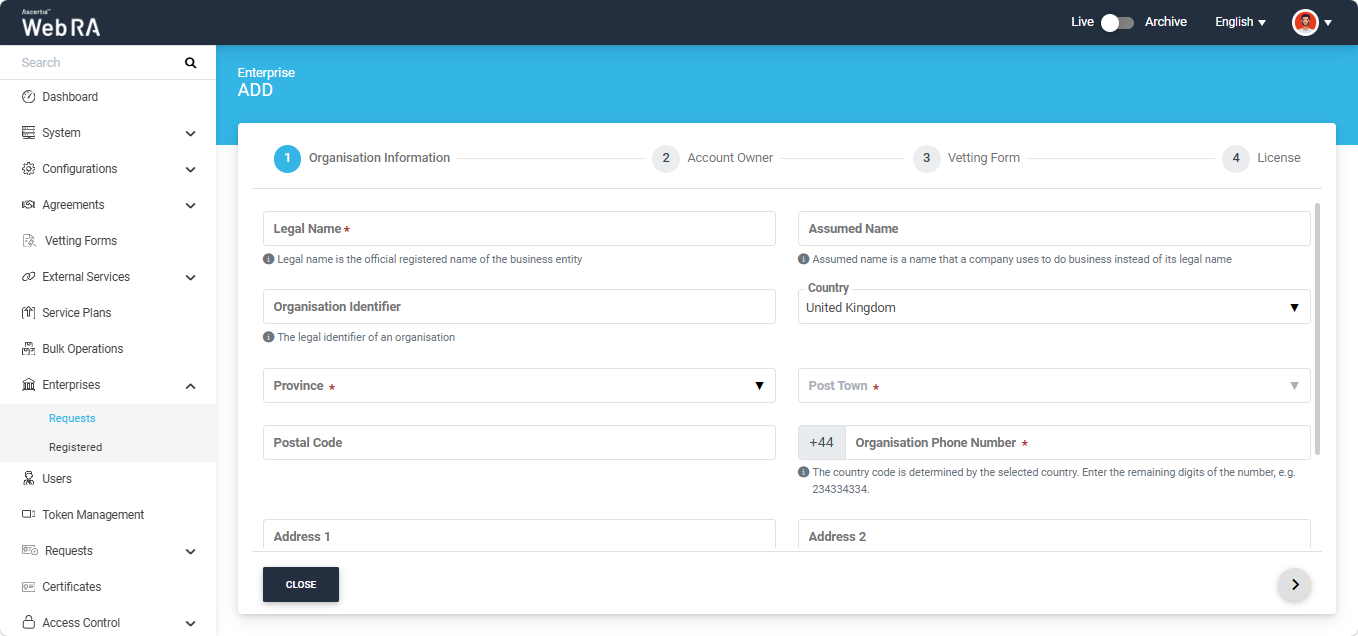
The system displays the Add Enterprise screen with 'Organisation Information' section appearing at the start. The fields appearing on this section are explained in the table below:
|
Organisation Information |
|
|
Field |
Description |
|
Legal Name |
Legal Name is the official name of the organisation under which the organization is registered with the government and it is the name that is used when submitting tax to the government e.g. Ascertia Limited |
|
Assumed Name |
It could be the name of the organisation that is commonly used e.g. Ascertia |
|
Organisation Identifier |
The legal identifier of the organisation. |
|
Country |
Select the country in which the organisation is registered. The list shows only the countries configured in Configurations > Default Settings > Allowed Country(s), and the Default Country is pre-selected. The selected country controls the Province/State and City lists, the field labels, the Postal Code validation and the phone prefix. |
|
Province/State |
Select the province or state of the organisation. The list shows only the provinces/states of the selected country. The label of the field follows the selected country, e.g. It will labelled as 'State' or 'Province'. For countries without this level (e.g. Singapore) it is an optional free-text field. |
|
City |
Select the city of the organisation. This field is enabled after a Province/State is selected and lists only its cities. The list is searchable. The label of the field follows the selected country, e.g. Post Town for United Kingdom. |
|
Postal Code |
Enter the postal code of the organisation. It is validated against the selected country's format. The label follows the country, e.g. ZIP Code for United States of America. |
|
Organsation Phone Number |
Official phone number of the organisation that is registered in the government documents |
|
Address 1 / Address 2 |
The street address of the organisation as provided at the time of company registration. |
|
Service Plan |
Select a service plan for this enterprise. You can use a shared service plan or create a separate plan for each enterprise depending on the certificate issuance of each organisation |
|
Create Default Role |
Select this checkbox to create a default role while creating a new enterprise. (screenshot attached below) |
Note:
- The fields marked as mandatory in the service plan become mandatory on this screen
- When the Country is changed, the selected Province/State and City are cleared, the Postal Code is validated against the new country and the phone prefix is updated.
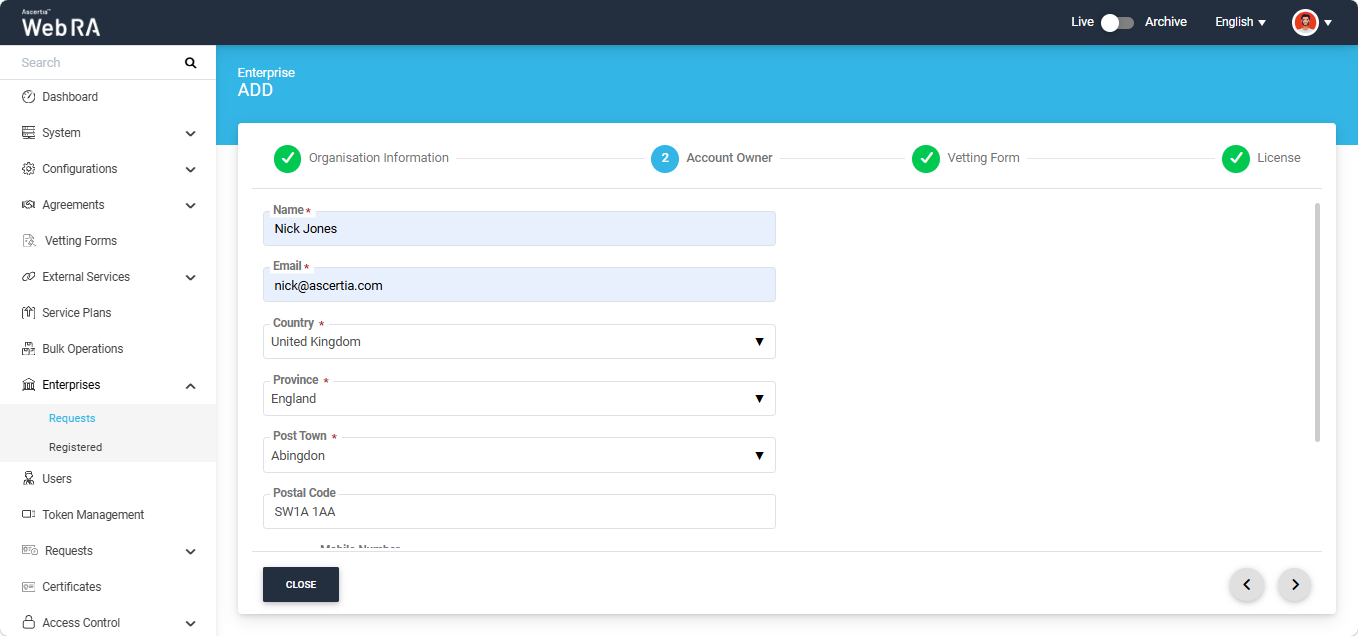
After providing the required information, click the next '>' button to proceed to the 'Account Owner' section.
|
Account Owner |
|
|
Field |
Description |
|
Name |
Name of the enterprise owner. It could be any representative of the organisation but ideally it should be the CEO. Any change request in the enterprise should be initiated by the enterprise owner. |
|
|
Email address of the enterprise owner. An email will be sent to this email address to create an account on the ADSS Web RA Web. |
|
Country |
Select the country of the Account Owner. By default, the dropdown field displays the country configured under Configurations > Default Settings > Default Country. You can change the selected country as required by choosing another country from the list. The list only displays countries configured under Configurations > Default Settings > Allowed Country(s). |
|
Province / State |
Select the province or state. The dropdown list shows only the provinces or states of the country selected under the 'Country' dropdown. |
|
City |
Select the city from the list. This field is available only after a province or state is selected and displays the cities associated with it. You can type in the field to search for a city. |
|
Postal Code |
Enter the postal code in the format required by the selected country. For example, a United Kingdom postcode must follow the format used in the UK. If the entered postal code does not match the required format, an error message is displayed, and you cannot proceed until it is corrected. |
|
Mobile Number |
Enter the mobile number without the country code. The country code is automatically populated based on the selected country (for example, +44 for the United Kingdom). This number is used to send one-time passwords (OTPs), if enabled. |
|
Job Title |
Enter the job title of the enterprise owner. |
After providing the required information, click the next '>' button to proceed to the 'Vetting Form' section.
Note: The Vetting Form section will appear under 'Add Enterprise' screen only if the "Enable Vetting, Administrators can approve enterprise requests after vetting" setting is enabled in the Service Plan.
This section will only display the fields configured in the Vetting Form.
|
Vetting Form |
|
|
Field |
Description |
|
Country |
Select a country from the list. The available countries and the default selection are configured by the administrator in the Vetting Form. |
|
Province / State |
Select a province or state from the list. This field displays the provinces or states associated with the selected country. |
|
City |
Select a city from the list. This field is available only after a province or state has been selected and displays the cities associated with it. |
|
Postal Code |
Enter the postal code in the format required by the selected country. |
|
Mobile Number |
Enter the mobile number without the country code. The country code is automatically populated based on the selected country. |
|
Multi-Text |
Enter one or more values. Press Enter after entering each value to add it to the field. You can then enter additional values in the same way. |
After providing the required information, click the next '>' button to proceed to the 'License' section.
|
License |
|
|
Field |
Description |
|
Name |
Name of the certification profile for which an enterprise wants to use ADSS Web RA to create certificates. |
|
Unlimited |
It is a check-box that can be used to allow a user to create unlimited certificates. This field will appear only if a user is allowed to create unlimited certificates. |
|
Certificates Quota |
This defines the total number of certificates an enterprise is allowed to generate from ADSS Web RA against each certification profile. |
|
Expiry |
This defines the duration for which these certificates are valid. |
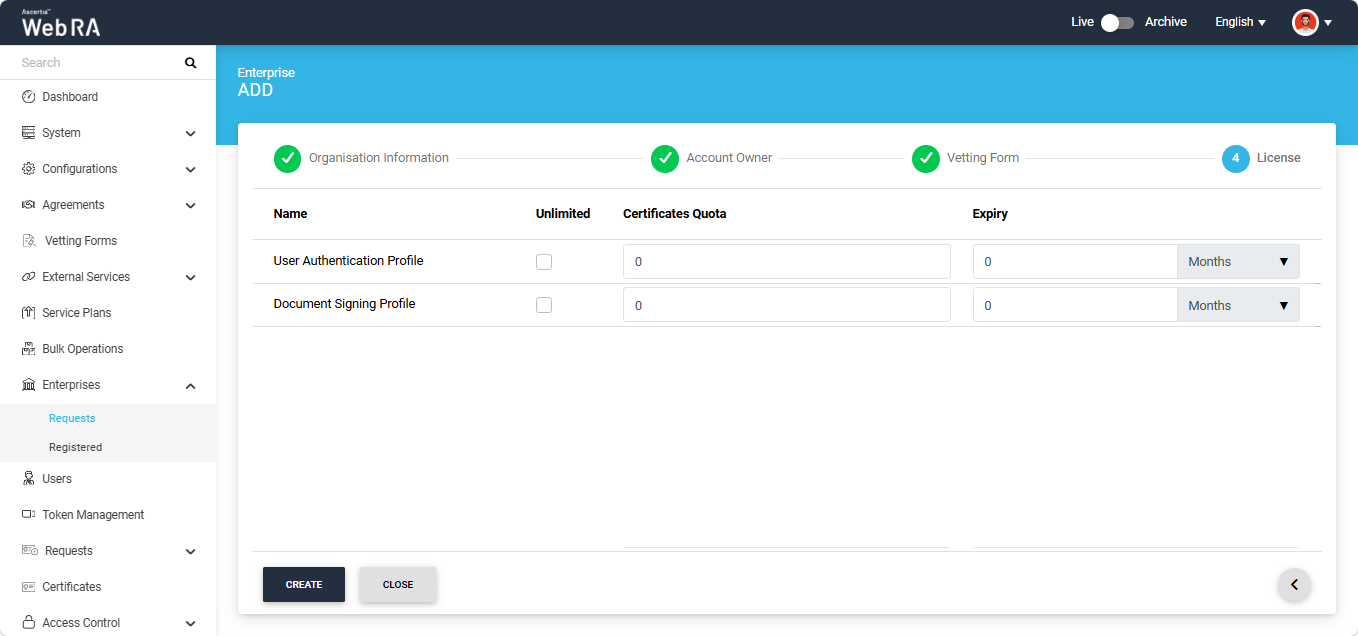
After assigning the quote to the profiles, click Create. A confirmation dialog will appear on the screen.
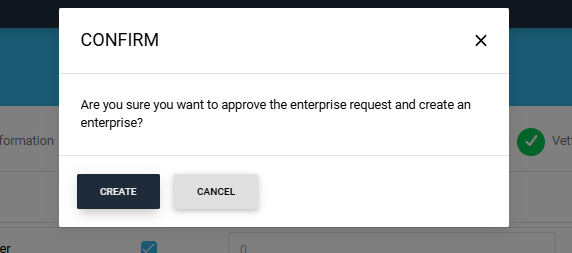
Click 'Create'. The enterprise will be registered and displayed in the Registered enterprise listing.
|
|
1) An enterprise registration request must be approved by an administrator while registering an enterprise account from ADSS Web RA admin, if vetting is enabled for enterprise registration under service plan. The enterprise account must be shown with Approved status under Enterprises > Requests and with Active status under Enterprises > Registered, once it's approved by an administrator. |

View Request
- Expand Enterprises > Requests from the left menu pane.
- Click on
 button against a specific enterprise request and then click View Request.
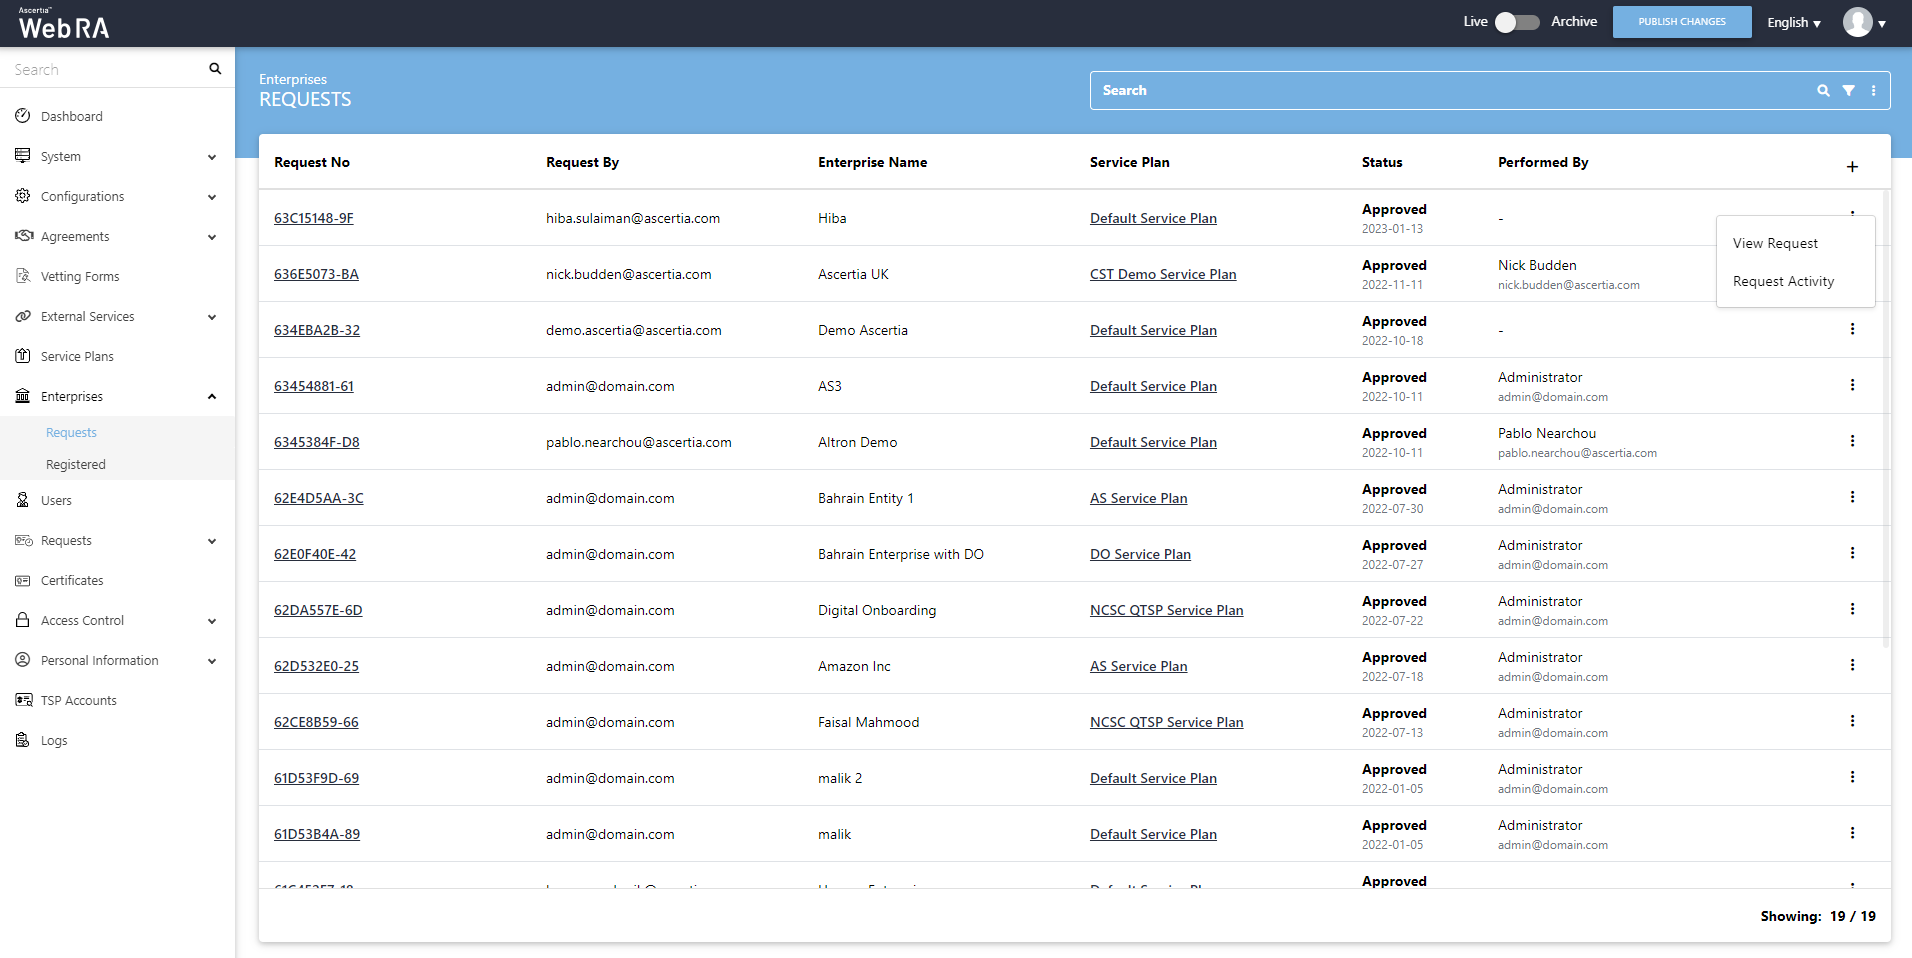
The details of the request will be displayed in a disabled form.
Request Activity
- Expand Enterprises > Requests from the left menu pane.
- Click on button against a specific enterprise request and then click Request Activity.
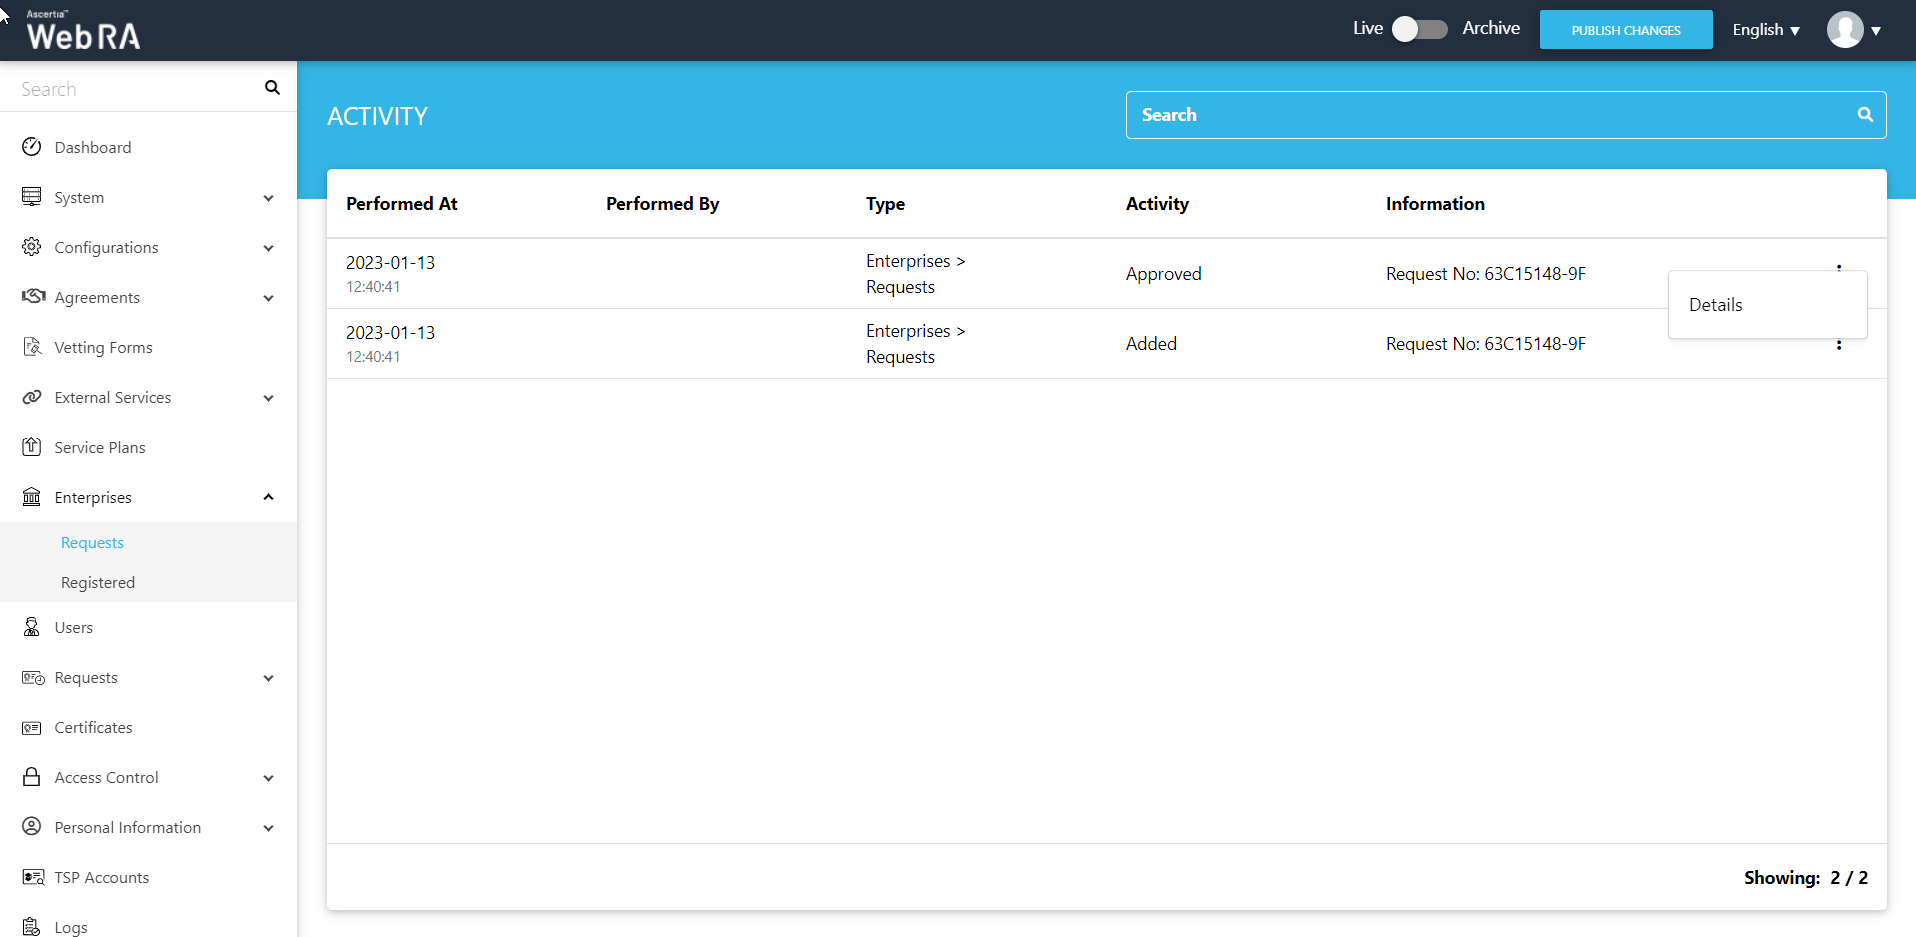
Click Details.
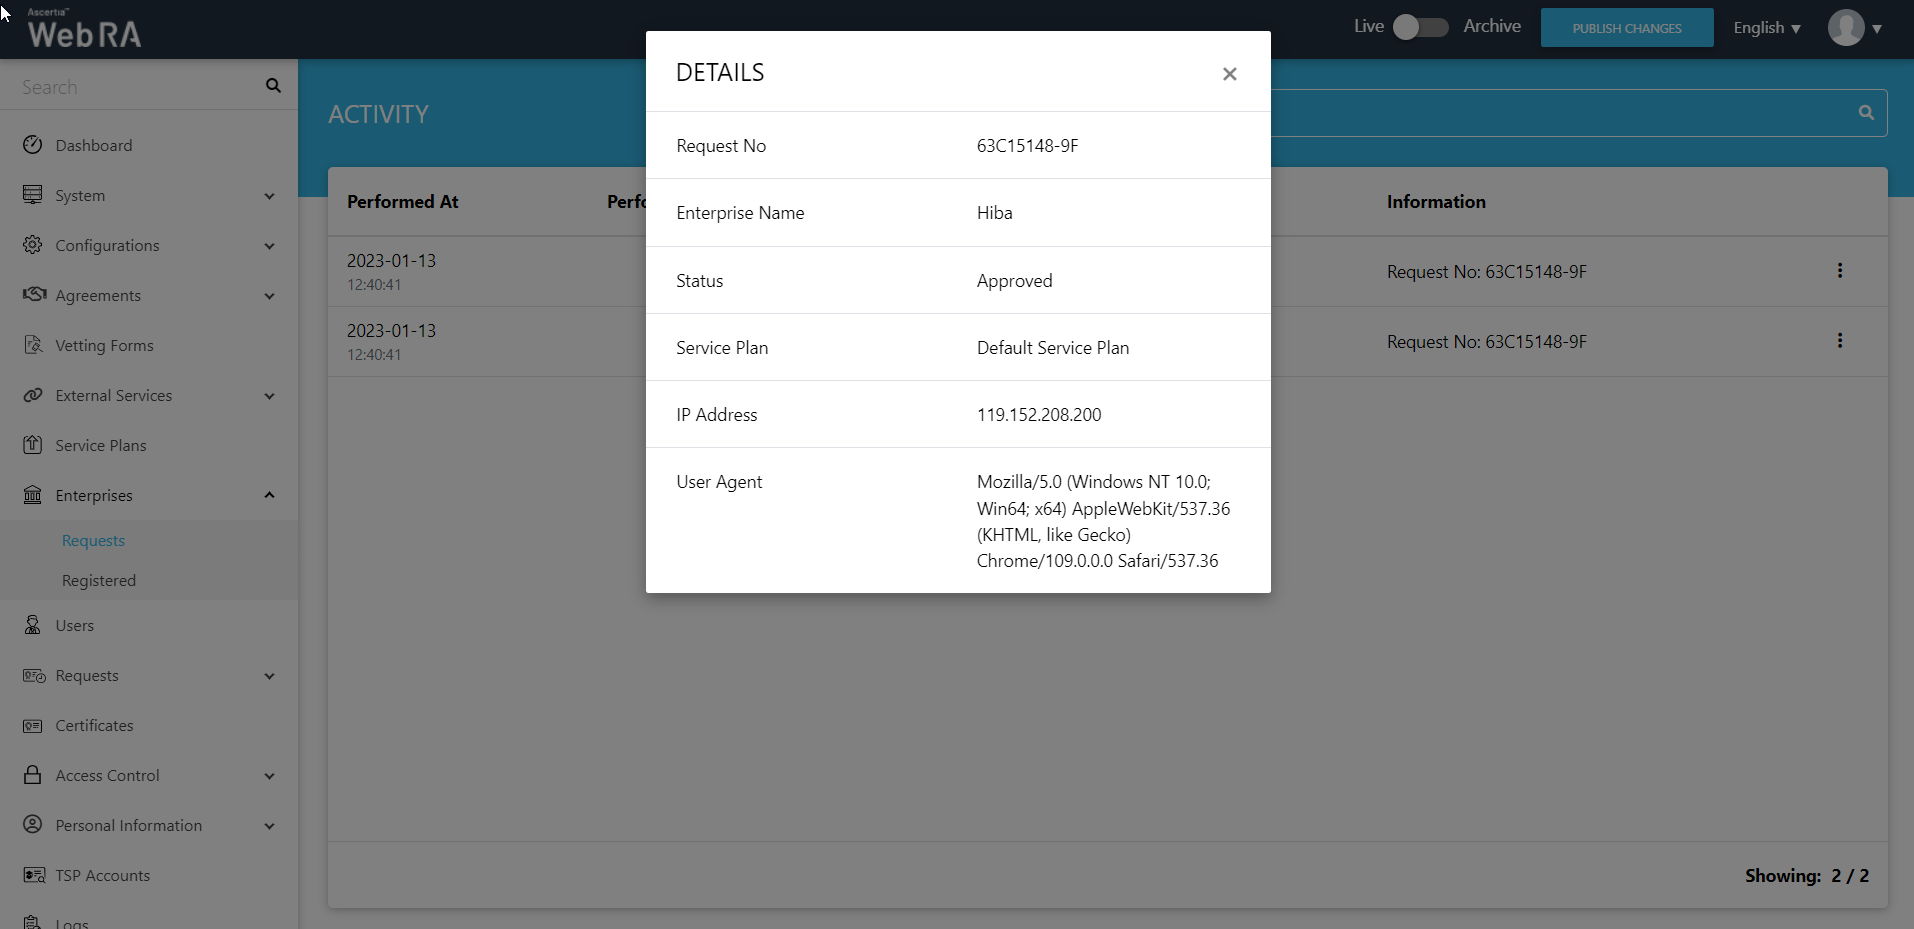
Then click Close.