
Power BI
Power BI Connector
To create a Power BI connector, expand External Services > Connectors from the left-tree menu.
Then, click the add ‘+’ icon in the grid header.
The system will display the ‘Add Connector’ screen, which consists of two sections: Basic Information and Details.
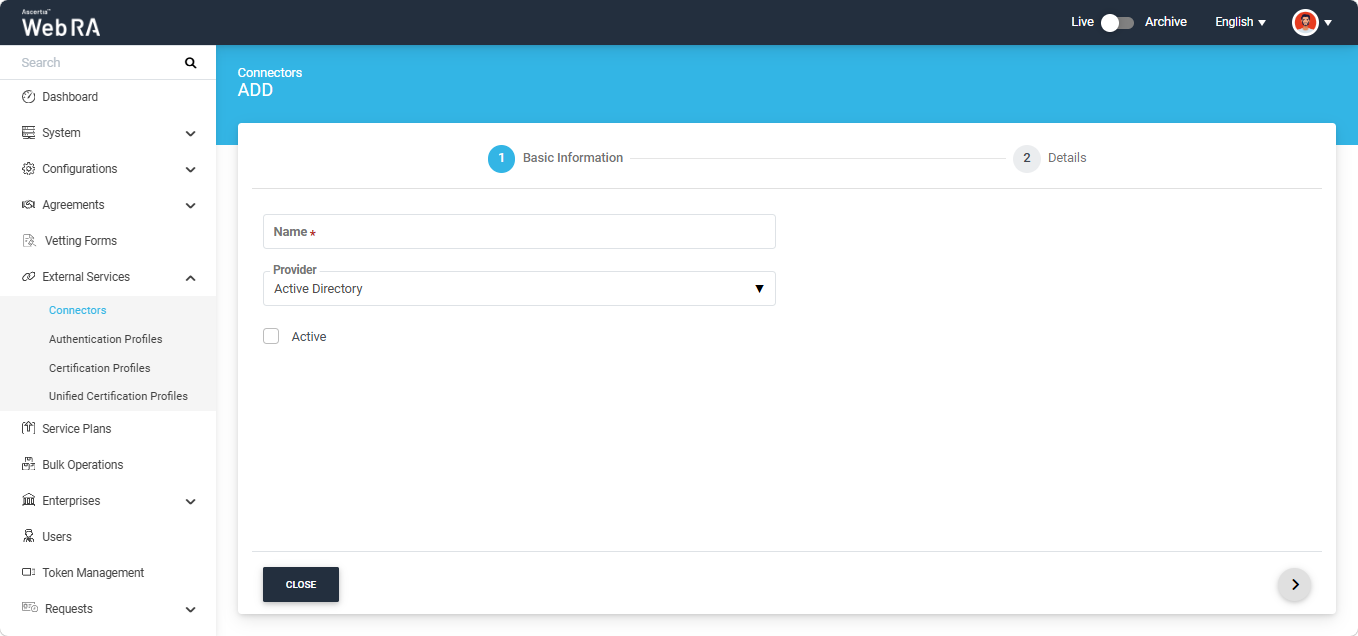
Basic Information
The fields appearing on the Basic Information screen are explained below:
|
Field |
Description |
|
Name |
Specify a unique name for this connector, for example: Power BI Connector. |
|
Provider |
Select Power BI as the provider for this connector. By default, Active Directory is selected. Click the Provider drop-down list and select Power BI. |
|
Active |
Select this check box to make this connector active. Inactive connectors cannot be configured in certification profiles. |
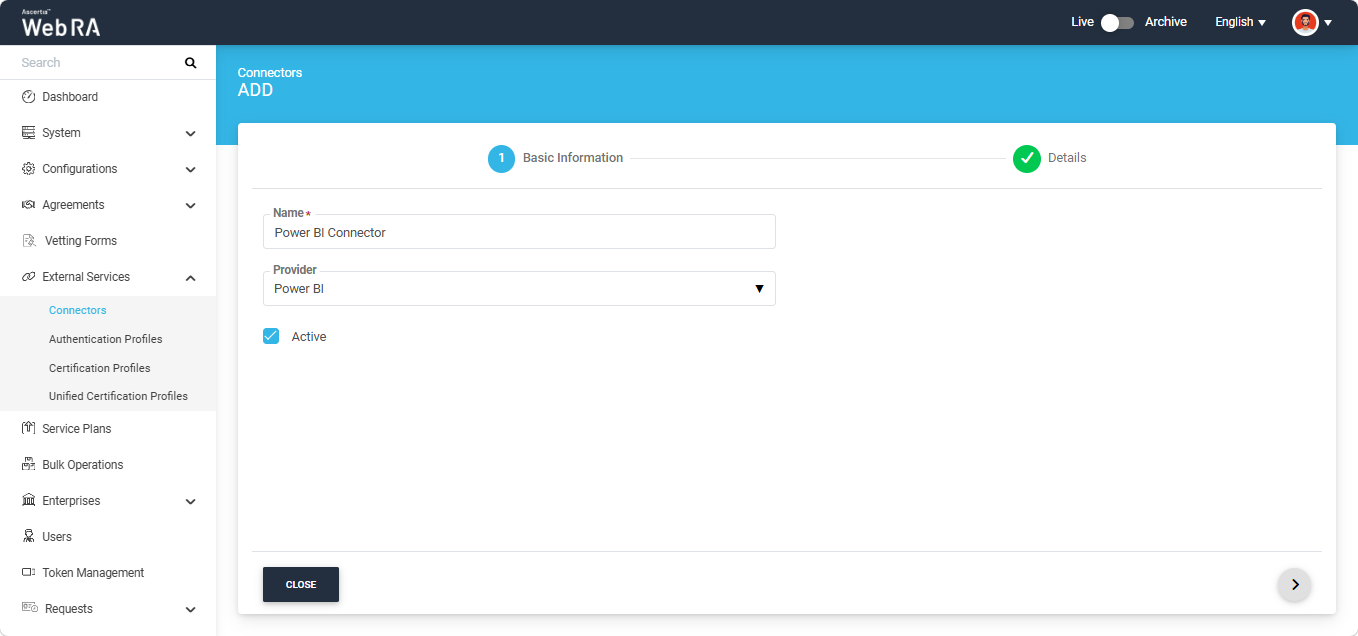
After specifying the information in the required fields, click the next ‘>’ button to navigate to the ‘Details’ section.
Details
The fields appearing on the Details screen are explained below:
|
Field |
Description |
|
Client ID |
Enter the application client ID of the Power BI app registered in Azure Active Directory |
|
Client Secret |
Enter the client secret value created for the Power BI app registered in Azure Active Directory. |
|
Tenant ID |
Enter the application tenant ID of the Azure Active Directory where the Power BI app is registered. |
After entering the information in the required fields, click the ‘Test Connection’ button to verify that the connector configuration is correct and that the connection is working.
If the connection is successful, the system displays a success message confirming that the Power BI connection is working correctly.
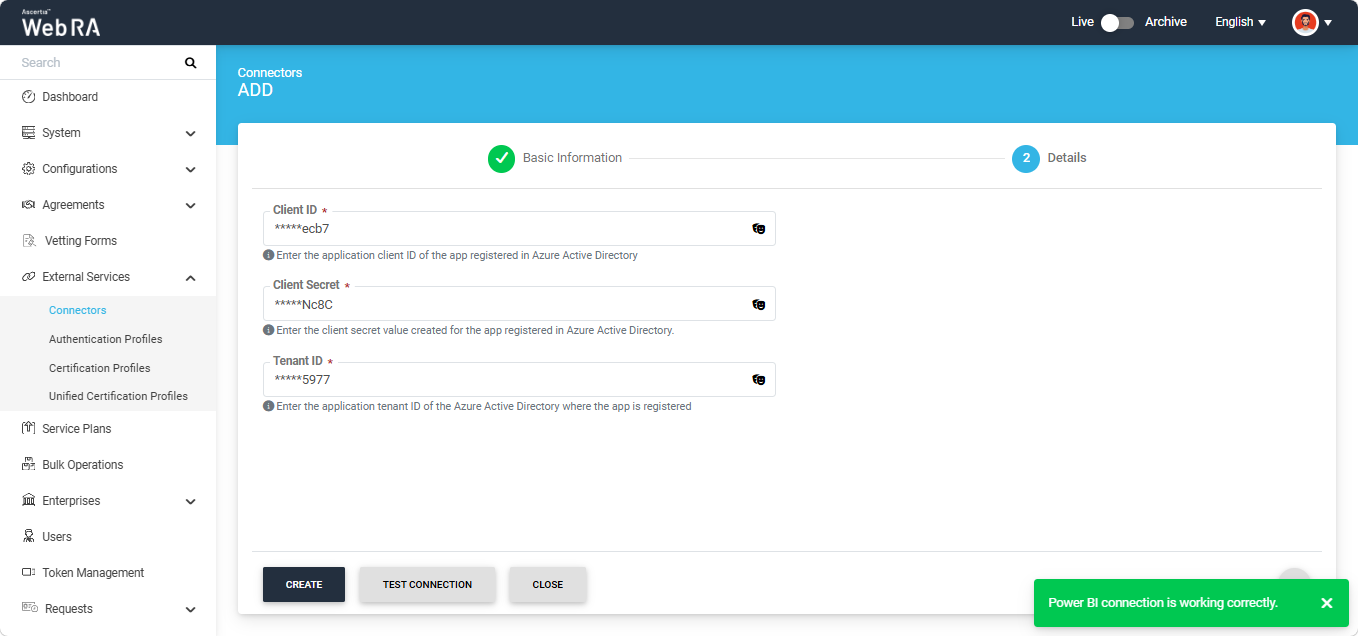
Click the ‘Create’ button to add the Power BI connector in the Web RA system.