Configuring AJP Connector for Local Signing
When you need to sign using local smartcards or USB Tokens, then ADSS Signing Server Go>Sign Service is required. This relies on proper configuration of an AJP connector on the proxy server (if used).
Consult the following points to configure AJP services.
Prepare the Packages
- Retrieve the package tomcat_iis_connector.zip from the path [SigningHub Installation Directory]/tools/adss-server/support. It contains the configuration files necessary for the ISAPI filter to run and communicate with ADSS Signing Server.
- Extract the zip file and place the contents in a folder at a convenient location on your server machine. The default and recommended location is C:\tomcat_iis_connector.
- Copy the isapi_redirect.dll file from either of the x32 or x64 directories (based on your hardware architecture on the server machine). These folders are in the tomcat_iis_connector directory. Place this dll file at the root level of tomcat_iis_connector directory.
- If you extracted the AJP Connector to a directory other than the default recommended directory (i.e. C:\tomcat_iis_connector), then edit the isapi_redirect.properties file and ensure that the log_file, worker_file, worker_mount_file and rewrite_rule_file properties are pointing to the correct locations.
If your ADSS Signing Server is not running on the same server as SigningHub Enterprise, then edit the worker.properties.minimal file in the conf directory so that the worker.worker1.host and worker.worker2.host properties point to the IP address or host name of your ADSS Signing Server installation.
Add ISAPI Filter for SigningHub Enterprise
Note if ISAPI Filter element (IIS feature and not SigningHub Enterprise) is not installed on your IIS then click here for help.
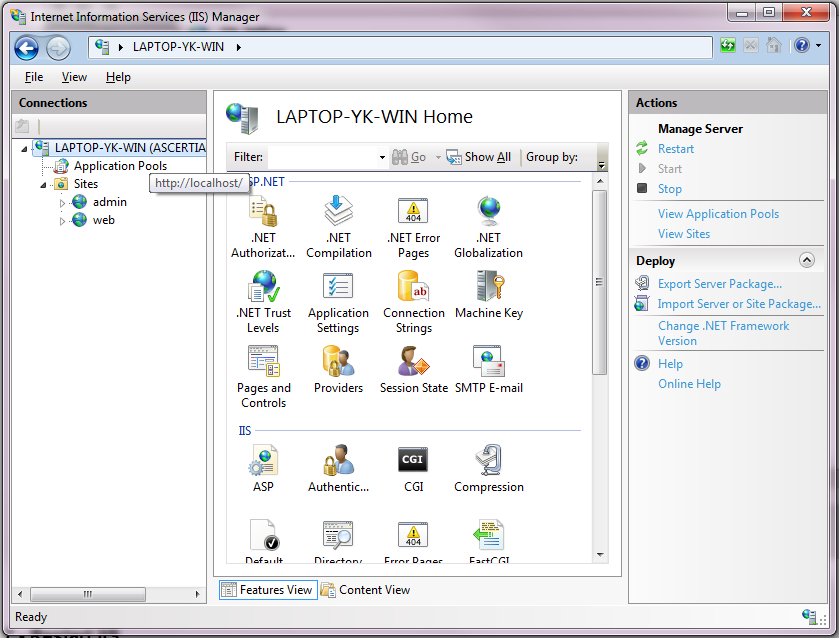
- Open Internet Information Services (IIS) Manager.
- In the Connections panel, ensure that the SigningHub Enterprise Desktop Web application (i.e. by default named as Web) is selected. Now double-click the ISAPI Filters icon in Features View:

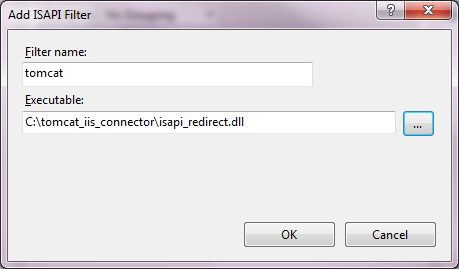
- From the Actions panel on the right, click Add. Set the Filter name to tomcat and set the Executable to point to the isapi_redirect.dll file that you placed in root level of tomcat_iis_connector in the above step:
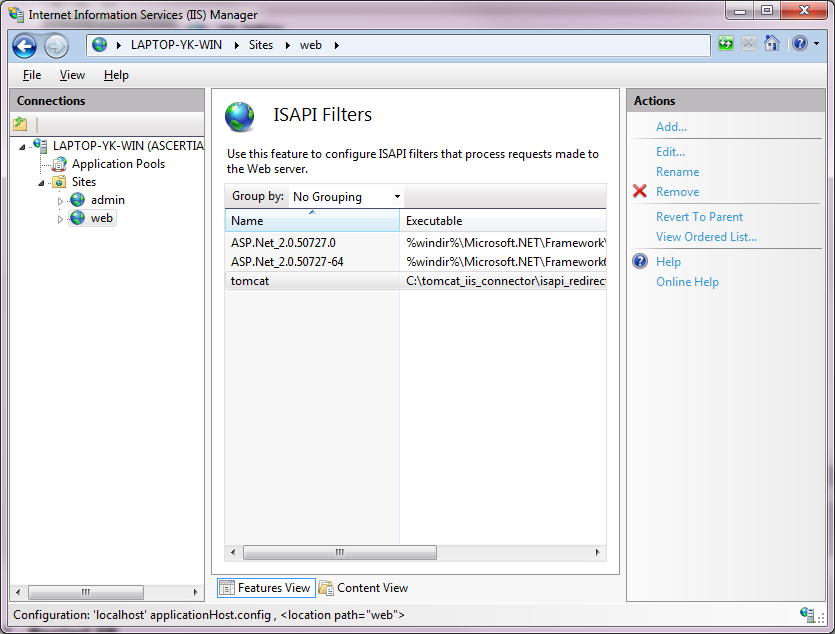
- Click OK. The new filter should now be listed in the ISAPI Filters list for the website:
Add Virtual Directory
Now add a virtual directory in the SigningHub Enterprise Desktop Web application to host the ISAPI Filter.
- In the Connections panel, ensure that the SigningHub Enterprise Desktop Web application (i.e. by default named as Web) is selected. Right-click Web and select Add Virtual Directory:

- Set Alias to jakarta and Physical Path to tomcat_iis_connector directory (e.g. C:\tomcat_iis_connector). Click OK:

Verify that the jakarta virtual directory is now present under the SigningHub Enterprise Desktop Web application: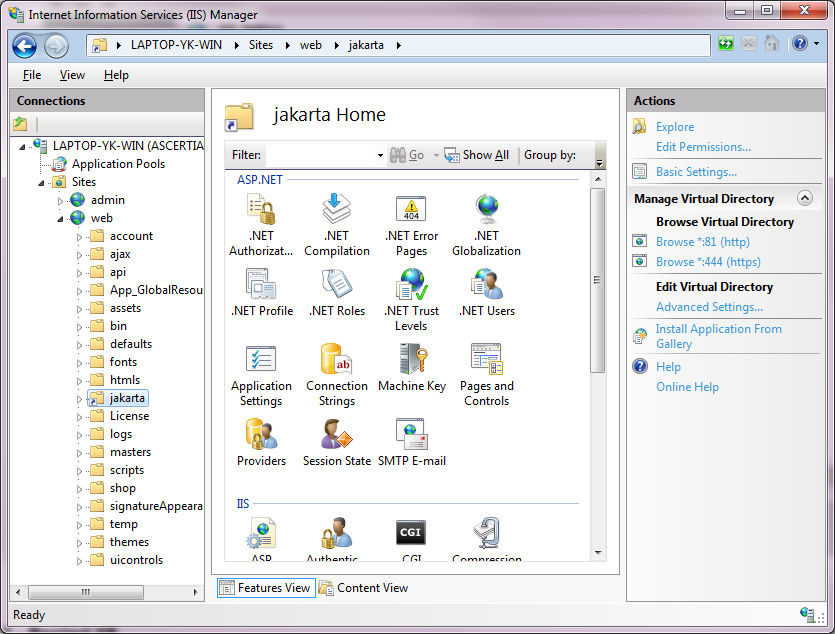
- Now select the jakarta virtual directory from the Connections panel, and double-click the Handler Mappings icon in the Features View:

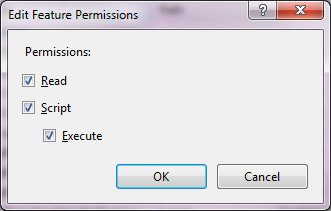
- Click the Edit Feature Permissions link in the Actions panel. Ensure that the Execute option is selected along with the Read and Script options:
- Click OK to close the dialogue message box.
Register ISAPI Extension
Next, register isapi_redirect.dll as an authorised ISAPI Extension.
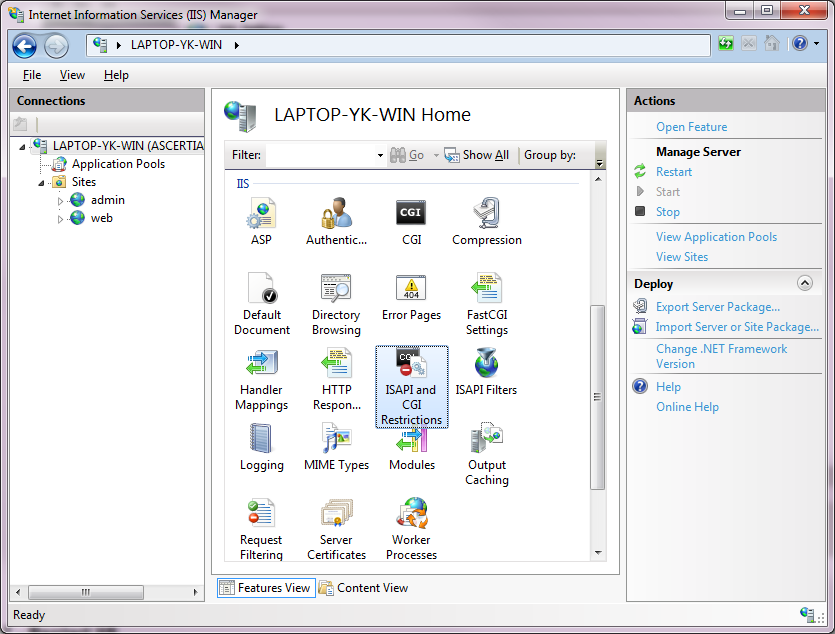
- In the Connections panel, ensure that the local IIS Server instance is selected:
- Double-click the ISAPI and CGI Restrictions icon in Features View:
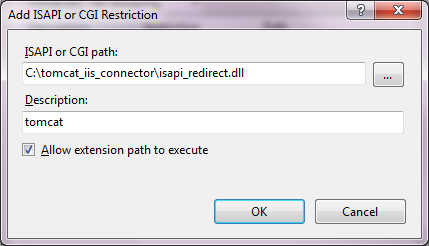
- Click Add in the Actions panel, and set the ISAPI or CGI path to the isapi_redirect.dll you placed at the root level of directory tomcat_iis_connector in the step above. Set the Description to tomcat. Ensure that the Allow extension path to execute option is selected:
- Click OK to close the dialogue message box.
- Verify that the new ISAPI item (i.e. tomcat) is listed in the table with the Allowed restriction:

Update ADSS Signing Server & SigningHub Enterprise Configuration
ADSS Signing Server Go>Sign Service must be updated to cater for local signing in SigningHub. To do this follow these instructions:
- Open the ADSS Signing Server console and login.
- Click Go>Sign Service menu option.
- Click the Service Manager option from the left-hand menu.
- In the Go>Sign Service Address field, paste the URL that points at the AJP connector server. This is the address of the web website that includes the AJP connector configured in IIS, i.e. https://<your_domain>.
|
|
No postfix URL setting is required. |

- Click on the Update button.
- Now go to Go>Sign Profiles and add/edit the profile. (Note that if sample data is added then Go>Sign Profile adss:gosign:profile:001 is configured to work with SigningHub)
- Set the Go>Sign Profile Type as PKCS#1.
- Save the configurations.
- When prompted, click on the Restart button.
Next update the ADSS Signing Server connector in SigningHub Enterprise Admin to use the ADSS Signing Server host URL behind AJP connector, e.g. use http://machine-name/ instead of the default URL http://machine-name:8777/. To do this, follow these instructions:
- Open the SigningHub Enterprise admin console and login.
- Select the Configurations menu.
- Select the Connectors menu from the right-hand side.
- Choose to edit the ADSS Signing Server connector.
- Update the Go>Sign Service Address entry. It should match the entry used directly above in the Go>Sign Service Address field, i.e. the address of the web website that includes the AJP connector configured in IIS.
|
|
Ensure that the final ‘/’ character at the end of the URL is not omitted. |

- Save the changes.
- Choose the Publish Changes option found towards the top right of the browser.
|
|
In order to deploy the AJP connector with SigningHub Enterprise x64 bit package, it is recommended to explicitly set the Enable 32-Bit Application option to False under the advanced properties in IIS, otherwise AJP connector might not function correctly.
|

|
|
Please note that Local Signing will not be available by using sessionState mode SQLServer. However, if users still require performing Local Signing, then please follow these steps to replace sessionState mode with InProc:
<sessionState mode="SQLServer" allowCustomSqlDatabase="true" sqlConnectionString="AdocsEntities" cookieName="SH_ID" timeout="60" compressionEnabled="true"></sessionState> <sessionState mode="InProc" timeout="60" cookieName="SH_ID" cookieSameSite="None" /> |

Restart IIS from the Connections panel. Right-click on the IIS local instance and Restart the IIS Server.