Managing Custom Appearance
SigningHub supports custom Signature Appearances that could best suit your organisational needs. This requires configurations at different ends, i.e
- ADSS Server
- Customize Signature Appearance Attributes
- SigningHub Installation Directory
- SigningHub Admin
- SigningHub Desktop Web - Enterprise User Role
- SigningHub Desktop Web - User's Personal Settings
Configurations Required in ADSS Server
- Create a new PDF Signature Appearance as per requirement using signature appearance designer in the ADSS Server, for details see how to create a new PDF Signature Appearance in ADSS Server.
- Once the new signature appearance is designed, open the signature appearance preview by clicking the View button and save the appearance image as PNG file.
- Now click the Export button to get the signature appearance file (APP file).
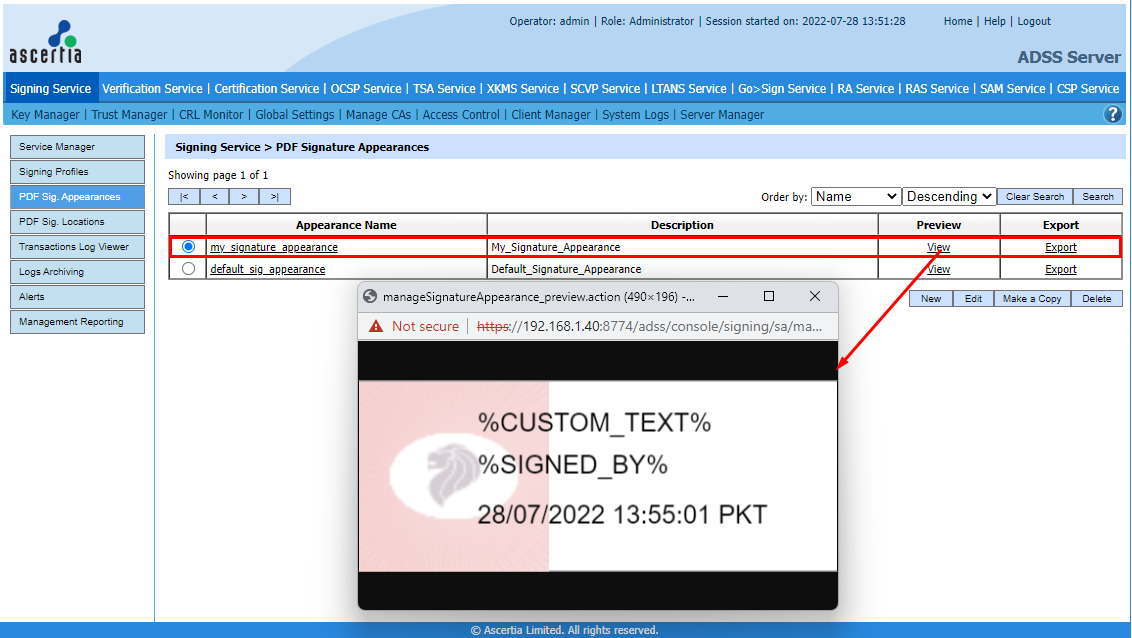
- The appearance image file (PNG file) and appearance file (APP file) must have same name, e.g. My_Signature_Appearance.app and My_Signature_Appearance.png
You will need to customise signature appearance file (APP file) to set signature appearance file according to the desired needs as explained in the next step.
Customise Signature Appearance
SigningHub supports following customization in signature appearance attributes:
- Multi Line text
- Custom text
- Custom positioning of attributes
- Custom date time formats
- Time Zone abbreviations
- Font style
- Font Color
|
|
|

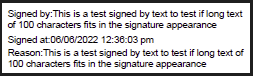
Multi Line Text:
SigningHub supports multiline text attributes up to two lines. If text does not fit in two lines then extra text will be truncated.
- To enable multiline in Signature Appearance , you have to:
- Edit "my_signature_appearance" (.app file)
- Add multiLine attribute with value true in the SignatureAppearance root element

|
|
|
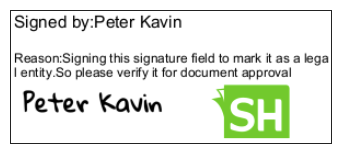
Custom Text:
SigningHub supports custom text attribute if extra text needs to be added other than default attributes.
- To add custom text attribute user needs to follow these steps:
- Edit signature appearance file, e.g. my_signature_appearance.app
- Add an attribute with name CUSTOM_TEXT in appearance file and set its position and font elements accordingly.

- Custom text value needs to be added in <Value> element.
- SigningHub reads this attribute in signature appearance file and display the value according to the defined parameters.
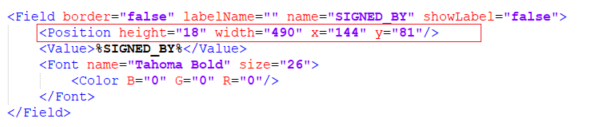
Custom Position of attributes:
SigningHub supports custom positioning of attributes defined in signature appearance file.
a) To achieve the custom positioning of an attribute user needs to follow these steps:
- Edit signature appearance file, e.g. my_signature_appearance.app
- User needs to update following properties of the required attribute:
- height: represent the height of an attribute
- width: represent the width of an attribute
- X: represents the starting position of an attribute
- Y: represents the starting position of an attribute from TOP
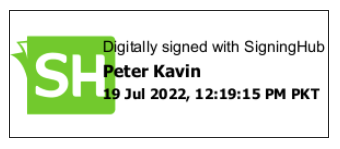
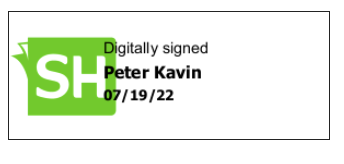
Custom date time format:
SigningHub supports custom date time format.
a) To achieve custom date time format user needs to follow these steps:
- Edit signature appearance file, e.g. my_signature_appearance.app
- User needs to update <Value> of SIGNING_DATE attribute and set the required date time format syntax.
- User can update custom date time format according to the below mentioned examples:
- yyyy-MM-dd hh:mm:ss (2022-06-17 04:19:13 PM)
- yyyy-MMM-dd hh:mm:ss (2022-Jun-17 04:19:13 PM)
- MMMM-dd (June-17)
- yyyy-MM-dd (2022-06-17)
- dd MMM yyyy, HH:mm:ss tt (25 Jul 2022, 05:42:29 AM PKT)

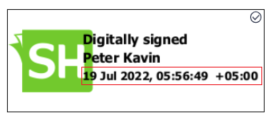
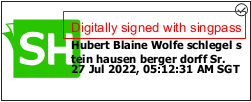
Time zone abbreviations:
SigningHub supports time zone abbreviations in custom date time format.
a) To achieve this user needs to follow these steps:
- Edit signature appearance file, e.g. my_signature_appearance.app
- If time zone offset "zzz" is not provided in custom date time format, system will display time zone abbreviation instead of numeric value, e.g. PKT, SGT

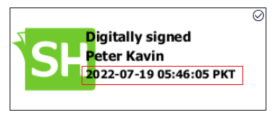
- If time zone offset "zzz" is provided in custom date time format, system will display numeric representation of time zone.

|
|
|
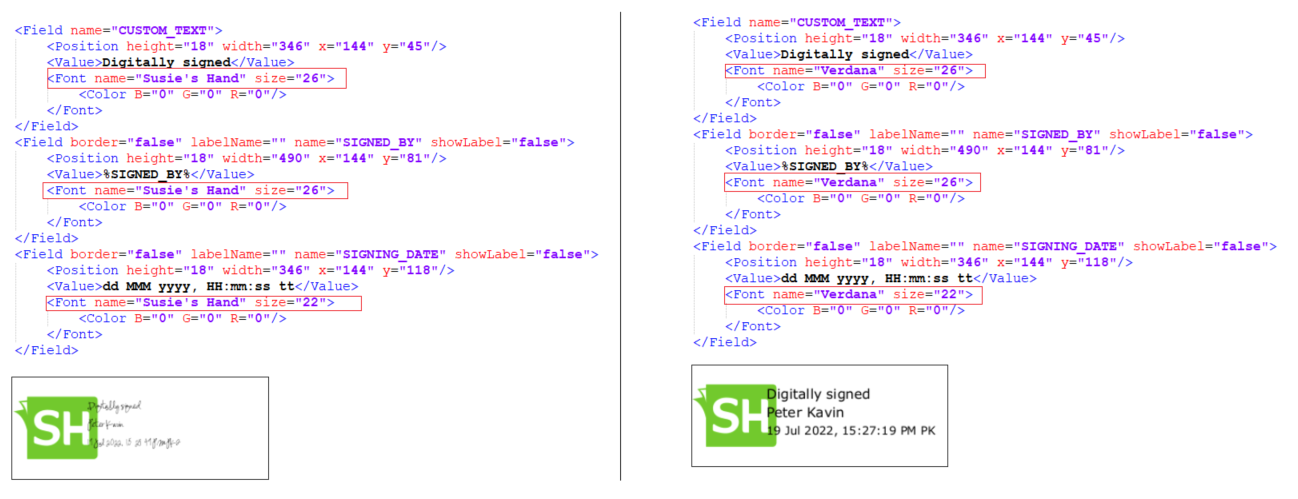
Font Style:
SigningHub supports different font styles. Supported font styles are:
- Arial
- Lucida Sans Unicode
- Susie's Hand
- Tahoma
- Tahoma Bold
- Verdana
a) If user required to use Susie's Hand or Verdana font style for text attributes, following steps need to be followed:
- Edit signature appearance file, e.g. my_signature_appearance.app
- User needs to update font style name against each text attribute.
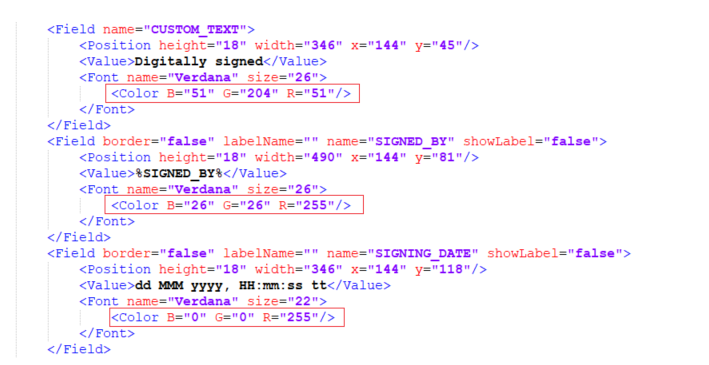
Font Color:
SigningHub supports custom font color.
- To achieve text attribute font color, user needs to follow these steps:
- Edit signature appearance file, e.g. my_signature_appearance.app
- User needs to update RGB value in <Color> element against each text attribute.
|
|
|
User needs to place both (My_Signature_Appearance.png and My_Signature_Appearance.app) files in SigningHub Installation Directory.
Configurations Required in SigningHub Installation Directory
After configuring all attribute properties of signature appearance user need to follow these steps to be able to use custom signature appearance:
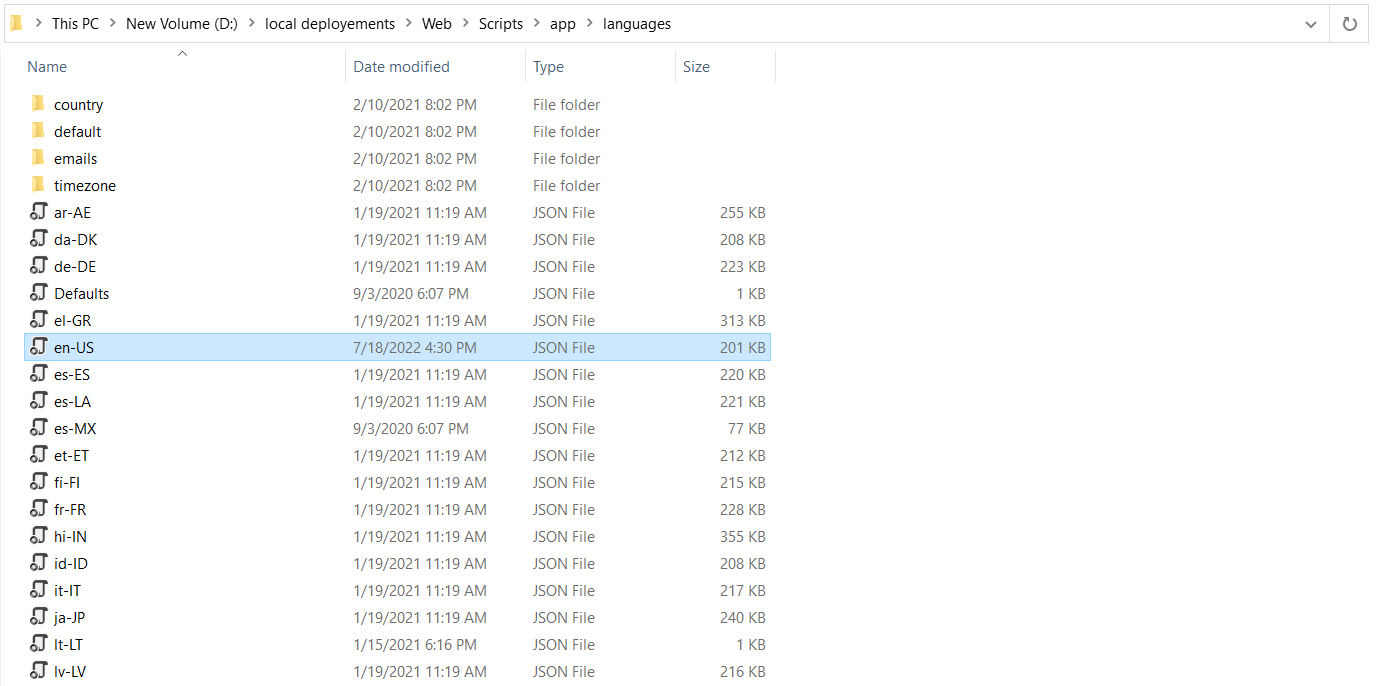
- Navigate to the path [SigningHub-Installation-Directory]\default\appearances, and place both (My_Signature_Appearance.png and My_Signature_Appearance.app) files.

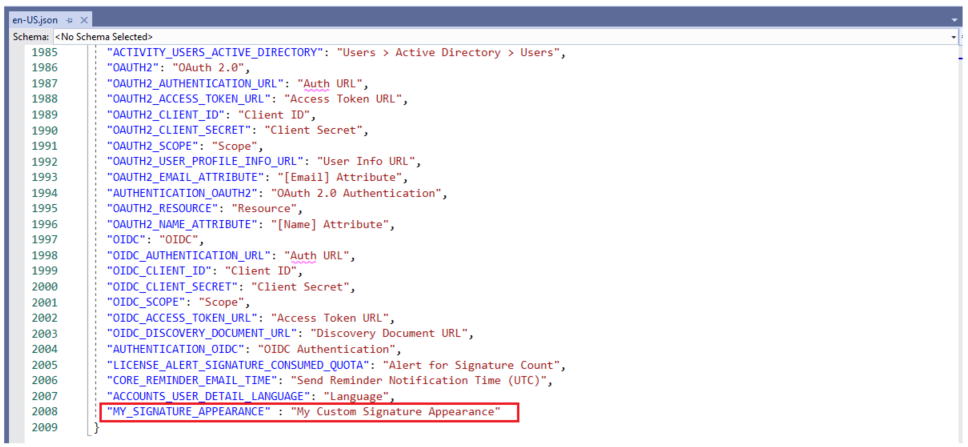
- Navigate to the path [SigningHub-Installation-Directory]\admin\Scripts\app\languages, and edit the JSON file of particular language e.g. en-US.json.
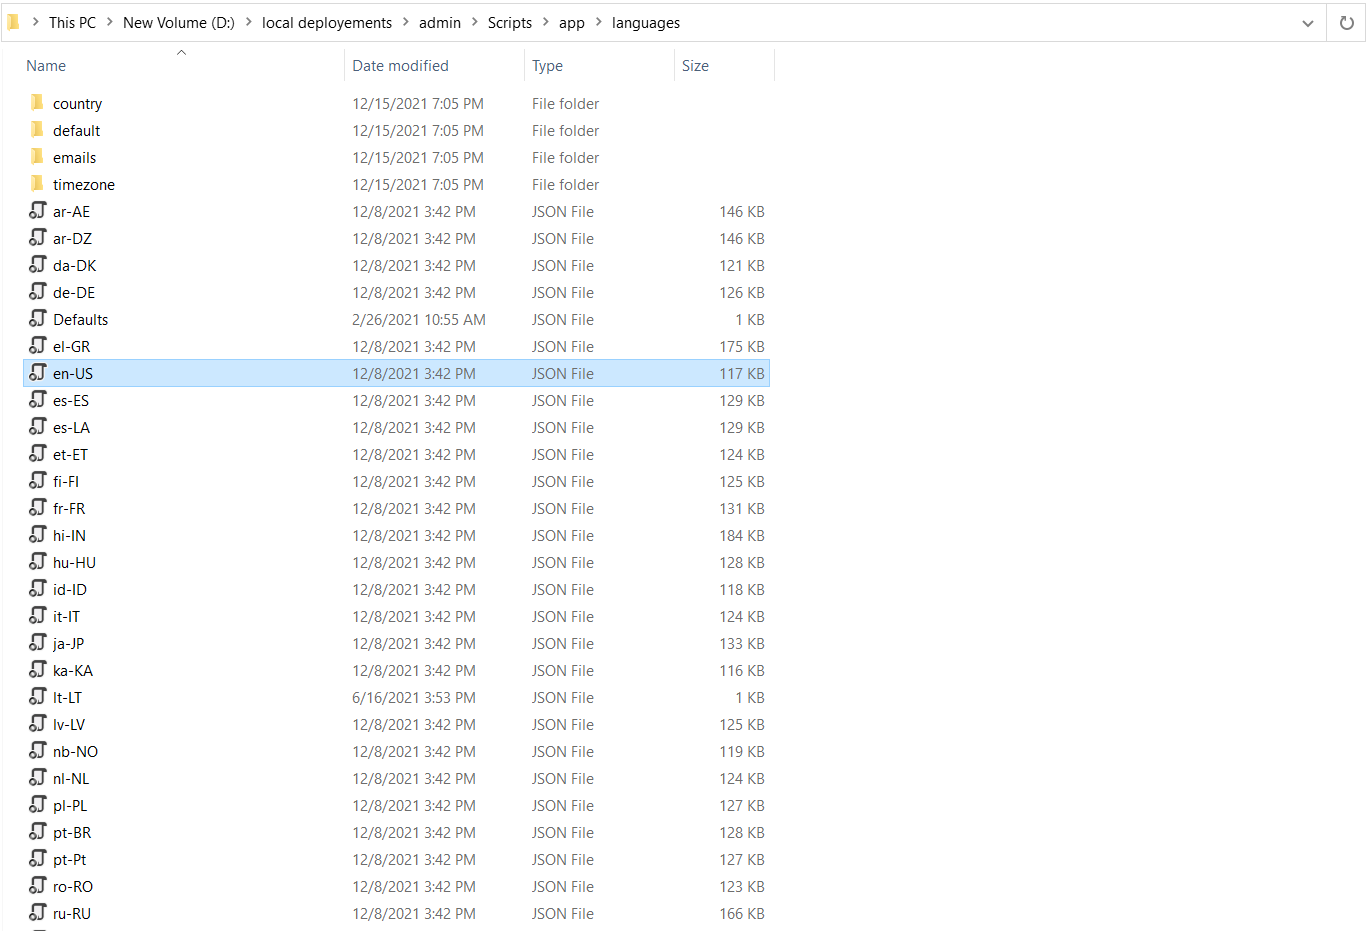
- Add a comma (,) at the end of the last line, and add a new entry of the language text to be displayed in SigningHub Admin: "MY_SIGNATURE_APPEARANCE": "My Custom Signature Appearance". User needs to provide signature appearance file name in capital letters e.g. "MY_SIGNATURE_APPEARANCE". Save and close the language file.
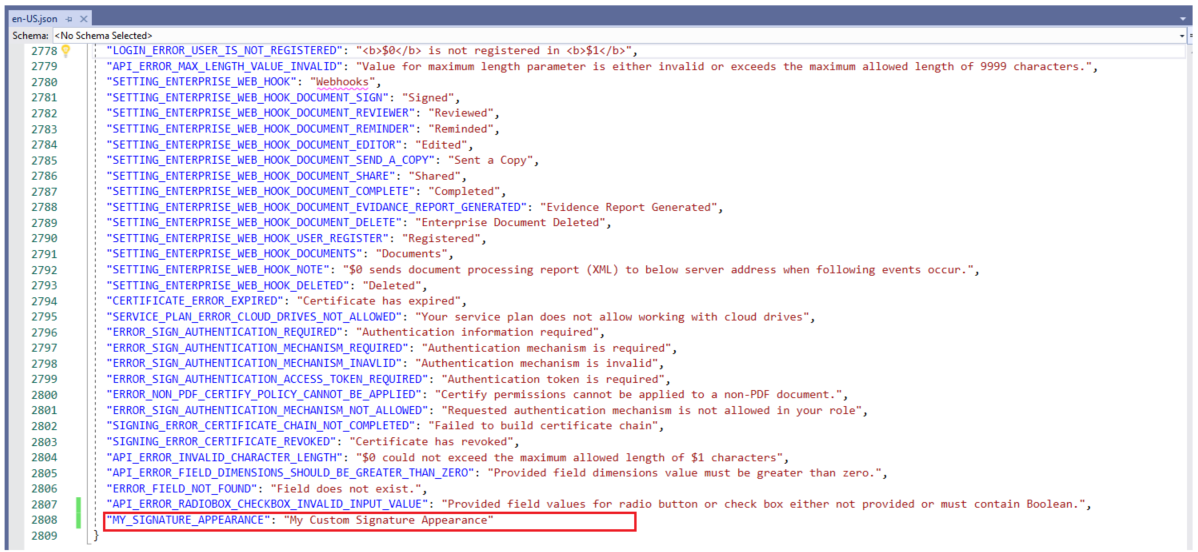
- Navigate to the path [SigningHub-Installation-Directory]\web\Scripts\app\languages, and edit the JSON file of particular language e.g. en-US.json.
- Add a comma (,) at the end of the last line, and add a new entry of the language text to be displayed in SigningHub Web: "MY_SIGNATURE_APPEARANCE": "My Custom Signature Appearance". User needs to provide signature appearance file name in capital letters e.g. "MY_SIGNATURE_APPEARANCE". Save and close the language file.
Configurations in SigningHub Admin
After completing the above mentioned steps, user needs to perform following steps:
- Log in to SigningHub Admin.
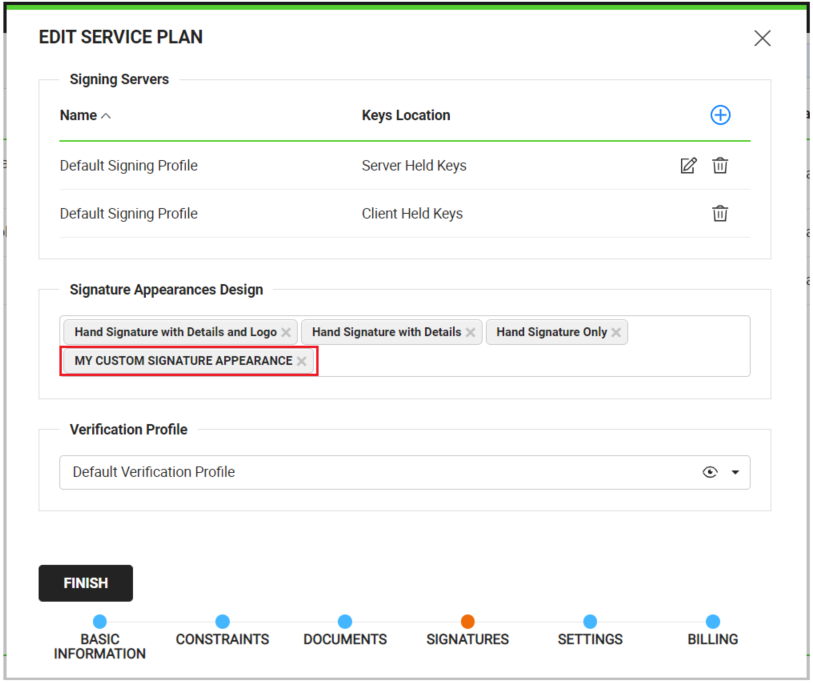
- Navigate to the Service Plan screen
- Edit the service plan and add new added signature appearance under Signatures Tab.
Configurations in SigningHub Desktop Web - Enterprise Role
After configuring the signature appearance in Service Plan, user needs to follow these steps to configure it in Enterprise Role:
- Log in to SigningHub Desktop Web with enterprise admin credentials.
- Navigate to the Enterprise Settings > Roles
- Edit the enterprise role, and navigate to the Signature Appearance tab.
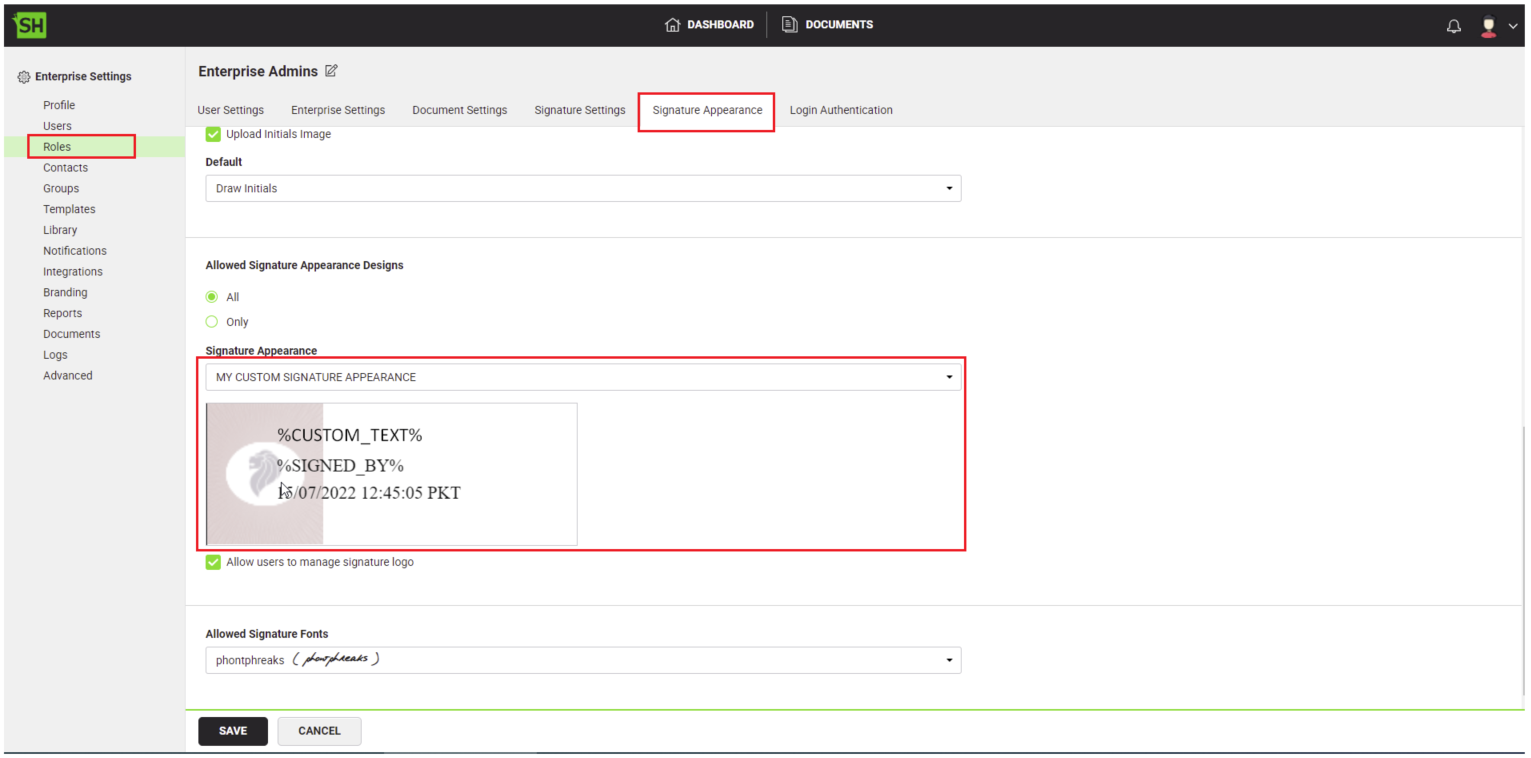
- Select the new added signature appearance (i.e. My Custom Signature Appearance) from the Signature Appearance drop down. Save and close the role after editing.
Configurations in SigningHub Desktop Web - User's Personal Settings
After configuring the signature appearance in enterprise role, user need to follow these steps to configure new added signature appearance in Personal Settings:
- Log in to SigningHub Desktop Web.
- Naviagate to My Settings> Signatures> Signature Appearance tab and select the new added signature appearance (i.e. My Custom Signature Appearance) from the Signature Appearance Design drop down. Save these configurations.
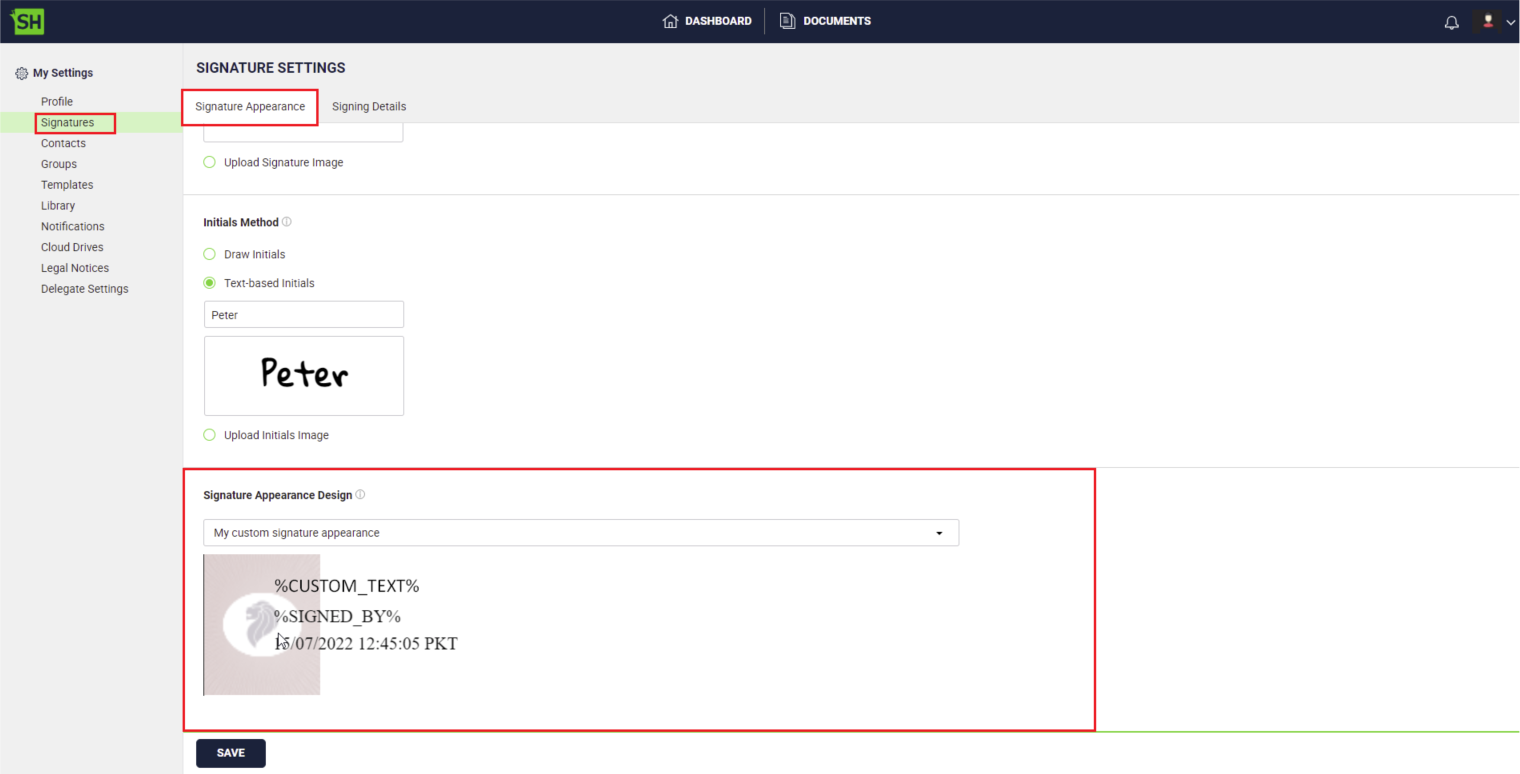
Signature appearance configured in personal settings will be used as the default appearance in signing dialog when user performs signing operation.