Create SigningHub Permissions in Site Collection
After you have opted an existing site collection, or have created a new site collection in your SharePoint environment, to install SigningHub for SharePoint you need to:
1. Create required permission levels in the site collection on which the add-in is required to install, and
2. Assign the permission levels to SharePoint site groups as required.
These permission levels are used to give a restricted end-user access of SigningHub for SharePoint to the site collection. A SharePoint site group having all these permissions will have full access to the SigningHub for SharePoint add-in.
To comply with the SigningHub standards, the permission names should be:
|
SH-SETTINGS |
Allows users to access the admin related configurations option within the add-in. |
|
SH-CHECKSTATUS |
Allows users to access the check documents status option within the add-in. |
|
SH-SHARE |
Allows users to access the share documents option within the add-in. |
|
SH-SIGN |
Allows users to access the sign documents option within the add-in. |
|
SH_SETTINGS_ACCOUNT |
Allows users to access the Account Setting sub-section of the configuration's options. |
|
SH_SETTINGS_USER |
Allows users to access the User Setting sub-section of the configuration's options. |
|
SH_SETTINGS_DOCUMENT |
Allows users to access the Documents Setting sub-section of the configuration's options. |
|
SH_SETTINGS_ADVANCE |
Allows users to access the Advanced Setting sub-section of the configuration's options. |
|
SH_SETTINGS_AUTOPULL |
Allows users to access the AutoPull Setting sub-section of the configuration's options. |
|
SH_SETTINGS_LOCATION |
Allows user to access the Completed Documents Location of the configuration’s options. |
|
Please note that permission names are case-sensitive, and any deviation in them or skipping any permission may possibly lead to SigningHub for SharePoint malfunction. Consider an example of creating the "SH-SETTINGS" permission, the same process can be followed to create other three as well. Once you are done, you need to assign these permission levels to your SharePoint user's groups as required. |
|
1. Browse the SharePoint site link (on which SigningHub add-in is required to install) and log into your Office 365 account with SharePoint administrator credentials.
2. Click ![]() and select the "Site settings" option.
and select the "Site settings" option.
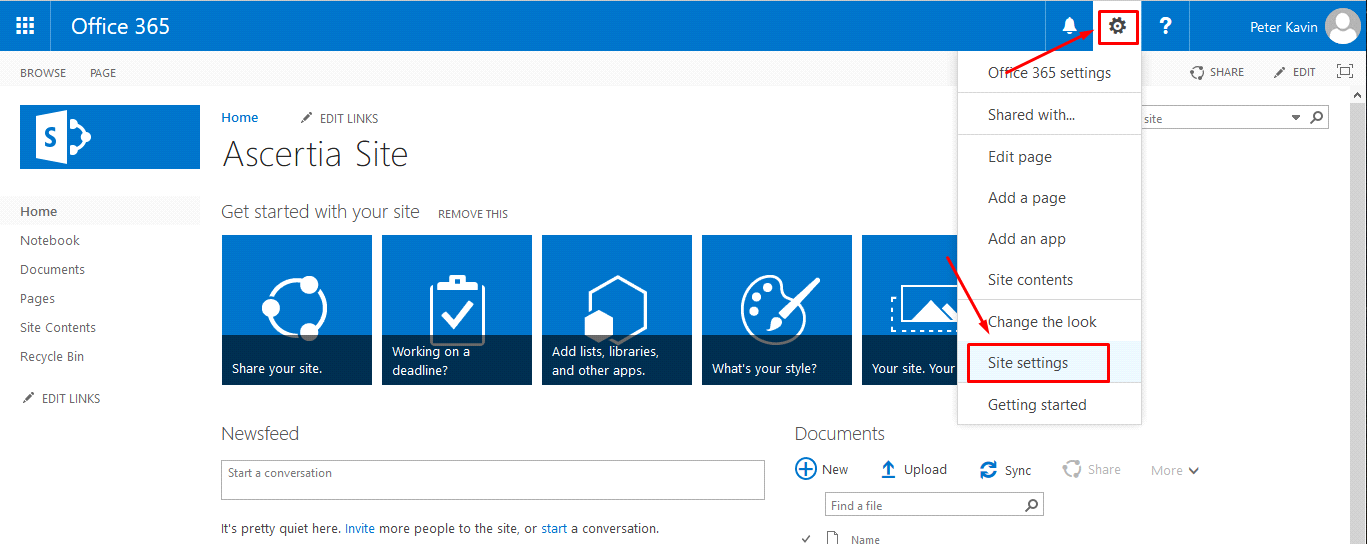
3. Click the "Site permissions" option.
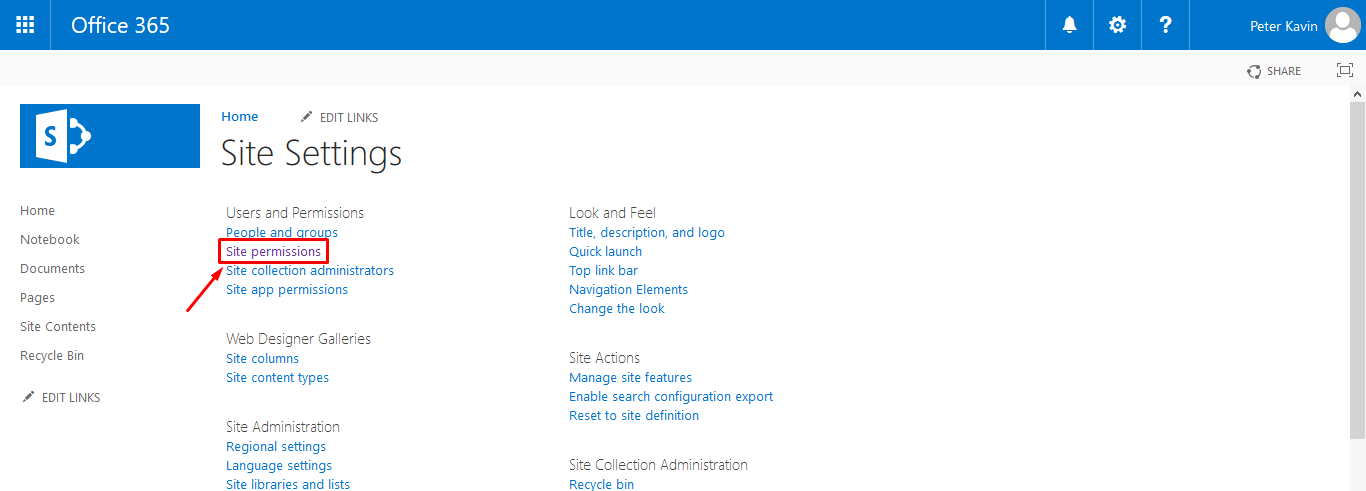
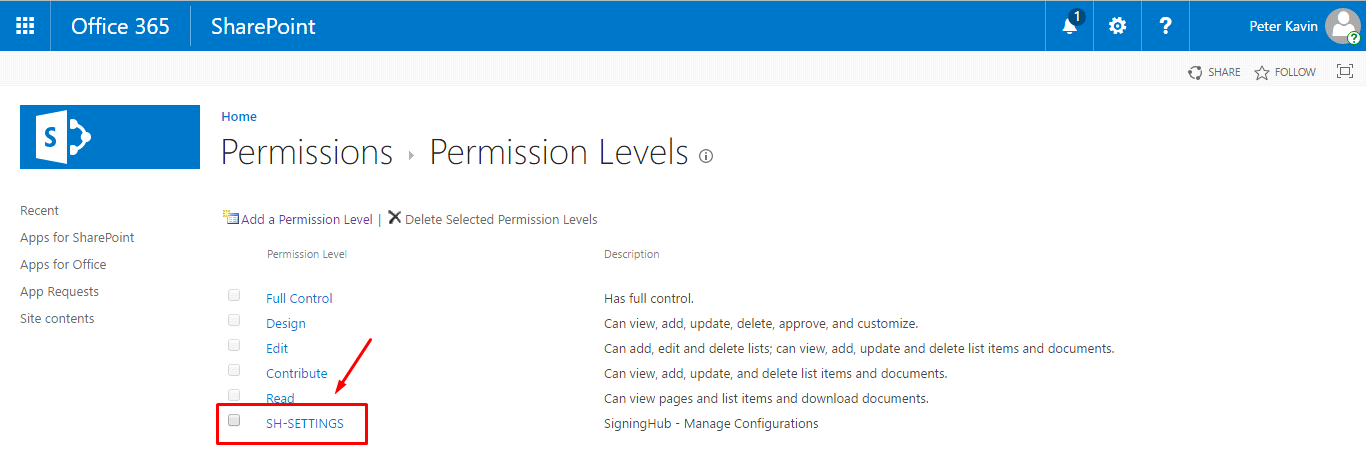
4. Click the "Permission Levels" option.
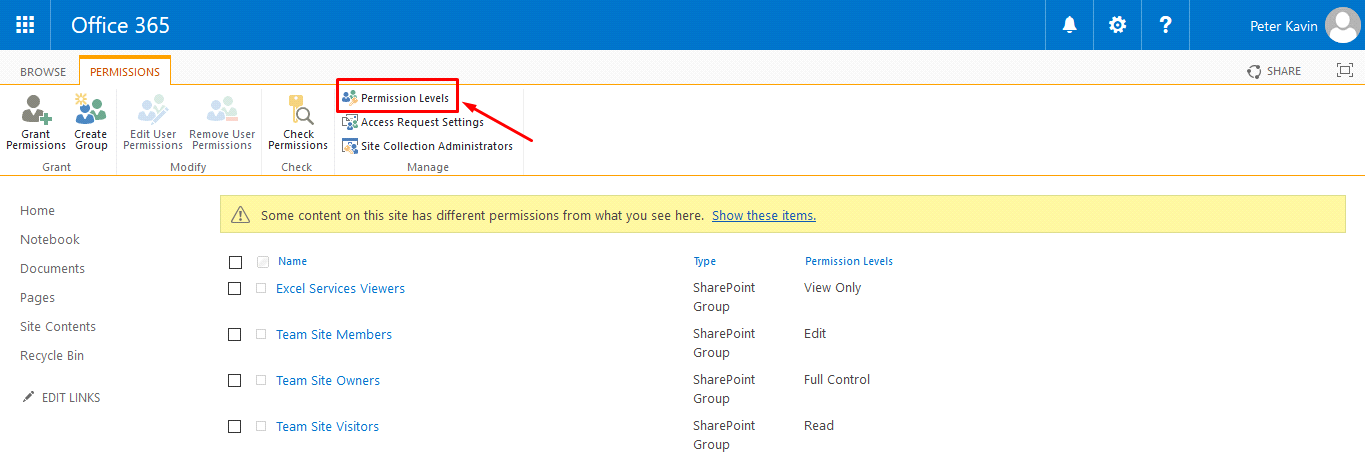
5. Click the "Add a Permission Level" option.
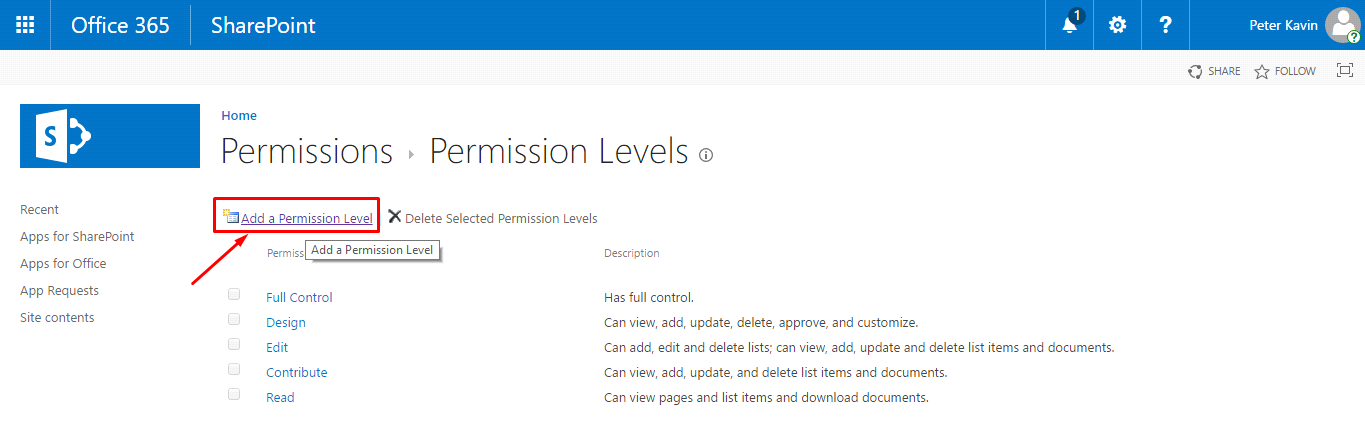
6. The "Add a Permission Level" page will appear. Specify the permission name as "SH-SETTINGS" and its description in the provided fields.
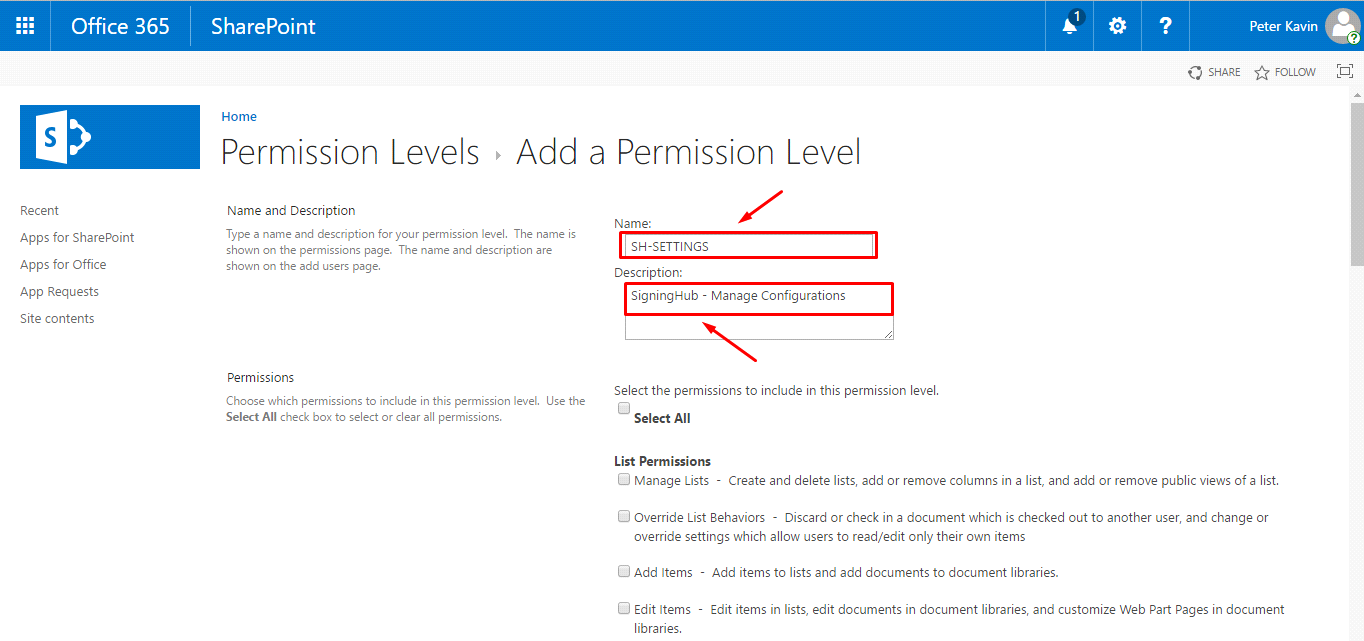
Now scroll down the "Add a Permission Level" page and select the "Enumerate Permissions" check box, as marked with the red arrow.
Repeat the steps 5, 6 and 7 to create other permissions as well in the same way.
After creating all four permissions, wait for 15-30 minutes to make these changes effective in your SharePoint account. It is also recommended to logout from your browser and re-login.