Step 6 - Using the Service Manager
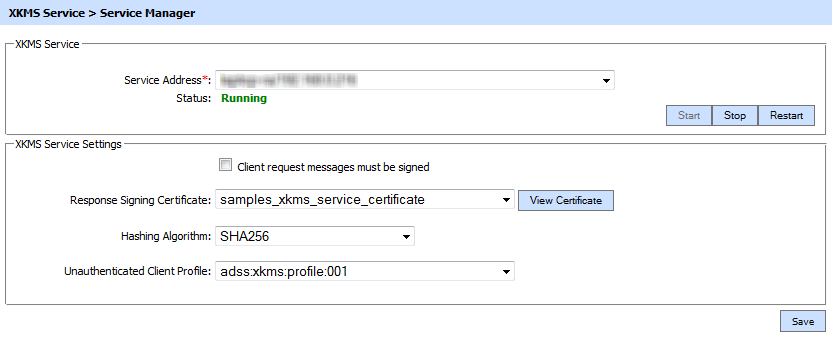
To start or stop the XKMS Service, go to the Service Manager tab and ensure the correct address is shown:
The configuration items are as follows:
|
Items |
Description |
|
Service Address |
The address of the XKMS Service being controlled from this Service Manager. Ensure the address points to the correct service URL, i.e. if you are running the service on multiple machines in a load-balanced configuration then check that the name is correct for the particular instance that needs to be started/stopped/restarted. By default it will be that of the local machine. |
|
Start |
Start the service. Status will change to “Running” after a successful start. |
|
Stop |
Stop the service. Status will change to “Stopped” after the service is stopped. |
|
Restart |
Stop and then start the service in one go, Status will change to “Running” after a successful restart. |
|
Client request messages must be signed |
Select this checkbox to ensure that client applications are forced to sign XKMS Service request messages. The ADSS XKMS Service checks if the path of the request signing certificate can be built to a trusted authority present within Trust Manager. If the path is not built to a trusted CA withing the Trust Manager then the request will not be entertained. |
|
Response Signing Certificate |
All XKMS Response messages are signed so that end user can trust the ADSS XKMS Service responses. To specify the signing certificate (and private key) use the drop-down menu labeled Response Signing Certificate. If such a key has not been generated and/or certified then do this via the ADSS Key Manager as explained in Step 1. |
|
Hash Algorithm |
Selected hashing algorithm is used to sign the generated XKMS responses. The available options are SHA1, SHA256, SHA384, SHA512 and RipeMD160. |
|
Unauthenticated Client Profile |
This profile will be used to process the request if no client is specified in the request. |
|
|
Ensure all the changes are saved by clicking the Save button and restart the service to take changes effect. |

See also
Step 1 - Generate Key and Certificate
Step 2 - Registering CAs
Step 3 - Configure CRL Monitor
Step 4 - Configuring XKMS Profile
Step 5 - Registering Business Applications