Step 3 - Configuring CSP Profile
To make it easier for business applications to request management of users and certificates along with signing operations, the ADSS CSP Service uses CSP Profiles. A CSP profile defines the format and characteristics of the user password policy and signing service settings that will be used when this profile is referenced in a user registration and signing requests from a client application.
To create or edit a CSP profile, click on CSP Profiles and the following screen is shown:

A new profile can be created by clicking the New button. An existing profile can be edited by clicking the Edit button. If you want to create a new profile by copying large part of an existing profile then click Make a Copy. The following screen is shown:
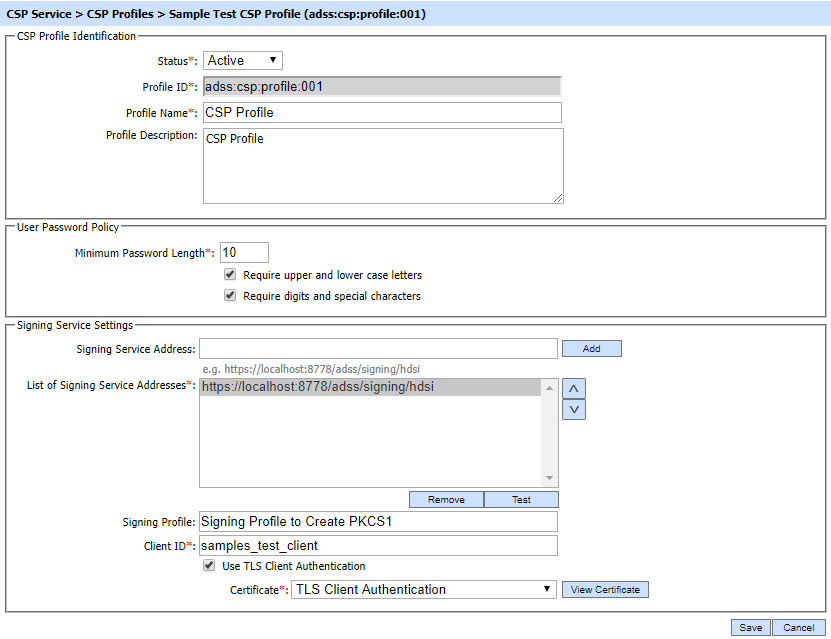
The configuration items are as follows:
|
Items |
Description |
||
|
Status |
A CSP profile may be marked Active or Inactive. Note: An inactive profile will not be used to process requests generated by client application. |
||
|
Profile ID |
A mandatory field which provides a system-defined unique identifier for this profile. |
||
|
Profile Name |
A mandatory unique name defined by the ADSS Server Administrator for easier recognition of the profile within the ADSS Operator Console. |
||
|
Profile Description |
This can be used to describe the profile in more detail (e.g. in which circumstances will this CSP profile be used). This is for information purposes only. |
||
|
User Password Policy |
This section defines the configurations that control user password policy against which the user password is matched. |
||
|
Minimum Password Length |
Defines the minimum possible length (Characters) for the user password. Note: The default value is 10. |
||
|
Require upper and lower case letters |
If this option is selected then both upper and lower case characters must be used in user password during user registration. Note: The default is not to enforce this restriction. |
||
|
Require digits and special characters |
If this option is selected then both digits and special characters must be used in user password during user registration.
Note: The default is not to enforce this restriction. |
||
|
Signing Service Settings |
This section defines the configuration required for requests forwarding to Signing Service. |
||
|
Signing Service Address |
Use this field to add Signing Service address(es). |
||
|
List of Signing Service Addresses |
This field shows the Signing Service addresses that can be used to generate user signatures. Multiple service addresses can be added. The Test button checks that the service is available. The Remove button deletes a configured service address. |
||
|
Signing Profile |
Specifies the Signing profile to be used for this CSP profile. |
||
|
Client ID |
Shows the Client ID of Signing Service. CSP Service will use this Client ID while communicating with Signing Service. Signing service verifies that this is a registered Client ID within the Client Manager module before granting access to this service. |
||
|
Use TLS Client Authentication |
If this option is enabled then CSP Service will communicate with Signing Service using TLS client authentication. Note: By default it is disabled. |
||
|
Certificate |
Select the client TLS certificate which pre-exists in the Key Manager. Note: It is required to register the Issuer CA of the client TLS certificate in Trust Manager with the purpose CA for verifying TLS client certificates. |

The table of CSP profiles can be sorted in either Ascending or Descending order by selecting a table column from the drop down list. The list can be sorted by ‘CSP Profile ID’, ‘CSP Profile Name’, ‘Created At’ or ‘Status’. By default, CSP profiles are sorted on ‘Created At’ filter.
Click on the Search button on CSP Profiles listing page will display following screen:
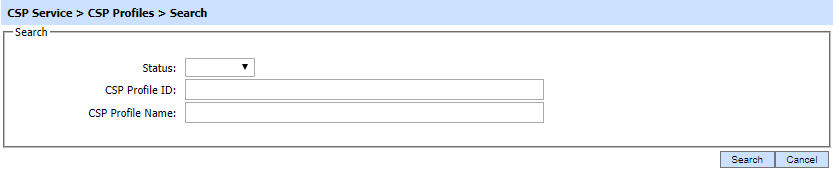
This helps to locate a particular CSP Profile the ADSS CSP Service may have configured. The CSP Profile can be searched based on Status, CSP Profile ID and CSP Profile Name. If a search is based on multiple values, then these will be combined together using the “AND” operand, and thus only records that meet all the criteria will be presented.
|
|
If "_" character is used in the search then it will act as wildcard. |
|
|
The Duplicate profile will be created without the Name and Description of the selected Profile. The Unique ID generates automatically or the next available ID will be assigned to the Profile. |
See also
Step 1 - Configuring Hardware Crypto Source
Step 2 - Configuring Notification Settings
Step 4 - Registering Business Application
Step 5 - Using Service Manager